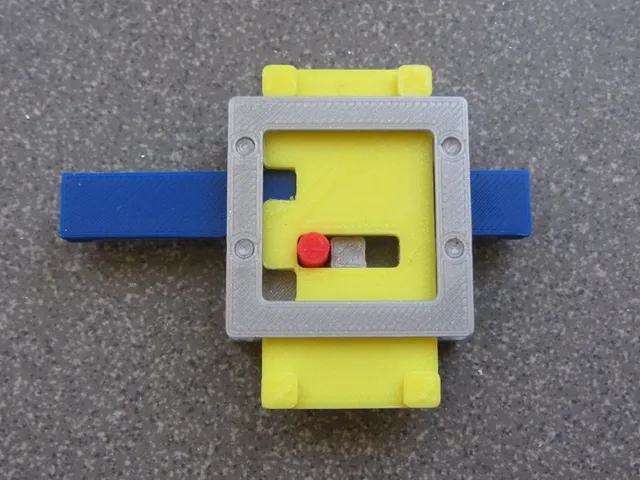
Zuse Z1-Z2, Z4 type memory cell demonstration set
prusaprinters
This is my interpretation of the operation of a single bit of memory as used in the Zuse Z1 and Z2 programmable calculators, and later for the Z4 computer. Most information is from pages 218-221 in the book described below. The original Z1 is designed and build in 1936-1941. The replica/redesign is build by Konrad Zuse in 1989.The original described parts are simple metal strips and a pin (red, blue, yellow and middle gray parts), I added the guides and end stops. In the actual machine the parts will be different and integrated. This model is only to demonstrate the principle, not to resemble the original (destroyed) or replica (Deutschen Technikmuseum, Berlin, Germany: https://sdtb.de/museum-of-technology/exhibitions/1256/).Die Rechenmaschienen von Konrad Zuse/Hrsg.: Raul Rojas. Mit Beitr. von F.L. Bauer, H.Dorsch, H. Petzold, R. Rojas, G.-A. Thurm und G. Widiger sowie zwei Patentschriften von Konrad ZuseISBN-13:978-3-642-71945-5Springer-Verlag Berlin Heidelberg 1998See the "Custom Section" for a description of the animations and the "How I Designed This" section for animated GIFs.Print SettingsPrinter Brand:PrusaPrinter: i3 MK3**Rafts:** NoSupports: NoInfill: 5-20% Filament: any brand, PLA, but any rigid filament will do Post-Printing Some post-print filing is required to make the parts fitting and easy to operate. Assembly of the memory cellHow I Designed This The parts are designed in OpenSCAD, source files are included. Most parts have a dependency on the speicherPrimitieven1.scad file. read 0read 1write 1 (from 0)write 0 (from 1)More info:http://electrickery.connected.by.freedominter.net/mechanics/zuseGates/
With this file you will be able to print Zuse Z1-Z2, Z4 type memory cell demonstration set with your 3D printer. Click on the button and save the file on your computer to work, edit or customize your design. You can also find more 3D designs for printers on Zuse Z1-Z2, Z4 type memory cell demonstration set.
