Zippier Fidget Spinner
prusaprinters
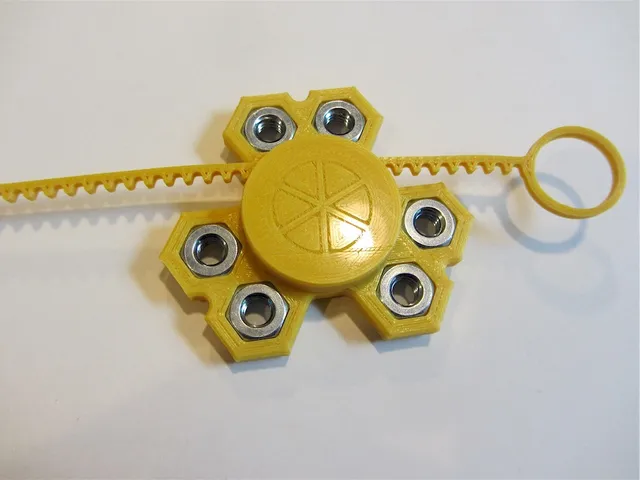
I reduced the diameter of the drive gear so that this fidget spinner is 60% zippier than my first Zippy Fidget Spinner! (https://www.thingiverse.com/thing:2379179) It works great without the zip cord, too. UPDATE: I've added a slightly smaller rip cord (zipper140.stl) for folks with a 150mm print bed. Print Settings Printer Brand: MakerGear Printer: MakerGear M2 Rafts: No Supports: No Resolution: 0.2mm Infill: 20% Notes: The part zippy2_.stl has a built-in break-away support where the bearing goes. Break this out and clean up any loose bits before proceeding with the assembly. Post-Printing Assembly & Use You'll need six 1/4-20 nuts (7/16" across the flats) for the inertial mass and one 608 bearing. After printing, press all 6 nuts into place in the outer ring (zippy.stl). Remove any shields or seals from your bearing and wash out any grease or oil to make it spin longer. Press the bearing into the outer ring so that it is flush with the bottom (the non-geared side). Insert the hub into the bearing so that it covers the gear. Press the hub cap into the other side of the hub. If it is not a tight fit, increase the size by 1% or so, or else carefully superglue in place. After printing the zipper, run it under hot water and gently flex it so that it is more or less straight. Insert the end of the zipper into the slot in the hub and then let'r rip! Category: Mechanical Toys
With this file you will be able to print Zippier Fidget Spinner with your 3D printer. Click on the button and save the file on your computer to work, edit or customize your design. You can also find more 3D designs for printers on Zippier Fidget Spinner.