Zip Tie Ceiling/Wall Hanger for 4" PVC Pipe (v1.1)
prusaprinters
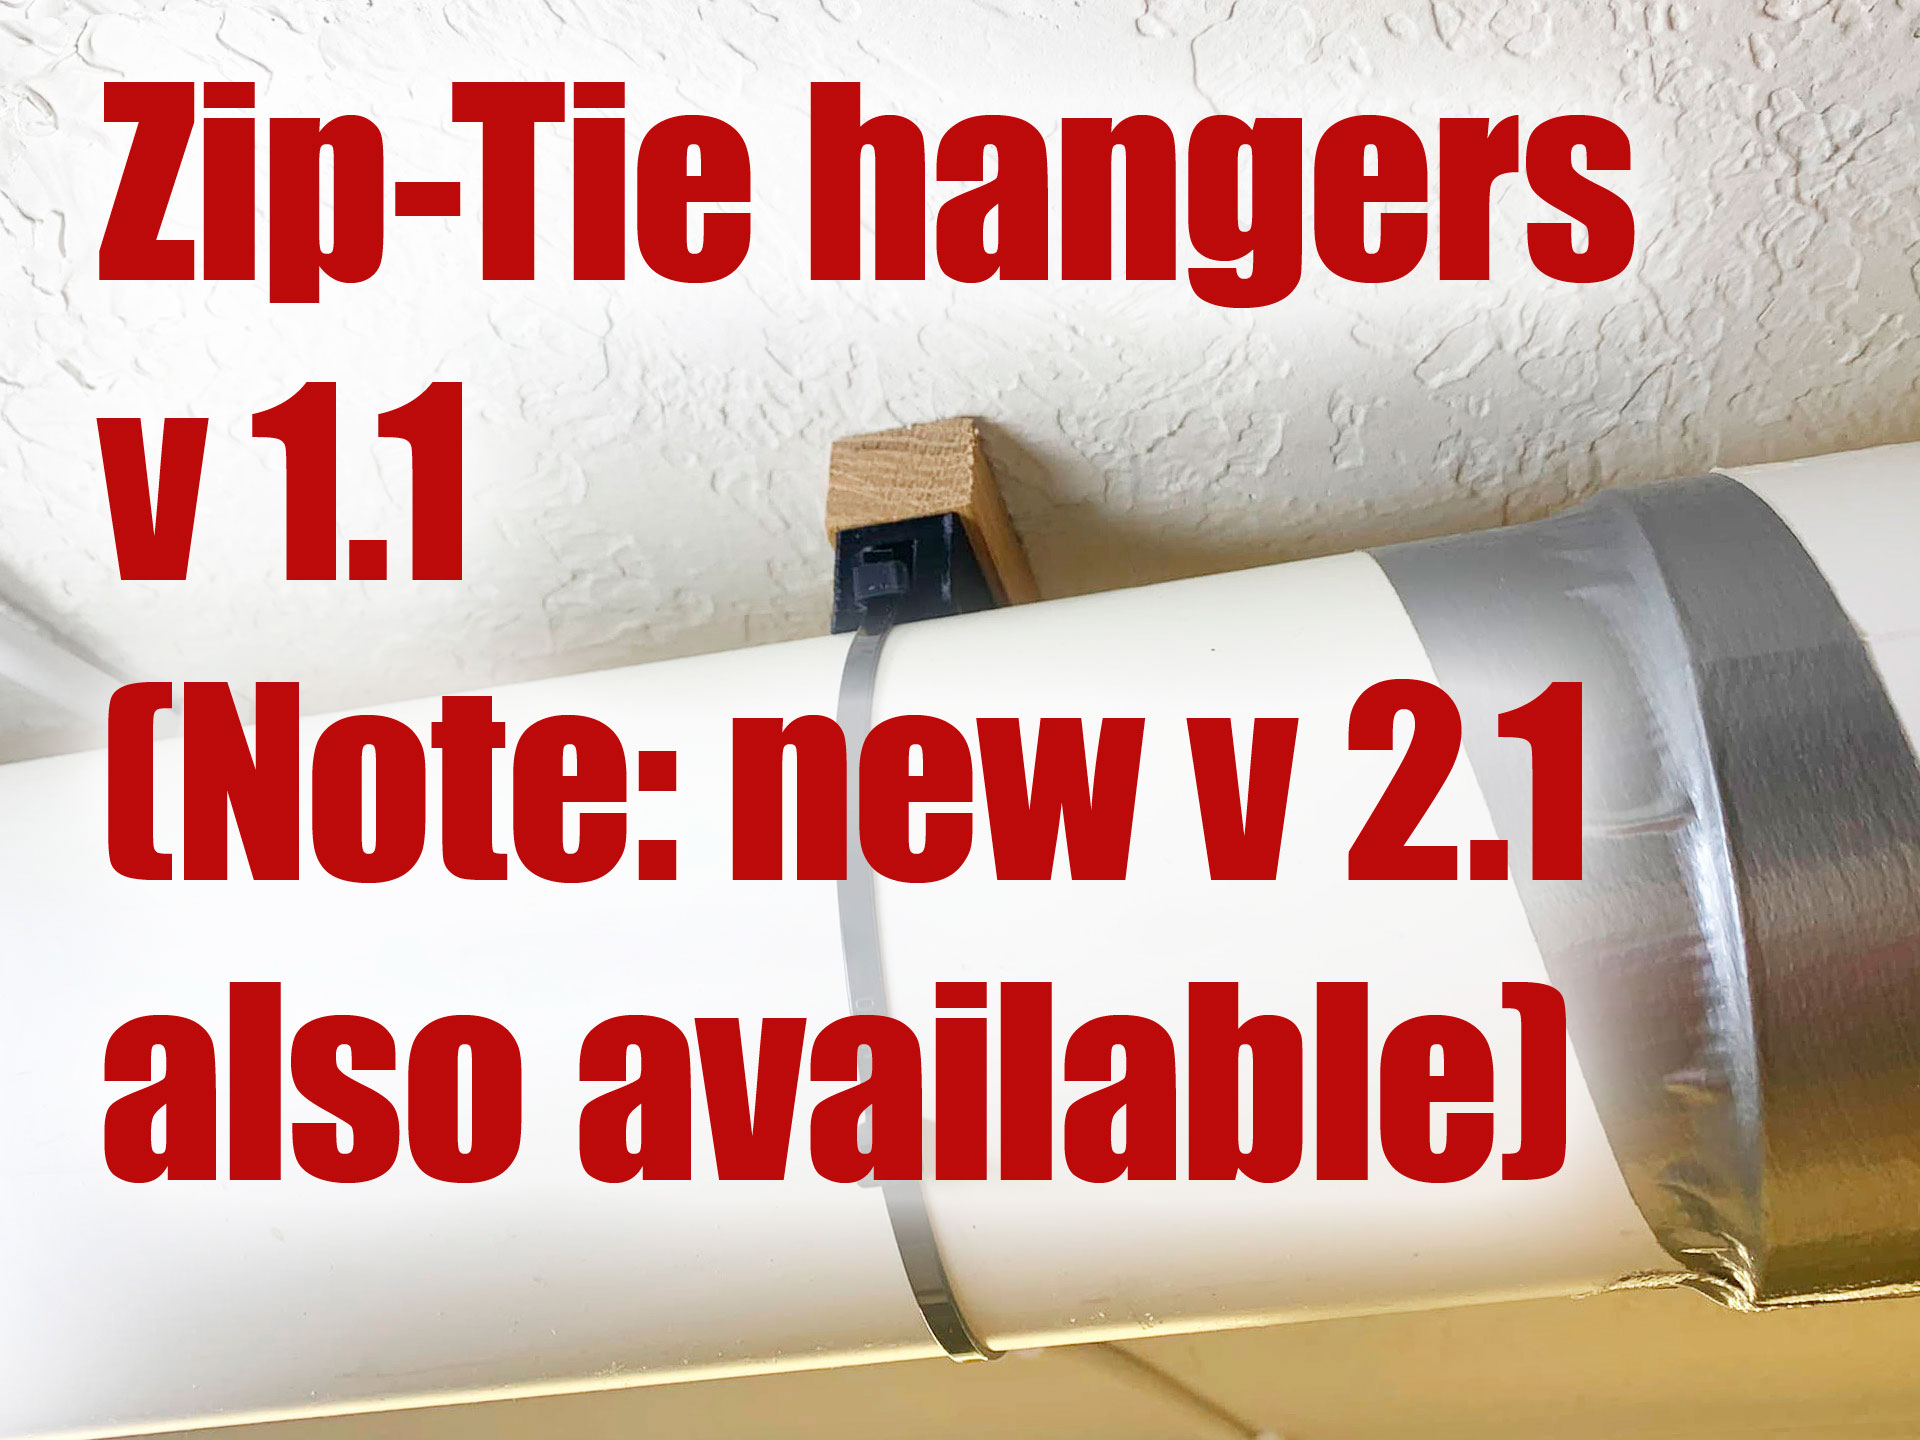
<p>There is now an <a href="https://www.printables.com/model/239201-zip-tie-ceilingwall-hanger-for-4-pvc-pipe-v21">improved v2 design of this, available here.</a></p><p>There have been two suggestions on this listing to improve against any risk of layer separation. (1) Move weight-bearing bits to have them under compression from the screws. <a href="https://www.printables.com/model/239201-zip-tie-ceilingwall-hanger-for-4-pvc-pipe-v21">This is now v2.0</a>. (2) Rotate print orientation to reduce risk of layer separation. This is now v1.1, (this listing). I also did both compression and rotated print orientation, <a href="https://www.printables.com/model/239201-zip-tie-ceilingwall-hanger-for-4-pvc-pipe-v21">which is now 2.1</a>.</p><h3>Tips</h3><p> </p><h5>Thin-wall pipe</h5><ul><li>Use thin-wall PVC pipe, aka S&D (sewer and drain), not thick-wall. It's lighter and cheaper. Did I mention lighter?</li></ul><h5>Use enough hangers</h5><ul><li>I'm assuming anyone savvy enough to be installing their own dust collection would realize not to try to hang a 10' pipe on only one of these hangers.</li></ul><p> </p><h5><strong>Differences between v1 and v2:</strong></h5><ul><li>v2 is stronger overall, as all the essential weight-bearing bits are shifted to be under compression (to help protect against delamination between layer lines)</li><li>v2 offers more screw options. Ideally at least two screws should be used, which are located on opposing sides of the zip-tie track, and as far apart as possible — so ideally use two corners that are opposite in both directions. However, if due to restricted access or a narrow joist you need to use other options, the new v2 has 6 screw holes instead of 3. Hopefully some combination will help you through the tightest spot.</li><li>v2 is slightly thicker, positioning your 4" PVC pipe at 5/8" down from the surface that the printed part is mounted to, as opposed to ½" away on the original v1.</li></ul><h5>Notes: </h5><ul><li>My original version 1 is in use in my workshop, and I printed each one with an unusually high number of perimeter walls, and they are quite strong. I seriously doubt they will fail, and I won't be replacing them unless there is a failure. </li><li>I made these two remixes (v1.1, v2.0, and v2.1) because kind-hearted redditors pointed out that (a) compression would be better, and (b) switching the print orientation would reduce risk of delamination (failure between printed layers) without any additional print time or effort.</li><li>Use at your own risk, and employ common sense. :-) </li><li>If your printer is capable of even a minimal amount of bridging, you should be able to print the stronger v1.1/v2.1 If not, I'm leaving the 1.0 & 2.0 files in, but realize that's not quite as strong, and that could perhaps be compensated for by increasing number of perimeter walls/infill. </li></ul><p>- - - -</p><p>I wanted some hangers I could attach to the ceiling of my workshop by sinking at least two and optionally three screws through the hangers and into joists, and then use zip ties to attach 4" PVC pipe to the hangers, for purposes of dust collection.</p><p>I printed them out of PLA and with extra perimeter walls and extra infill for increased strength. I then used pre-cut and pre-drilled wood between these hangers and the ceiling to get the right height to match existing pipe installed using another type of hangers. That extra gap is really helpful when it comes to wrapping the pipe joints with tape.</p><p>PS: these things work like a charm. 10,000 times easier than the method I used before this. I cannot overemphasize how pleased I am with the function of this part.</p><p>If you use these, I strongly suggest using a stud finder in order to be able to hit solid wood.</p><p>I remixed this using SketchUp Make 2017 (free version still available for download from Trimble's website). I am including the SketchUp file in case it helps someone with mods.</p><p> </p><p><strong>My PayPal tip jar: </strong><a href="https://paypal.me/design8studio"><strong>https://paypal.me/design8studio</strong></a><strong> </strong></p><p> </p><p><strong>Various LowRider 3 CNC remixes:</strong></p><ul><li><a href="https://www.printables.com/social/127223-doug-joseph-design8studio/collections/175217"><strong>LowRider 3 CNC Collection</strong></a></li></ul><p> </p><p><strong>View all my models and remixes on Printables:</strong></p><ul><li><a href="https://www.printables.com/social/127223-doug-joseph-design8studio/models"><strong>Design8Studio 3D models</strong></a></li></ul><p> </p><p><i>*Amazon product links are affiliate links. </i> </p>
With this file you will be able to print Zip Tie Ceiling/Wall Hanger for 4" PVC Pipe (v1.1) with your 3D printer. Click on the button and save the file on your computer to work, edit or customize your design. You can also find more 3D designs for printers on Zip Tie Ceiling/Wall Hanger for 4" PVC Pipe (v1.1).