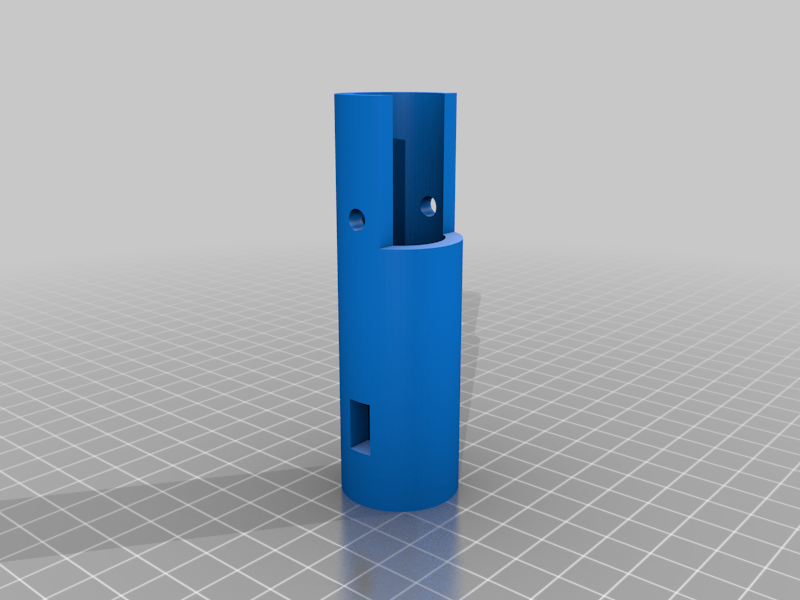
Zephyrus office chair headrest extension
prusaprinters
<p>I really like my office chair, but I wanted to customize it a bit to accommodate my height. The first step was to replace the gas cylinder with a taller one that I found online. That was the easy part because there are plenty of options to choose from. The second step was to make the adjustable headrest go higher. That took some custom work. I designed an extension for the headrest mount that adds 2 inches (50 mm) to the height.</p><p>My chair is the Shaquille O'Neal Zephyrus made by True Innovations and sold at Office Depot. It's possible that this design will work with similar chairs. The headrest mount seems to be similar in design to what you'd find in some cars. The headrest has a pair of notched metal posts that fit in a pair of plastic bushings. The bushings, in turn, fit in a pair of metal tubes. I designed an extender that goes between the bushings and the tubes to get some extra height.</p><h4>Updates</h4><p>June 30, 2021: The original extensions cracked after a few weeks of use, so I updated the design to have thicker walls.</p><p> </p><h3>Materials Needed</h3><p>2 four-inch zip ties</p><h3>Installation</h3><p>Remove the headrest. You may need someone to help with this step.</p><ol><li>Raise the headrest all the way.</li><li>Reach between the headrest and the chair back. Find the button on top of each of the plastic bushings that hold the metal headrest posts.</li><li>Simultaneously press both buttons while lifting up on the headrest.</li></ol><p>Remove the bushings from their mounting tubes. Do this by pressing the tabs on both sides while lifting up on the bushing.</p><ol><li>Slide one extender down onto each of the metal tubes. The bottom of the extender should be flush with the bottom of the tube. Make sure the round holes in the extenders align with the rectangular holes in the metal tubes.</li><li>Pass a zip tie through the round holes on each of the extenders. DO NOT TIGHTEN THE ZIP TIES YET.</li><li>Do not do this step until the zip ties are in place! Insert the headrest bushings into the extenders. Make sure the buttons are facing outward. They should click into place.</li><li>After the bushings are installed, then you should close and tighten the zip ties.</li><li>Trim off the excess zip tie length, and rotate the ties so they won't rub on the headrest as it goes up and down.</li><li>Reinstall the headrest.</li></ol><h3>Print Settings</h3><p>Rafts: No<br>Supports: No<br>Infill: 100 (It needs to be strong.)<br>Filament: PLA</p><h3><strong>Notes: </strong></h3><p>Print with the notched end of the tube pointing up. You'll need to print two of them. I recommend 100% infill for strength.</p><p> </p><p> </p><p> </p><p>Category: Office</p>
With this file you will be able to print Zephyrus office chair headrest extension with your 3D printer. Click on the button and save the file on your computer to work, edit or customize your design. You can also find more 3D designs for printers on Zephyrus office chair headrest extension.
