Zaribo Y axis lead screw conversion
thingiverse
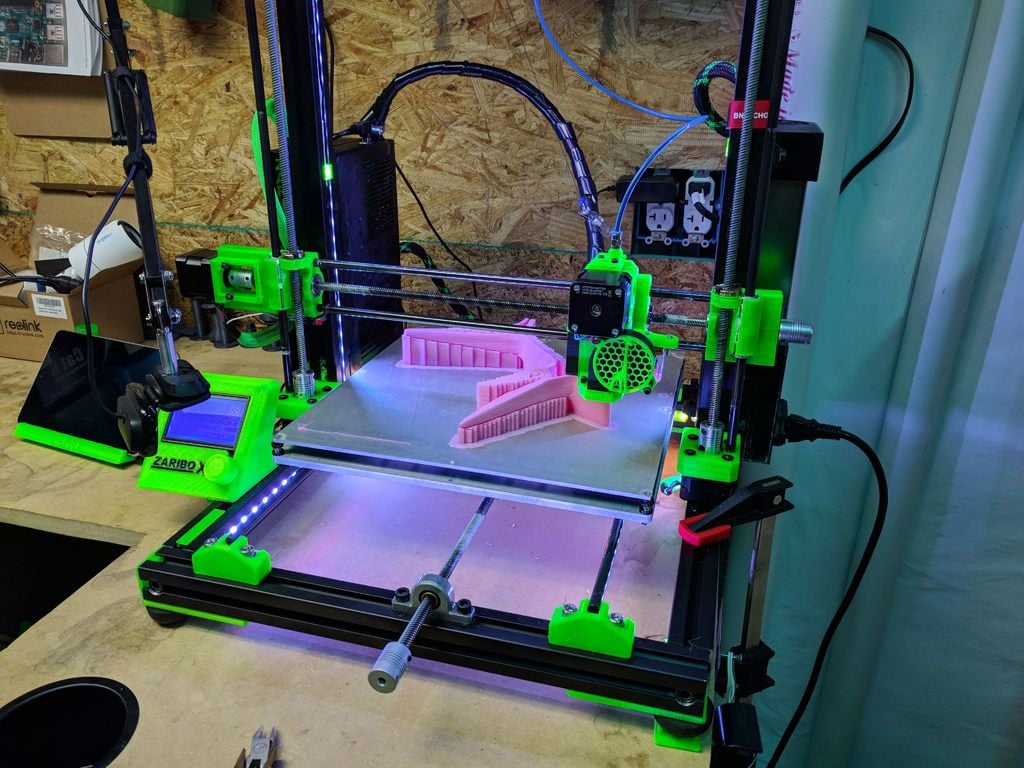
This is a mount for a Nema 17 motor mounting to a 3030 extrusion. This orients the motor so that you can replace the belt driven Y axis with a lead screw. Links below for the lead screw, Tnut, and Tnut holder. Your particular application may vary with the difference in height between the 3030 extrusion and your Y axis bed plate. I needed to add two washers as spacers to maintain alignment of the lead screw from the motor to the idler bearing. I found the easiest way to achieve proper alignment between the Tnut holder, motor, and idler bearing was: First mount the Tnut and holder to the Y carriage plate Install the motor/motor mount and idler bearing onto the 3030 extrusion. Install the mounting hardware but do not tighten down full into the 3030 channel nuts at this time. They should move freely along the extrusion with minimal effort. Insert the lead screw through the idler bearing, and into the Tnut. Continue screwing the lead screw until you can insert it until the coupling, attaching it to the motor. At this point it will be obvious if you need to adjust the heights (raise the motor mount and the idler bearing, and or lower the Tnut holder by adding a spacer between the plate and the holder).
With this file you will be able to print Zaribo Y axis lead screw conversion with your 3D printer. Click on the button and save the file on your computer to work, edit or customize your design. You can also find more 3D designs for printers on Zaribo Y axis lead screw conversion.