Z-Stop for Makergear M2
pinshape
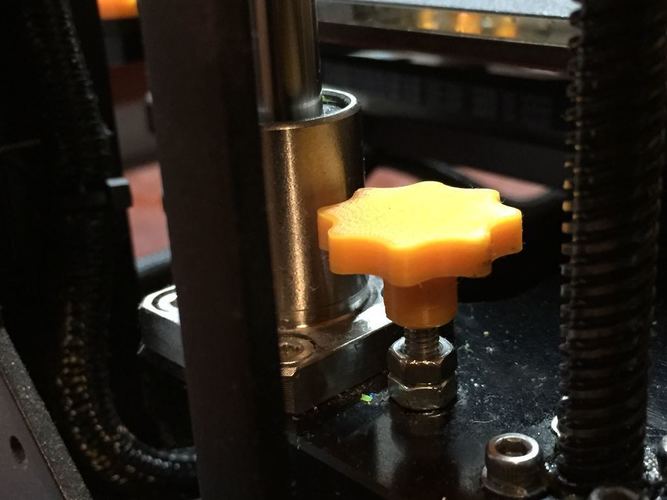
Because I've started experimenting with BuildTak, I've noticed that the quality of adhesion to this surface is extremely dependent on the position of the nozzle relative to the bed. So fine tuning bed height becomes a must in order to get this to work right. Because my previous Z-stop (http://www.thingiverse.com/thing:254002) wasn't very adjustable or of the right height for the E3Dv6 hotend, I needed to redesign this part. I've posted 3 versions of different lengths online. I use the shortest one myself. If you are using BuildTak or a similar surface, it's really crucial to be able to make fine adjustments. I noticed that a 1/8 turn on the knob can make all the difference between not sticking at all and sticking too hard. It's that sensitive. But if you get it to work, it's the best surface I've used so far. This part should print just fine without needing any modification or support. To assemble this, you need to reverse the orientation of the M2's Z-stop screw. You then secure the screw in place with the two nuts, giving room for the Z-stop to move freely. As shown in the photos, screw the Z-stop onto the bolt and you can now finely tune your Z-stop length without having to loosen the two nuts and reposition the bolt.
With this file you will be able to print Z-Stop for Makergear M2 with your 3D printer. Click on the button and save the file on your computer to work, edit or customize your design. You can also find more 3D designs for printers on Z-Stop for Makergear M2.