Z-seam Optimization ringing / ghosting
thingiverse
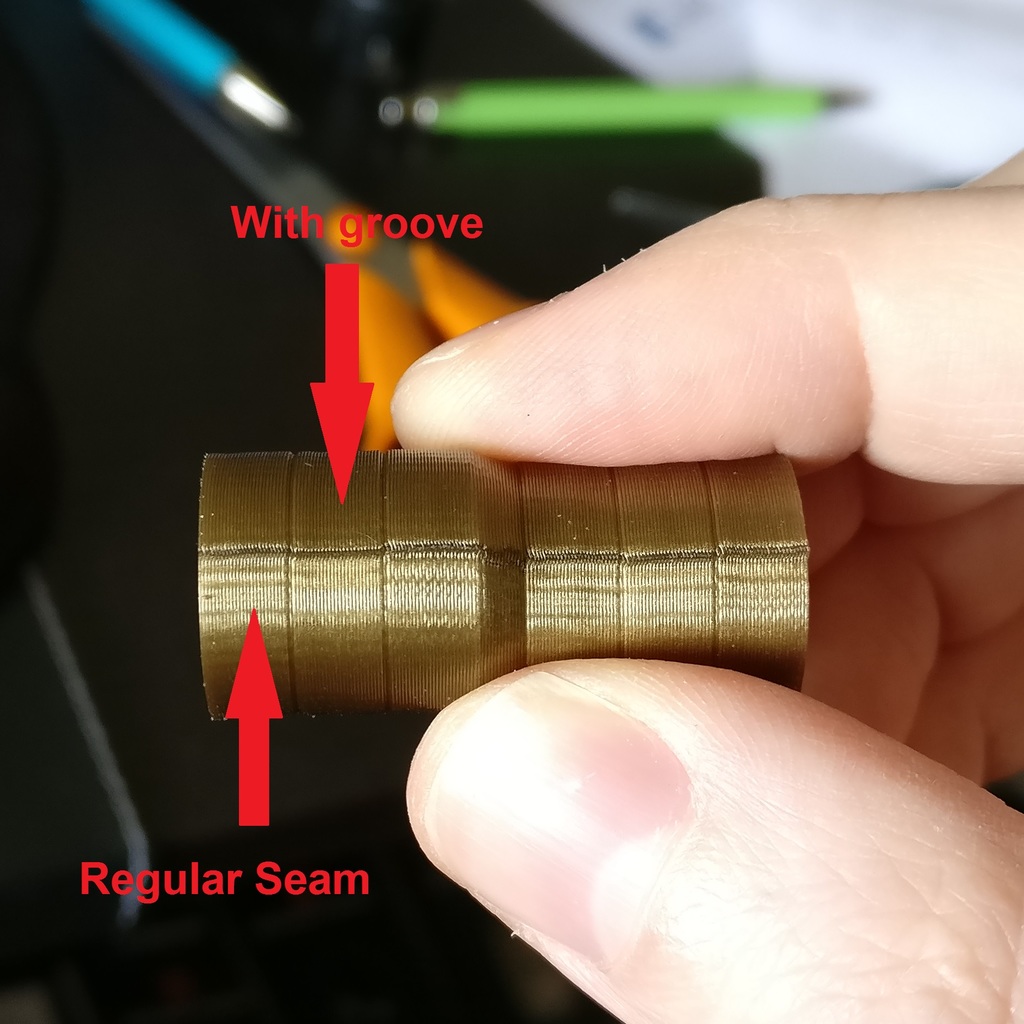
What to Reduce Ringing in Prints by Adding a Groove and Aligning the Z-seam A Simple Way to Minimize Ringing on 3D Prints Ring reduction is achieved by introducing a small groove into a model, then aligning the Z-seam with it. How to Implement this Technique Start by loading an STL file into a slicing software like Cura. Verify that walls are printed in a counter-clockwise direction, which is typically the default setting in Cura. Adjust the Z-seam settings according to these steps: Set Z-seam settings to "User specified." Check the box next to "Z-seam relative." Enter -1 or any value within the model's diameter for Z-seam Y. Values outside the diameter also work, but results may not be optimal. Note: You might need to swap X and Y, or remove the minus sign, depending on your printer's axis configuration. Increase speed settings to a level where ringing is evident, such as an outer wall speed of 35mm/s and a jerk of 15. Print using a shiny filament for best results. Results Editing the groove depth and angle in Fusion 360 can lead to even better outcomes. Share your findings by posting a Make and specifying the groove depth and angle you used. Perhaps slicer developers could incorporate a "Start and stop point inset" feature to simplify this process. Videos Demonstrating Ring Reduction Techniques
With this file you will be able to print Z-seam Optimization ringing / ghosting with your 3D printer. Click on the button and save the file on your computer to work, edit or customize your design. You can also find more 3D designs for printers on Z-seam Optimization ringing / ghosting.
