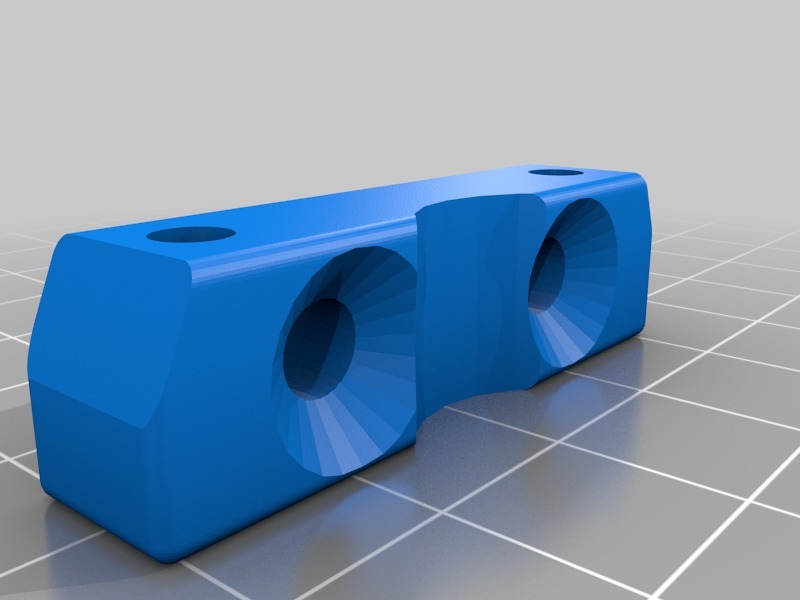
Z Axis Motor Mount for Creality CR-10 - Corrected for Glass holder Y Axis travel
prusaprinters
<p>This is a slight adjustment to the Z Axis motor mount I needed after installing the "Creality CR-10 Wire management, Strain relief and Glass holder" <a href="https://www.thingiverse.com/thing:2328449">https://www.thingiverse.com/thing:2328449</a> which I found impacted the corner of the motoer mount, precluding full and unobstructed Y Axis travel. The solution is to draw in the corners of the Z Axis motor mount to avoid the problem.</p> <h3>Print Settings</h3> <p><strong>Printer:</strong></p> <p>Creality CR-10</p> <p class="detail-setting rafts"><strong>Rafts: </strong> <div><p>No</p></div> <p><strong>Supports:</strong></p> <p>No</p> <p class="detail-setting resolution"><strong>Resolution: </strong> <div><p>0.2</p></div> <p><strong>Infill:</strong></p> <p>80%</p> <p><br/> <p class="detail-setting notes"><strong>Notes: </strong></p> </p><div><p>I print all Support elements that might be exposed to any stresses, out of ABS but we're not printing a fan shroud or anything that would be exposed to any meaningful heat, so PLA should be fine too.</p></div> Post-Printing ============= <p><strong>Z Axis Motor mount instalation</strong></p> <div><p>Motor mount installation is a bit of a pain in the add. It's easier if you disconnect the Z Axis lead screw, in order gein straight-on access to the bolts that hold the motor mount in place. You may be able to remove the original mount without removing the lead screw but you'll likely be unable to apply enough straight-on pressure to tighten the bolts into the frame.</p> As such, do this: <p>1.) Loosen the two lower set screws in the X axis lead screw coupler, and push the coupler and screw up off the motor shaft, allowing it to hang freely as you work.</p> <p>2.) unscrew the bolts holding the original motor mount to the frame</p> <p>3.) Unscrew the bolts holding the original motor mount to the motor.</p> <p>4.) Secure the new motor mount to the motor</p> <p>5.) Position the motor in place against the frame, and secure it in place using the frame bolts through the new motor mount.</p> <p>6.) slide the lead screw coupler down over the Y Axis motor shaft, taking care not to allow the coupler to touch the motor housing (there has to be a few millimeters of space there) and re-tighten the two bottom set screws in the lead screw coupler.</p> <p>Done! That wasn't so bad, was it?</p> <h3>How I Designed This</h3> <p><strong>Designed in OnShape</strong></p> <p>This is a trivial adjustment but if you want to mess with it further you can do so here: <a href="https://cad.onshape.com/documents/0c57ff6b1dea63911580d8e6/w/7403f359e07a658ad5a24d65/e/ae9b678c9e5875d5cd993057">https://cad.onshape.com/documents/0c57ff6b1dea63911580d8e6/w/7403f359e07a658ad5a24d65/e/ae9b678c9e5875d5cd993057</a></p> <p>You'll note that the full geometry was imported into onShape. This was accomplished from the motor mount STL file from which this object was remixed, by first importing the STL into FreeCAD, and exporting a STEP file, which was then imported into onShape. This facilitated boolean operations, which is really all that was needed to accomplish this remix.</p> </div></p></p> Category: 3D Printer Parts
With this file you will be able to print Z Axis Motor Mount for Creality CR-10 - Corrected for Glass holder Y Axis travel with your 3D printer. Click on the button and save the file on your computer to work, edit or customize your design. You can also find more 3D designs for printers on Z Axis Motor Mount for Creality CR-10 - Corrected for Glass holder Y Axis travel.
