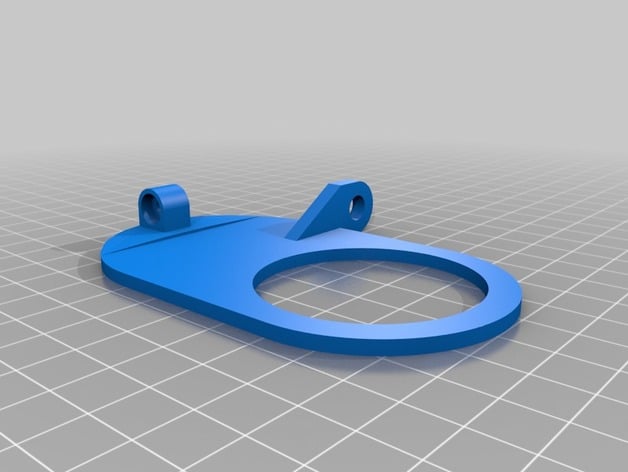
Yi Home Camera Dropcam External Antenna Mount
thingiverse
Want to boost the wireless on a Yi Home Camera or DropCam with an external high gain antenna? This upgrade is designed to swap out the upper part of the Yi Home Camera Mount, providing a mount point for an RP-SMA antenna. The Yi camera matches the standard DropCam and works great but hasn't been thoroughly tested. Printing recommendations: I suggest printing 3 layers on all walls, with 50% Rectilinear Infill and a 0.2 mm layer height. This combination strikes the perfect balance between quality, strength, and print speed. Since this was designed for PLA, you may need to adjust your settings slightly if you're using ABS, as it tends to shrink as it cools. For a seamless finish matching the stock stand base, sand with 100 Grit sandpaper until smooth, then move on to 400 Grit, 800 Grit, 1200 Grit, 2000 Grit, and finally finish with 3000 Grit. Skipping the lower grits can accentuate any indentations between print lines. Parts you'll need: * Wifi converter cable with antenna - http://amzn.com/B00DMHSODS This comes in a package of two large antennas; feel free to use any RP-SMA Dual Band 2.4GHz 5GHz + 2 x 8in / 20cm U.fl / IPEX Cable Antenna Mod Kit. Modding your Yi Camera: Note that this will void your warranty! Open up the camera by removing the 4 screws on the back, taking care not to damage the speaker or its connections. On the board, there are 4 more screws; remove them as well. You can gently pry off the lens portion of the camera to release it from the case. Once you've separated the circuit board and the front of the case, locate the wireless antenna wire and disconnect it. You can either remove the wire entirely or tape over the end if you might need it later. We decided to remove the microphone to minimize security risks; if you want to do the same, snip the wires and take out the mic. This gives you a great spot to route the antenna wire out. If you don't want to remove the microphone, use a small round file to create a new hole by filing half circles on both sides of the case at the same point, matching up to form a hole. Use the microphone hole as your guide. After removing the microphone or creating your new hole, route the antenna cable between the camera board and the primary board, making sure not to block any IR LEDs or the camera. Connect the new antenna lead by lining up the connector and pressing until it snaps into place. Then you can put everything back together, ensuring the speaker is properly reinstalled. Upgrading the Mount/Stand: Carefully remove the plastic covers from either side of the Hinge using an exacto knife or needle; they're caps, not stickers, so it might take some work. Unscrew the hinge and press out the screw with a toothpick or thin rod. Pull out the stock upper mount from the lower mount. On both sides of the upper mount hinge, you'll find rubber spacers - remove them and place them in the corresponding holes on your newly printed upper mount. You should then be able to reassemble everything, making sure to put the screw back in the right direction; it's easy to tell when you see little Y's inside the hole where the washer goes. After the stand is back together, attach the other end of the antenna lead to the antenna mount point with the included washers and nut. Then pop your camera in, and you're all done! Post-Printing: To maintain a smooth finish on your print, lightly sand it using 100 Grit sandpaper until smooth. For an even higher shine, proceed with 400 Grit, 800 Grit, 1200 Grit, 2000 Grit, and finally finish with 3000 Grit.
With this file you will be able to print Yi Home Camera Dropcam External Antenna Mount with your 3D printer. Click on the button and save the file on your computer to work, edit or customize your design. You can also find more 3D designs for printers on Yi Home Camera Dropcam External Antenna Mount.
