Yet Another Zipper
pinshape
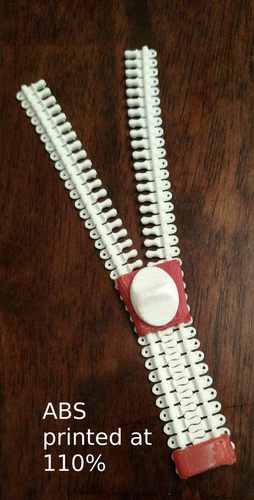
Summary Work in Progress. Your ideas and comments are welcomed! June 2017: Simplifying printing was a major goal, so I added an end stop, eliminating support needs. If you use the new model for ABS prints, increase size by 10% to prevent breakage. The standard size is ideal for nylon. My aim is to create an actual zipper that can be ironed onto cotton tape and sewn into fabric. May 2017: I was intrigued by the challenge of replicating a real zipper. Why? Because it seemed like a tough task. After numerous iterations, I achieved decent results, but understanding FDM printed part limitations was crucial. Make parts too thin and they break easily; make them too thick and flexibility suffers. Sewing onto cloth and ironing onto tape are now possible, though not yet tested. Caveats abound for this model. Dimensions need adjustment, particularly in areas where parts are too thin. Removing supports can be tricky due to fragile parts. I plan to enlarge the design slightly, incorporating end stops and making it easier to build. Parameterization in SCAD is a future goal. Printer Settings: Printer Brand: FlashForge Printer: Creator Pro Rafts: Yes Supports: Yes Infill: 100% Notes: The model is designed for nylon; increase size by 10% when printing ABS. A raft was necessary due to the small teeth and numerous parts. Ensuring a solid first layer proved challenging, but successful with a raft in place. Thin walls and rails required infill for stability. Check slicer settings to avoid hollow interiors. Post-Printing: Removing supports carefully is crucial, as thin walls can break easily. Gently rolling the interlocked sides apart helps separate them. Super glue secures the thumb thing to the slider's top. Design Process: Drawn from scratch in Blender
With this file you will be able to print Yet Another Zipper with your 3D printer. Click on the button and save the file on your computer to work, edit or customize your design. You can also find more 3D designs for printers on Yet Another Zipper.