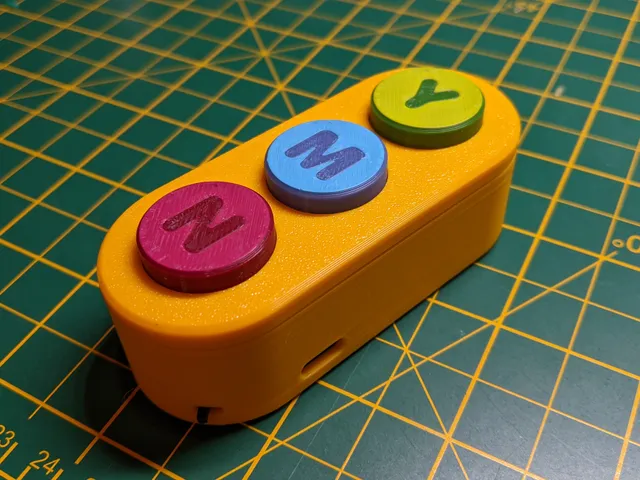
Yes/No/Maybe button
prusaprinters
This is a Yes/No/Maybe button, based on the BY8301 audio board.Buttons are included with the Y/M/N letters either engraved 0.4mm into the top for single color printing, or with a second part for two color printing. A blank button is also included.See https://www.instructables.com/Poor-Mans-MMU-Multicolor-Printing-With-Single-Extr/ for multicolor printing without an MMU or AMS.The fit is fiddly, and there may be differences in dimensions of the parts used, or printer/filament tolerances, so you may need to adjust the model (easiest with the STEP file), and/or file and sand to fit.No supports are required when printing.See original project for electronic components and instructions: https://www.thingiverse.com/thing:4628128AssemblyBY8301 audio uploading videoButton supportBend legs of pushbuttons straight, so that they can fit into the slots of the button supportBend legs out after inserting to hold buttons in placeWire ground side of buttons together. You can use a multimeter to determine which pins are connect by default.Connect leads to the other side of each button. These are connected to 101, 102, and 103 on the BY8301 board.WiringSee parent project instructions and BY8301 and TP4056 manuals as wellCase:Slide power toggle switch in to place. This should slide outward from the inside.Hot glue speaker in placeInsert USB-C end of TP4056 through USB slot. Use small screwdriver or similar to gently push retaining tabs backward to hold module in place. Failing that, break tabs, and hot glueHot glue BY8301 to H-shaped support. This is directional (one side is smaller to match the curve of the case), so consider orientation when wiring and assembling.Push BY8301 and support in to place. Support can flex a little to click under small retention tabs.Tuck LIPO batter in place. Hot glue if needed.Slide button support onto top lipAdd buttons over the momentary switchesPress lid piece over the top to hold button support down and close the case. Buttons should not be stuck down. If they are, you can gently remove material from under the stuck button to give the switch more space before being pressed down, or reduce the height of the button's lip to keep it from being pressed by the lid, and reprint.
With this file you will be able to print Yes/No/Maybe button with your 3D printer. Click on the button and save the file on your computer to work, edit or customize your design. You can also find more 3D designs for printers on Yes/No/Maybe button.
