Year of the Dragon Masquerade Masks
prusaprinters
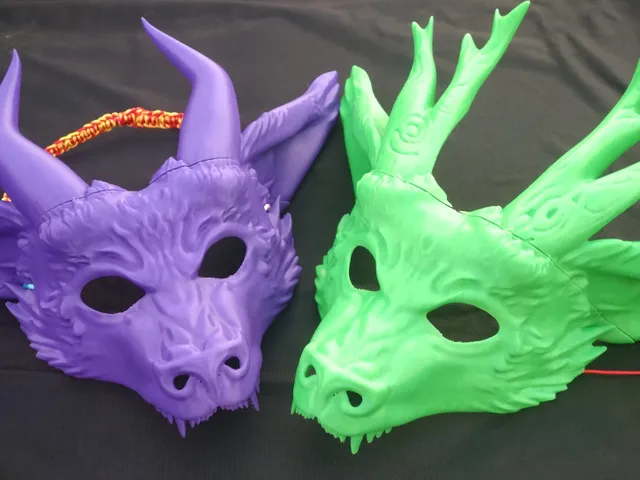
NOTE: The images are of the BAMBU STUDIO model. As I do not own any Prusa printer, or know how to use Prusa Slicer properly, I cannot guarantee your prints will look the same as mine if you use the STL files.These masks were designed for you to paint and customise! Print them in matte filament for best painting results, colouring this way will blend better with any other features you put on the mask. For example; you could stick paper leaves or string vine designs down the antlers, sculpt ivy around the face with air-dry clay, or dab on some fake moss to the antlers to give it that “old woodland” look. It's your mask, make it look how you want it to!With the Year of the Dragon (wood element) around the corner, I decided to make masks to celebrate. Fae are spirits in my country, usually found in forests with large pointed ears, so I mashed them together with a Dragon to create these masks.Rather than uploading each elemental dragon mask separately, I am bundling them into this one profile. You can choose a Wood Fae (antlers) and a Water Fae (horns). ---Wearing the mask---Holes for threading straps are found on the sides, below the ears. If you don't want to use these large holes, simply delete the “negative part” in Bambu Studio. A set of concealed holes can be found on the back of the ear base, where you'd find the default holes; these holes were added just in case you want to thread more straps for a better fit, or if you did not want visible holes on the mask exterior. They do, however, only take 1 to 1.5mm cords whilst the large holes can fit up to around 10mm thick cords. The thicker the cord/strap, the better.The mask was sculpted over a standard styrofoam mannequin head model (Find it here). This size fits all four of my family members, but the ears can make it a bit tight on those with a wide front temple. This mask fits children or smaller people best. ---Print Set-up---Assembly is required. Due to the size of the masks, they are split into 3 sections: face, ear/horn left, and ear/horn right. They are attached via plugs. If the plugs do not fit, I recommend sanding them and trying them again. I would also advise you to glue them together to ensure they don't come off.Supports are required to print these masks; without them, the mask will not print well, if at all.Turn supports ON.Set the type to “normal - Auto”.Set the style to “Snug”.The threshold angle should be unchanged (the default is 30).Tick the “on build plate only” box.If you don't want to use the narrow supports for the muzzle, simply use “normal - manual” type and paint a larger area on the muzzle like the below picture (the default supports haven't broken for me, but every printer is different)Using a brim is optional, but is highly recommended, as the mask profile is narrow it is at risk of coming off the hotbed without the brim. The horns/ears should not need a brim at all, but it's safe to still use them. This file is for PERSONAL use. To sell prints of the masks, you must subscribe to my Patreon: https://www.patreon.com/thomastedwards
With this file you will be able to print Year of the Dragon Masquerade Masks with your 3D printer. Click on the button and save the file on your computer to work, edit or customize your design. You can also find more 3D designs for printers on Year of the Dragon Masquerade Masks.