Y-Axis Rail Rod Mounts with Integrated Leveling
thingiverse
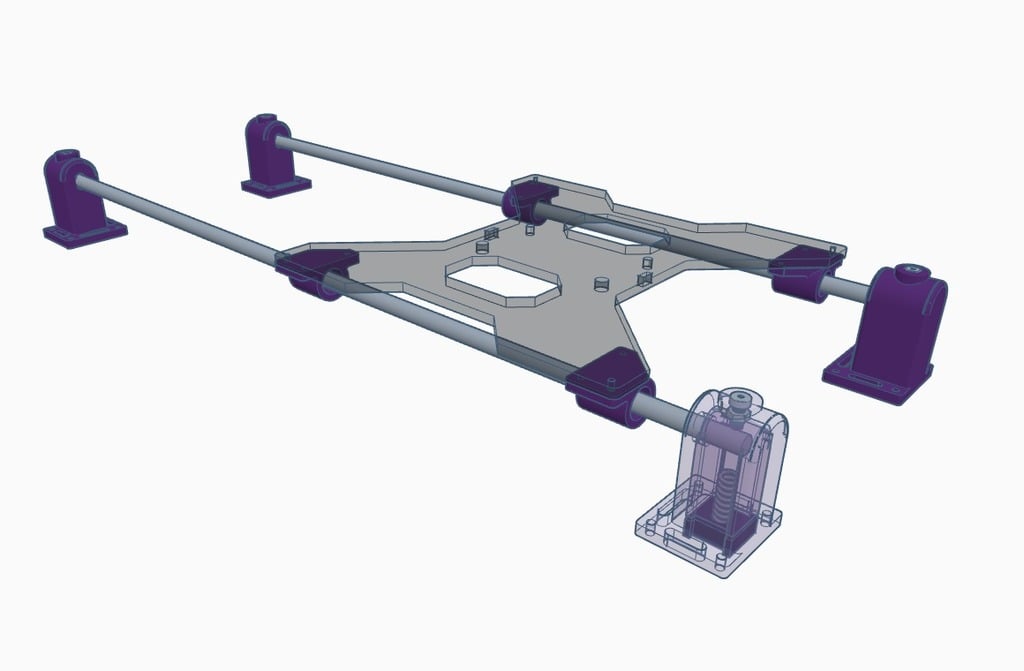
Edit #1 (January 29): The mounting base size has been reduced from 50mm to 40mm in order to accommodate new longer rods, measuring 50cm, that fit perfectly on the IKEA Lack table. Edit #2 (March 03): Project completion marked with added notes at the bottom of this description. I initially used linear bearings with horizontal rods but was dissatisfied with the excessive movement caused by tall springs located at heatbed retaining screws. The LM8UU linear bearing mounts utilize original bogie holes to achieve optimal attachment, minimizing any lever movements. Two additional holes must be drilled per mount. Teflon spacers will be placed between the bogie and heatbed, with a standard M3 nut insert. The design incorporates original springs, M4 10mm (also compatible with 12mm), and standard M4 nuts positioned on top of mounts for micro-adjusting leveling, allowing +/- 2.50mm adjustment from optimal height. Springs will be at 50% capacity at the optimal rod distance of 48.50mm. Micro-adjusting aims to achieve parallel rods by eliminating unevenness in the mounting plane. The purpose is to level the system precisely. The base mounting style has been adapted from bitbrain's brackets, featuring 5mm thickness and 4mm holes at each corner. Notes: Begin by attaching mounts only through original screw-holes on the plate, then pass the rod through for proper alignment. Next, adjust distance from the main Y-axis aluminum profile while screwing the mount in place. Ensure equal distances left-right and front-back. Drill and bolt extra holes on the Y-axis bogie once adjusted. As an optional final step, remove original 4 mounting wheels.
With this file you will be able to print Y-Axis Rail Rod Mounts with Integrated Leveling with your 3D printer. Click on the button and save the file on your computer to work, edit or customize your design. You can also find more 3D designs for printers on Y-Axis Rail Rod Mounts with Integrated Leveling.