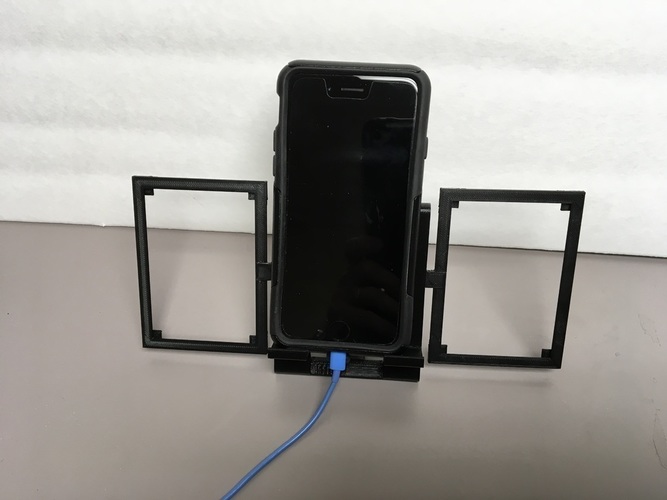
Y.A.P.S. - Yet Another Phone Stand
pinshape
Y.A.P.S - Yet Another Phone Stand This sturdy phone stand boasts six viewing angles, making it compatible with most smartphones, even those sporting large cases. The stand's elevated design allows for charging while maintaining an upright position. You can print the optional add-ons/mods for each side, such as the wallet-sized picture frame included. I'll continue to add more add-ons as time permits. I print this at .3 mm resolution PLA with 1.2 mm walls, featuring zero infill and support structures with a skirt for base adhesion. Ensure that the bracket is facing the correct direction when inserting it into the sides. [edited 3/10/2017]: A minor adjustment has been made to the picture frame add-on. The connector shaft and side of the frame were not properly aligned, so I shortened the length of the picture frame and widened its edge by 1 mm to accommodate standard photos (2.5 in x3.5 in). Print Settings Printer: QIDI Tech X-one Rafts: No Supports: Yes Resolution: .3 mm Infill: 0% Notes: At this resolution and speed, it takes approximately 2.5 hours on my printer for the stand and about 25 minutes for the picture frame to print. The picture frame add-on is optional and requires good contact cement to secure the connecting shaft and four corner pieces that hold the picture in place. Post-Printing Assembly Assembling the Stand After removing any support material, connect the bottom and top hinges to the inner facing holes on the sides, making sure they rotate smoothly and are properly oriented. Remove one of the sides and attach the small support bracket to it, ensuring that the side with bumps faces the front of the stand and clicks into place. Connect the other side to the support bracket while aligning the top and bottom hinges to the holes in the side. Alternatively, you can connect the support bracket to the sides first, then insert the hinges into the side holes while slightly twisting the sides. Be cautious not to twist too much, as this may cause the bracket to break. Assembling the Optional Wallet-Sized Picture Frame Add-On Good contact cement or other adhesive/glue is necessary for the picture frame add-on. The connector shaft is attached to the side of the picture frame with the rectangular tab. The four corner pieces are secured to the back using raised pegs as guides, applying glue only to the raised corners so that a photo can slide in. Contact cement the support shaft to the tab on the front of the picture frame. I Designed This Based on a foam board phone stand I created several years ago, this design has undergone multiple iterations and tweaks. The concept was sketched on my iPad and modeled using SketchUp.
With this file you will be able to print Y.A.P.S. - Yet Another Phone Stand with your 3D printer. Click on the button and save the file on your computer to work, edit or customize your design. You can also find more 3D designs for printers on Y.A.P.S. - Yet Another Phone Stand.
