XYZ Printing daVinci Jr 1.0 - HeatBed 110w 9A @ 12V
prusaprinters
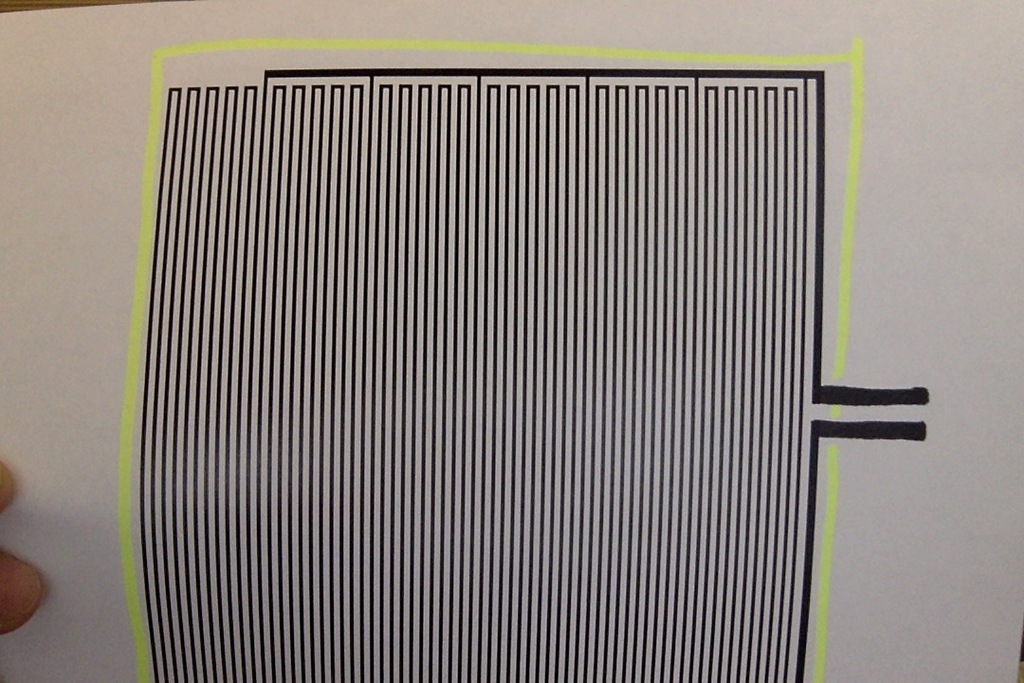
<p>DIY heatbed for Jr.</p><p>***Yes you can buy silicone heaters and stick them to the bottom of the glass but usually that requires some drilling/cutting into the metal base of the bed to get wires routed through.</p><p>With this solution you'll only lose 2mm of Z height if done correctly.</p><p>If you don't understand what I'm talking about then maybe this project isn't for you!</p><p>You'll need:</p><ol><li>PCB Clad 165x200mm - Jr glass is 165x165, you can get ones which are 165mm wide already of eBay. You need 1x side to be 200 to cut little tab which will stick out so you can solder wires to it.</li><li>All chemicals etc for PCB etching.</li><li>Small handsaw.</li><li>Soldering iron</li><li>16-18AWG wire</li><li>12v PSU - AT LEAST 9AMP</li><li>Temperature control board</li><li>Relay.</li><li>Sharpie</li></ol><p>Process is very simple.</p><ol><li>Print SVG on regular 2D laser printer (laser printer is a MUST)</li><li>Transfer print to PCB clad via iron method.</li><li>Fix up imperfections with Sharpie</li><li>Draw freehand with Sharpie extension traces for the power input so it sticks out a bit on the right hand side of your Jr bed.</li><li>Etch!</li></ol><p>I had my thermistor cartridge simply capton taped to on side. Not perfect but good enough for me.</p><p>But... You could do freehand traces on the bottom of the clad to get thermistor nicely in the middle with traces going out on the side underneath the power in (that's of course if you have double sided PCB clad)</p><p>I've covered all surface with capton tape to give it some kind of a insulation.</p><p>Wiring.</p><p>I've used cheapest available 12v temp controller board of eBay + ATX PC PSU to power it up.</p><p>And relay was wired to Jr exhaust fan to make it somewhat automated. That also ensured the bed is switched off automatically when print is done.</p><p>I hope all this makes sense.</p><p>P.S.: I'll try to find my heatbed and post some actual photos of it.</p><p>I've stopped using it only because Jr is no more. Cannibalised for parts</p>
With this file you will be able to print XYZ Printing daVinci Jr 1.0 - HeatBed 110w 9A @ 12V with your 3D printer. Click on the button and save the file on your computer to work, edit or customize your design. You can also find more 3D designs for printers on XYZ Printing daVinci Jr 1.0 - HeatBed 110w 9A @ 12V.