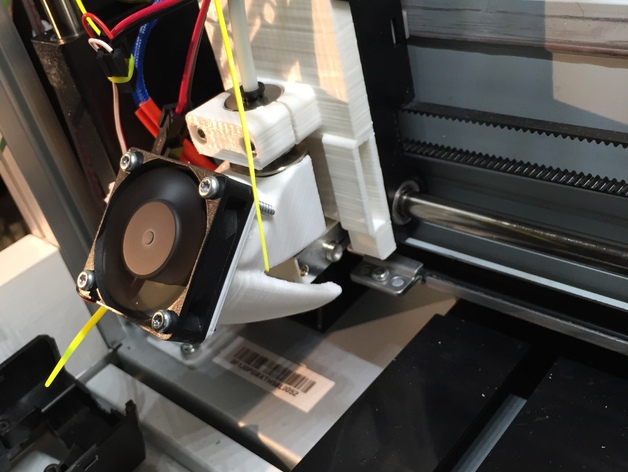
XYZ daVinci Jr - E3D V6/Lite6 Mount
thingiverse
DO THIS AT YOUR OWN RISK!!! I'm not responsible if you manage to ruin your printer, any parts or even your house. Use common sense when wiring and mounting things. Never leave printer unattended. If you haven't done anything like that before or don't have the necessary knowledge of electronics - DON'T DO IT! If you agree with what I've said, feel free to download. If you disagree, click on the magic X button and print some Yoda head (which is quite nice actually). This is the E3D v6/Lite6 mount for XYZ Printing daVinci Jr. It's supposed to fit in stock Jr, no RAMPS mod required or so (obviously if you've done one it will work as well). To get it up and running, you'll need an E3D v6/Lite6 heated bed itself and print the Mount and Clip STLs. (To secure the Clip in place, use existing Jr printhead screws which hold the fan in place.) You can use a heatsink fan that comes with the E3D hotend, but I've printed this one http://www.thingiverse.com/thing:839620 to have a print cooling fan as well and used an existing Jr hotend fan (only flipped so it blows onto the hotend instead of pulling it). I've printed it vertically to give some extra strength to the mount and a smooth finish to the airflow channel. Also, I've printed it with PLA but ABS would be better hence the temperatures. Been running it for 12-14 hours a day for the past two weeks without any problems whatsoever. The last thing you need to do is relocate the printhead PCB somewhere off the X gantry and wire everything up. Jr uses the same 100k resistor as E3D, so no mods are needed - just wire everything directly. Problems with the current design? Okay, it's not really a problem, more like a small miscalculation. With E3D in place, you need to go to Z axis offset and add roughly 2mm, depending on your bed level. I'll probably fix this in future versions but for now it's not a problem. On my to-do list: Design little PCB mounts which are held on 2020 extrusion somewhere. Add cable clamps so I can neatly trace cables from the hotend to the bowden tube. Design a little cable organizer on the PCB end, but that'll probably be part of the PCB mount/case. Things I'm not planning to do: Adopt this design to E3D's clone hotends (1st they are not worth the money quality-wise, 2nd hotend build quality isn't there so don't be surprised if by saving £20 you'll burn down your house which I presume is worth more than £20). Adopt this design to any other hotend manufacturer, I just don't have any of them on hand. Build an all-in-one mount + cooling fan. This open design is the whole reason why I said goodbye to Jr's "boxed" design approach. Things I consider: Do a direct drive iteration of this design so I can print flexible materials much more easily. The only setback for this is that 1st I need to redesign the X axis mount correctly. It won't carry extra stepper motors early without sagging even more. Print Settings Printer: XYZ Printing da Vinci Jr Rafts: No Supports: Yes Infill: 50% Notes: Print it vertically.
With this file you will be able to print XYZ daVinci Jr - E3D V6/Lite6 Mount with your 3D printer. Click on the button and save the file on your computer to work, edit or customize your design. You can also find more 3D designs for printers on XYZ daVinci Jr - E3D V6/Lite6 Mount.
