X & Y Calibration Ruler Pointer
thingiverse
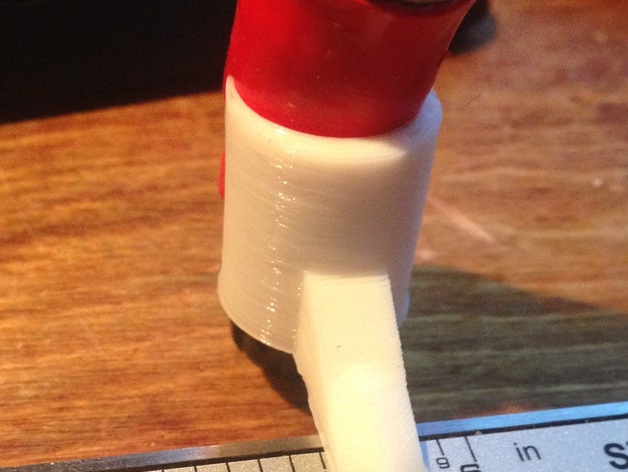
Clip this to your hot end nozzle for precision pointing. Now, see exactly how much the head/bed moves during calibrations. WARNING: Don't attach while your hot end is warm; plastic will melt, warp, or fuse. I sized mine to a Ubis hot end, but it should fit most even with some flexibility. This is my first 3D print shared with the world, so provide feedback. Give me a review despite its limitations. Instructions Orient the STL in your host for flat printing. Attach only when the hot end cools down. Place your ruler flat on the bed. Ensure it's square to the opposing axis. Use the nozzle as a reference point on the 0mm mark of the ruler, then align with the maximum travel point and step through points on the interface to confirm "Steps" for exact measurements. FOR THOSE OF YOU who have no idea what this is about, Your software sends pulses to the printer to move motors by a specific amount. These pulses MUST match exactly what the model or software intended. Variables such as motor variation, pinion teeth, pulley size, count, and power rating affect actual movement distance. Send M501 or M503 to get your printer settings' readout, then use M92 to set "Steps Per Unit" – how many pulses each motor gets for one unit of measurement, usually steps per mm.
With this file you will be able to print X & Y Calibration Ruler Pointer with your 3D printer. Click on the button and save the file on your computer to work, edit or customize your design. You can also find more 3D designs for printers on X & Y Calibration Ruler Pointer.