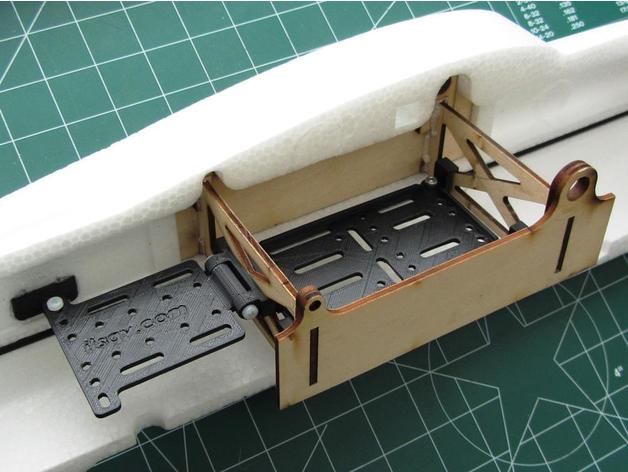
X-UAV Mini Talon Parts v4 - Rear Gear Deck
thingiverse
UPDATE 29 April, 2017 I added an optional screw plate and screw holes to the Rear_Deck_Pivot so you can make it completely removable if needed. The rear deck idea came from a user on RCGroups who suggested mounting an ESC directly under the hatch air vent. You can also mount a GPS puck or RX if that fits your build better. I really liked this concept, so I created my own version which pivots up to give access to anything below the deck when needed. Like my main "Gear Deck" in the v3 parts group, this mounts to the stock wood center structure because I believe the wood is stronger than similar sized printed parts and it will fit any stock plane. The front pivot piece snaps into the rear wood cross-piece and is held there with glue (CA). The deck helps to align where to glue the rear mount pieces. Installation Print the "Complete STL group" file or the individual parts. Tap the two pivot ears to M3 thread size. Tap the two rear mounts to M3 thread size. Mount the deck to the pivot piece with two M3 x 8mm screws (I use nylon). Snap the pivot piece into the center of the rear structure wood cross-piece and wick in some thin CA glue. Pivot the deck to level and mark the side foam where the rear mounts are to go. Use E6000 or UHU-POR glue to glue the mounts in place and screw the deck down to hold it all together while the glue sets. See Also More Mini Talon parts - http://www.itsqv.com/QVM/index.php?title=Mini_Talon_Parts_Compilation
With this file you will be able to print X-UAV Mini Talon Parts v4 - Rear Gear Deck with your 3D printer. Click on the button and save the file on your computer to work, edit or customize your design. You can also find more 3D designs for printers on X-UAV Mini Talon Parts v4 - Rear Gear Deck.
