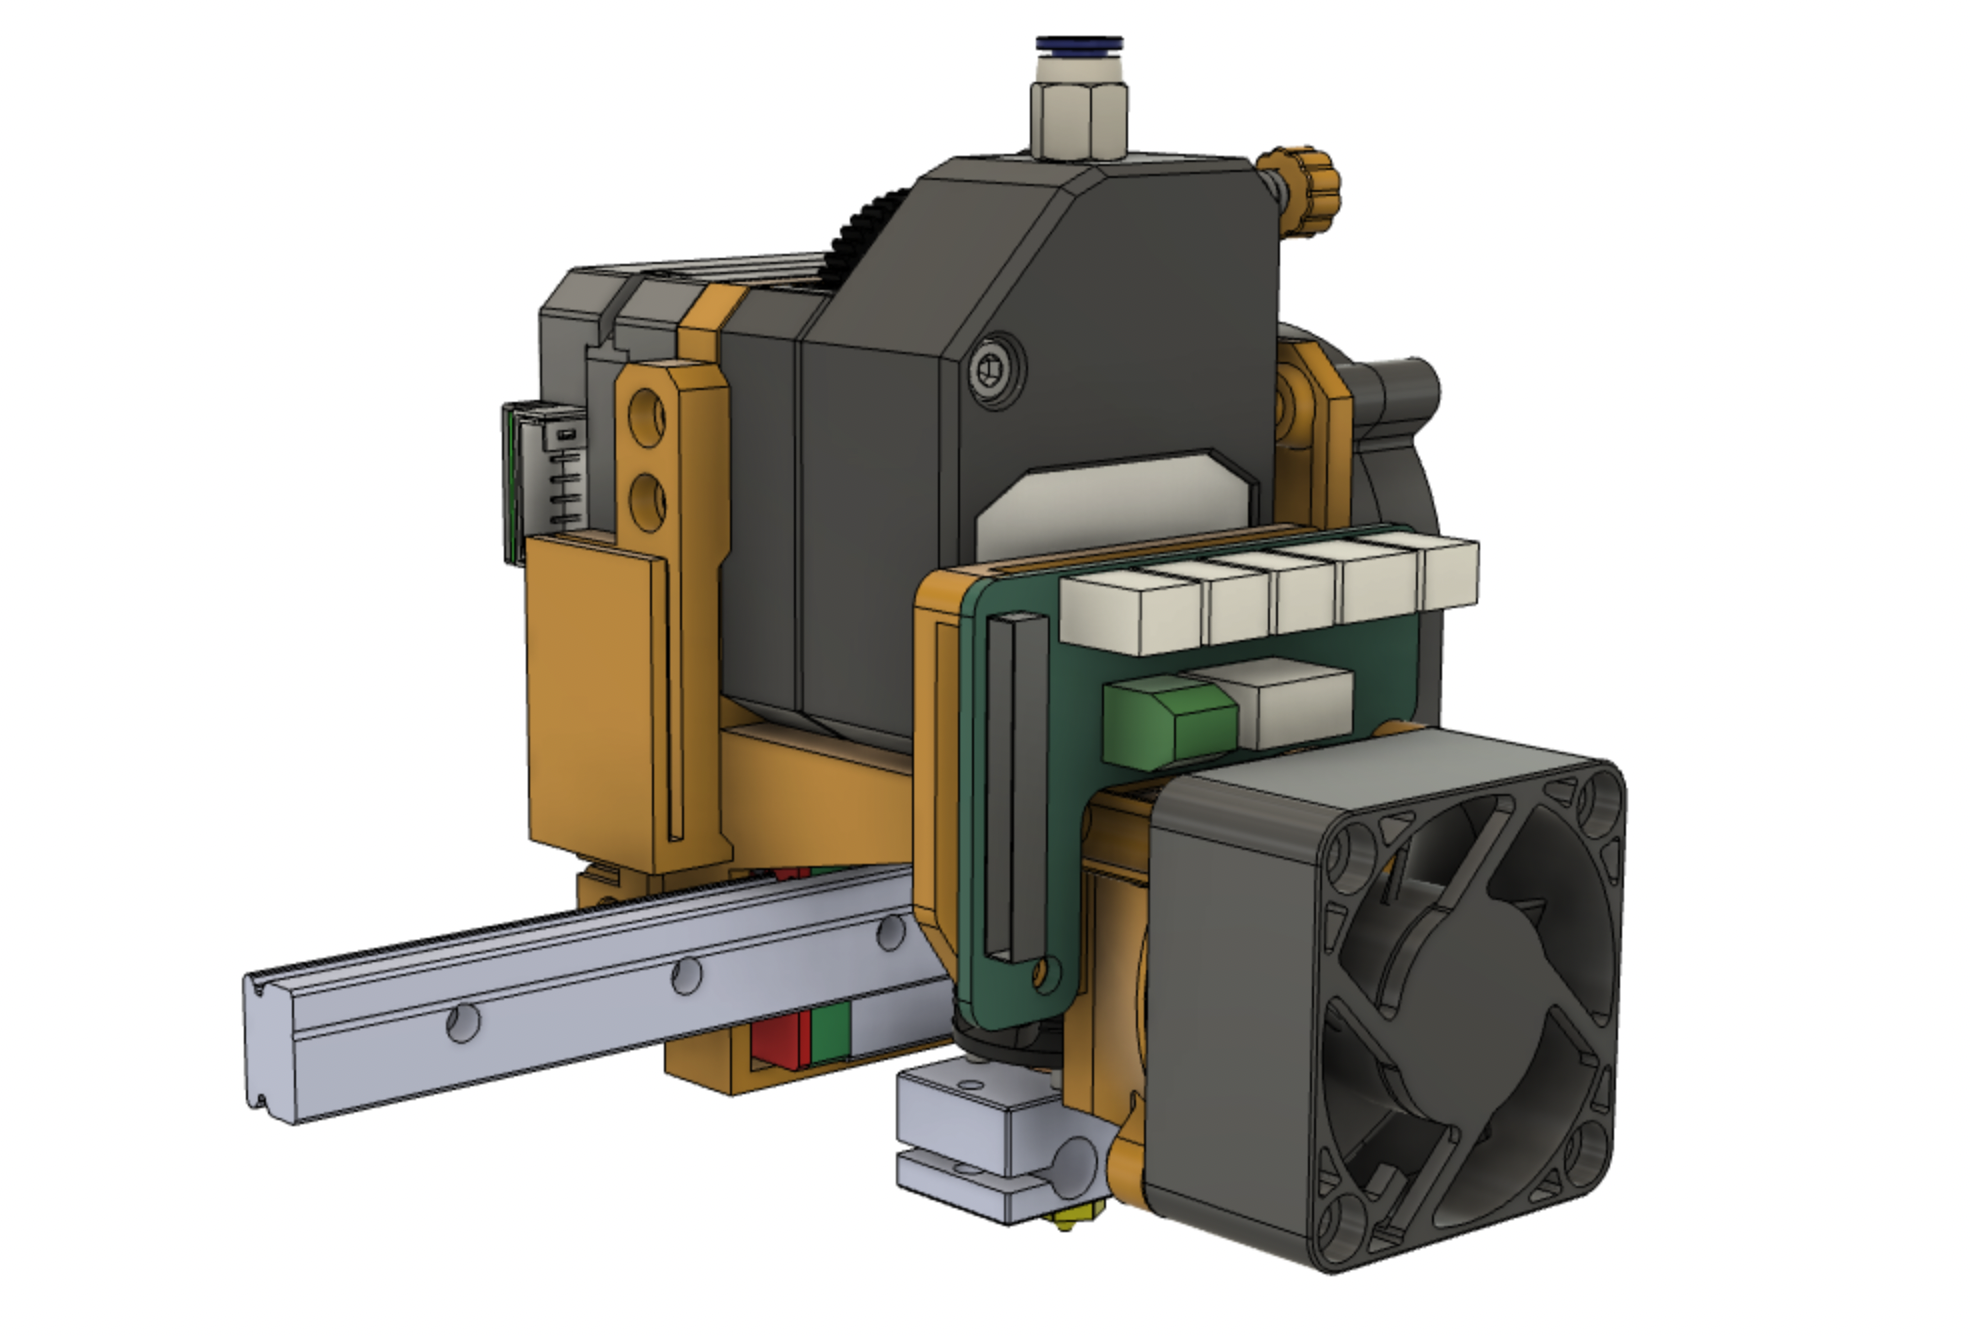
X-Max (X-Pro) Linear Rail Upgrade: Carriage for Universal Geared Dual Drive Extruder/E3D V6 Hot End
prusaprinters
<p>This carriage and extruder setup weighs 40% less and slides much more smoothly with increased movement accuracy on the linear rail than the stock Qidi extruder/carriage.</p><p>The associated linear rail gantry files can be found here: <a href="https://www.printables.com/model/272447-x-max-x-pro-gantry-linear-rail-upgrade">https://www.printables.com/model/272447-x-max-x-pro-gantry-linear-rail-upgrade</a></p><p>STEP files are provided to facilitate remixes and alternative extruder mounting options.</p><p><i><strong>Note: </strong>The carriage frame has only been tested with a BMG extruder and Dragon Hot End.</i></p><p><strong>Features:</strong></p><ul><li>The Layer Fan Duct snaps into place instead of using screws or magnets</li><li>The Layer Fan Mount slides into place instead of using screws</li><li>The Layer Fan Mount/Duct can be substituted with a standoff</li><li>The Belt Clip can be detached from frame without disconnecting or adjusting the belt</li><li>Extruder and hot end can be removed from the carriage without detaching the carriage</li></ul><p><strong>Printing:</strong></p><ul><li>All the files are designed to be printed as orientated without supports except for the ‘PCB and Fan Mount’.</li><li>If the plan is print only low temp filaments, then enhanced PLA will work, otherwise PC or PETG is needed. CF enhanced PC is OK, but not necessary. I do not recommend any Nylons, with or without CF, they are too flexible and prone to deformation when warmed with pressure applied.</li><li>I used 4 walls, 4 top and 4 bottom layers and 40% cubic infill with 40% overlap. All other setting adjustments were based on flow cubes and temp towers.</li></ul><p><strong>Post Printing:</strong></p><ul><li>The frame requires two inserts for the Belt Base, one insert for the PCB and Fan Mount and two M3 nuts for the Ribbon Guide.</li><li>The PCB and Fan Mount requires four inserts.</li><li>The Belt Base requires one M3 nut.</li><li>The radial fan mount requires two inserts.</li></ul><p><strong>Assembly:</strong></p><ul><li>The PCB and Fan Mount fits onto the front of the Frame and is held in place with a screw.</li><li>The Ribbon Guide is fitted to the side of the Frame. Note that there is space behind the guide to hold the motor wires in place.</li><li>The Radial Fan mount simply slides into place.</li><li>The Layer Duct snapping mechanism can be adjusted by filing material away or using super glue to add material back. Make sure to clean up any elephants foot on the parts. When snapping the duct onto the fan board, use a tool such as a screw driver to provide support to the fan board. The duct pivots on the base of the mount into/out of position.</li><li>The Belt Clip Base is fitted to the back of the Frame.</li></ul><p><strong>BoM:</strong></p><figure class="table"><table><tbody><tr><td><strong>Description</strong></td><td><strong>Amazon U.S.</strong></td><td style="width:250px;"><strong>Image</strong></td></tr><tr><td>M3x5.7mm, OD4.6mm Threaded Brass Insert</td><td><a href="https://a.co/d/6rNIbp1">https://a.co/d/6rNIbp1</a></td><td><figure class="image image-style-align-center image_resized" style="width:50%;"><img src="https://m.media-amazon.com/images/W/WEBP_402378-T2/images/I/41L4D-4Zi4L.jpg"></figure></td></tr><tr><td>Stainless Steel M3 Hex Socket Head Cap Screws and Nuts Assortment</td><td><a href="https://a.co/d/1ef5smv">https://a.co/d/1ef5smv</a></td><td><figure class="image image-style-align-center image_resized" style="width:50%;"><img src="https://m.media-amazon.com/images/W/WEBP_402378-T2/images/I/81WcTT23O2L._SL1500_.jpg"></figure></td></tr><tr><td>DDB Universal Geared Dual Drive Extruder</td><td><a href="https://a.co/d/bIT0TX7">https://a.co/d/bIT0TX7</a></td><td><figure class="image image_resized" style="width:75%;"><img src="https://m.media-amazon.com/images/I/41UP7KUcDnL._AC_.jpg"></figure></td></tr></tbody></table></figure>
With this file you will be able to print X-Max (X-Pro) Linear Rail Upgrade: Carriage for Universal Geared Dual Drive Extruder/E3D V6 Hot End with your 3D printer. Click on the button and save the file on your computer to work, edit or customize your design. You can also find more 3D designs for printers on X-Max (X-Pro) Linear Rail Upgrade: Carriage for Universal Geared Dual Drive Extruder/E3D V6 Hot End.
