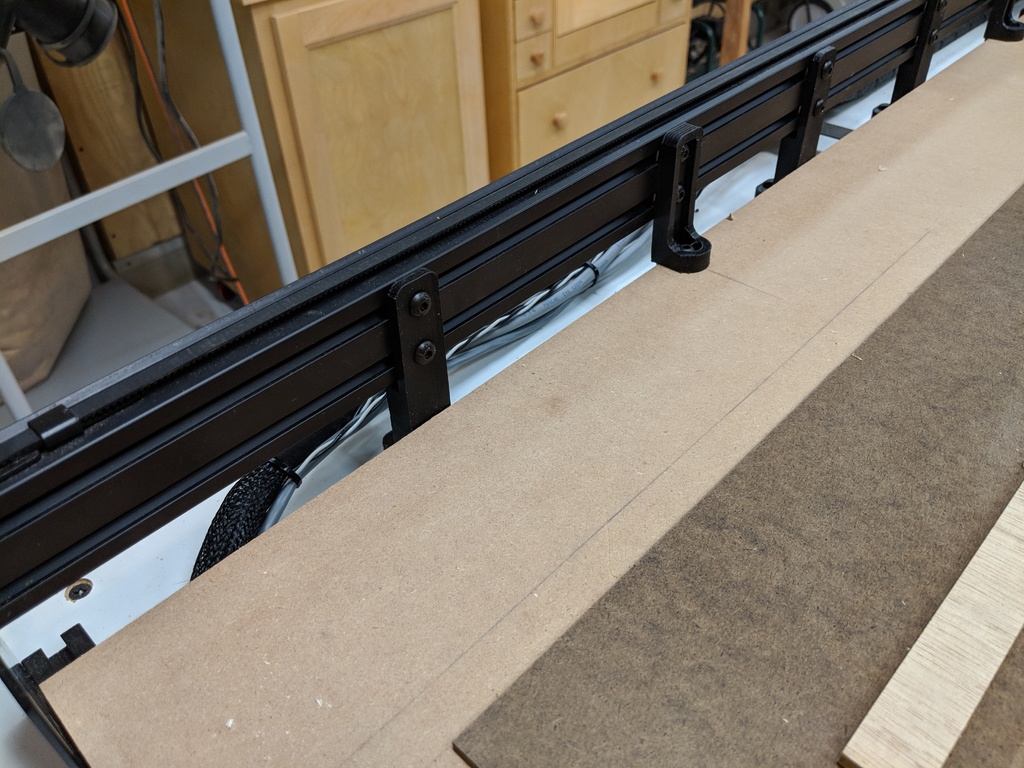
X-Carve Y Axis Stiffener
thingiverse
This is meant to stiffen the Y axis rails of the X-Carve by providing a tie between the rail and the table the machine is attached to. Two sets of pieces are used, four brackets which tie into the side waste board mounting holes and brackets (I used four on each side) which tie the Y rails to the table top the X-Carve is sitting on. Pre-insertion nuts are inserted into the upper and lower inner grooves of the Y rails and a M5x10 Button Head Cap Screw is fastened through the stiffener and into the groove and nut. Four M5x30 Button Cap Screws (longer than what came with the X-Carve) are used for the brackets which fasten to the waste board mounting holes. Assuming the table top is at least 3/4 inch thick, a Kreg 1 1/4 inch coarse thread pocket screw then fastens the stiffener to the table top. The pocket screw is at an angle so the pocket screw driver will clear the Y rail for easy installation. I can confirm that these stiffeners made a significant difference on my machine - peck drilling in Fusion 360 now works significantly better because the flex is gone. Total parts required (as I installed, fewer brackets might be sufficient): 4 x printed waste board mounted brackets 8 x printed counter mounted brackets 24 x M5 pre-assembly nuts 24 x M5-10 button head bolts 4 x M5-30 button head bolts 8 x 1 1/4 inch coarse thread Kreg pocket screws (and you will need a square driver for them) I have added a third file for a bracket where the reinforcement starts 10mm lower. This is for X-Carve owners who have a 30mm bolt attaching the lower V-wheels on their Y plates. The 30mm bolts collide with the outside brackets. If you (like me) use 25mm bolts to attach the adjustable V-wheels, you may find they just clear the brackets.
With this file you will be able to print X-Carve Y Axis Stiffener with your 3D printer. Click on the button and save the file on your computer to work, edit or customize your design. You can also find more 3D designs for printers on X-Carve Y Axis Stiffener.
