Wyze Pan Cam tilt mod
thingiverse
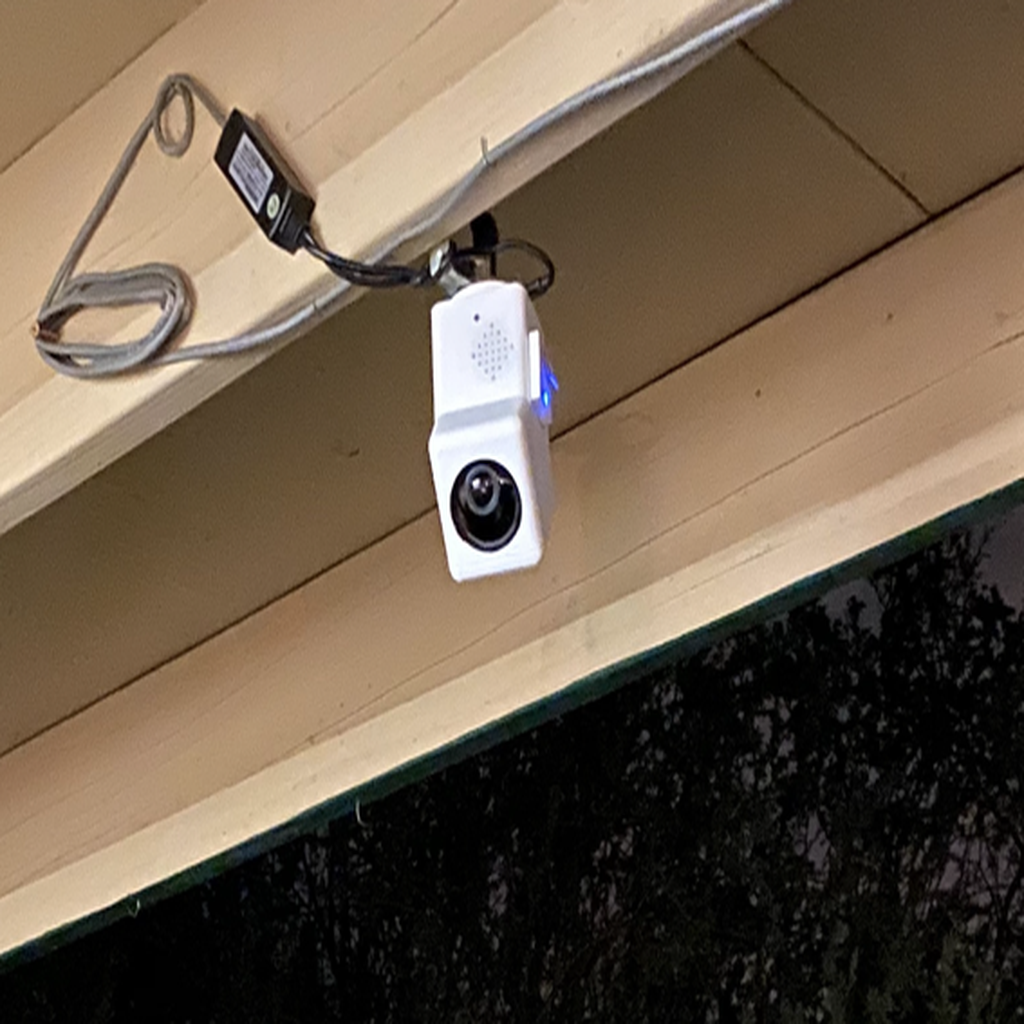
A modified Wyze Pan Cam housing is designed to utilize the full tilt range when hanging from a ceiling. The original housing often wastes half of the tilt range on the ceiling due to its design, while a standard tilt mount does not maintain the desired pan-range. The idea behind this modification involves gutting the existing Wyze Pan and transplanting its components into a new housing. This approach allows for a more efficient use of space and improved functionality. There are two versions of the main body available: one with the speaker in the front, which has been tested and is shown in pictures; and another version with the speaker in the back, which should work but has not yet been printed. Assembly involves using the screws from the original enclosure. First, attach the upper portion containing the camera, motor, and mounting hardware to the lid, then screw in the two mounting screws while leaving the camera ribbon cable connected. Next, slide the lid into the main body and feed the motor cable and camera ribbon cable through the bottom for a secure fit. The speaker is placed into its designated notch within the main body, held in place by stickiness from the original case or additional adhesive if necessary. The USB PCB is then screwed onto its mount, connected to the speaker via the USB port, and inserted into the main body from the bottom, lining up with the outer holes and securing it with two screws. Two extra screws are required, which can be obtained from the original enclosure's metal plate. The wifi antenna is carefully removed from the original enclosure and stuck in its new location within the main body, opposite the USB port or any other suitable area. The top/camera portion, speaker/USB ports, and antenna should now be installed on the main body. Connect the camera ribbon cable, USB ribbon cable, wifi antenna, and tilt motor wires to the bottom pan assembly. Twist the camera ribbon cable to ensure correct connector orientation for plugging it in (for the "speaker-front" version). The bottom panel and pan assembly snap into place within the new enclosure, much like they do in the original housing. Be sure not to forget the small black rubber piece that covers the LED on the PCB, as it may be a tight fit. The bottom screw hole should line up fairly well. There is also an additional hole for a screw, just to prevent any slippage. If the camera does not function after reassembly, do not panic – simply open it back up and reseat your ribbon cables.
With this file you will be able to print Wyze Pan Cam tilt mod with your 3D printer. Click on the button and save the file on your computer to work, edit or customize your design. You can also find more 3D designs for printers on Wyze Pan Cam tilt mod.