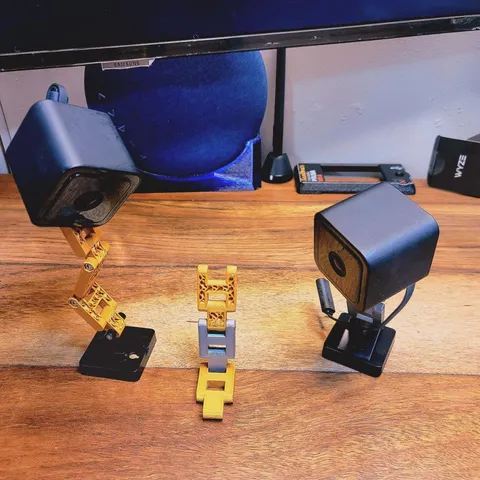
Wyze Links for v3 to add flexibility while keeping the magnetic base
prusaprinters
***And then there were two added a simplified version and a version with modifiers to give it a modifiable unique look. Change the infill types to get different effects. Slice the file to see what it will look like printed as it won't show until sliced. I imagine this would work really well with any enclosure that uses a metal that works with magnets. -----Note, will need an m2 screw and will first need to check to make sure it works with your cam edition as I have a limited edition version. fit should be tight as friction is used to keep pieces in place, I tightened mine well, but I am not responsible for what you do. Use your own discretion. Files can be modified by separating into parts and using the table manipulation under objects to get the right placement. I have multiple links in the file for that reason. feel free to ask questions. I can make a tutorial if anyone needs it. The wyze camera is known for being good for time lapses but I felt limited in attempting a time lapse as the camera base had such little flexibility. I would imagine this would help it work better in an enclosure as you could mount it to any metal that works with magnets without having to deal with adhesives as the wyze v3 comes with a magnet inside the base. You could even use it without a magnetic base and just merge one of the pieces in prusa slicer to another print and to make it a standalone or custom print. (probably better to have higher infill for bottom pieces if you do). I wanted to keep the magnetic base but get more flexibility out of my wyze camera. I just also feel that it gives the camera a little bit of a personality. I chose to go this route instead of having totally separated links so as to need less hardware. keep in mind that the more links you use the less the magnets will work as well as the unit may become to heavy. You will need at least one more m2 screw as the wyze camera only comes with one m2 which I used for the base piece. for the rest for m3 screws were used as I know most who 3d print have spares of these. I made this model entirely in prusa slicer so that it would be more easily customizeable for those who aren't as familiar with other cad programs. I left the files with the eyes hidden (that way they are still there but won't print) so that the files can be plated around. I have the limited edition of the Wyze camera so I am unsure if that changes the sizes. The link directly under the camera needs an M2 screw. The rest I used m3 screws as I have more of them. You can play with the infill on the bottom links to give different effects. making a base would be easy but I wanted to keep the magnetic bottom. It does stick to the side of the psu but unfortunately I haven't played enough with the camera to figure out if I can rotate the camera veiw 90 degrees. Imagine it would work really well with any enclosure that a magnet would work with.
With this file you will be able to print Wyze Links for v3 to add flexibility while keeping the magnetic base with your 3D printer. Click on the button and save the file on your computer to work, edit or customize your design. You can also find more 3D designs for printers on Wyze Links for v3 to add flexibility while keeping the magnetic base.
