Worx Screwdriver Spare Cylinder
prusaprinters
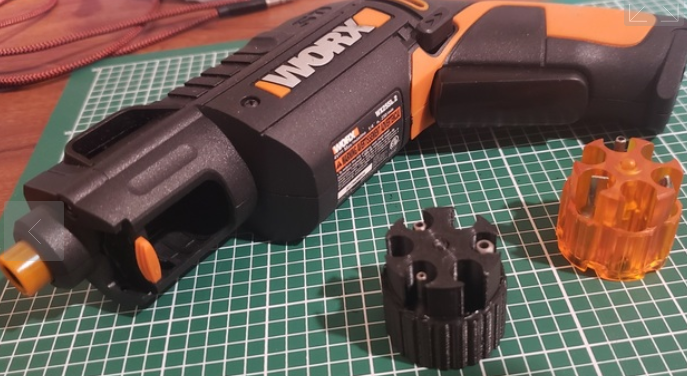
<h3>Non Printed Parts:</h3><p>3x 6mm Cylindrical Magnets<br>1x Pen Spring</p><p>The cylinder works on its own if needed, but is equal in functionality to the original if properly assembled. You need to push the plunger into the center hole of the cylinder, so that the small nipple pushes through the hole. Then, insert half of a pen spring after it, so that the plunger can slide forwards and backwards. Follow this with 2-4 6mm cylindrical magnets, which hold the hex bits in position. Finally, attach the plug with the nipple facing outwards and superglue the plug into position. Let it dry and voila!</p><h3>Printing:</h3><p>I used a stock <a href="https://www.amazon.com/Official-Creality-3D-Removable-220x220x250MM/dp/B07K3SZBHJ?dchild=1&keywords=ender+3&qid=1612857257&sr=8-1-spons&psc=1&linkCode=ll1&tag=thingiverse09-20&linkId=5419ace64a5f58b068a896710257ed13&language=en_US&ref_=as_li_ss_tl">Ender 3</a> to print the parts out of PLA, using default slicer profiles. Using a raft or a brim can make the plunger and cap not fit properly, so use those with caution.</p>
With this file you will be able to print Worx Screwdriver Spare Cylinder with your 3D printer. Click on the button and save the file on your computer to work, edit or customize your design. You can also find more 3D designs for printers on Worx Screwdriver Spare Cylinder.