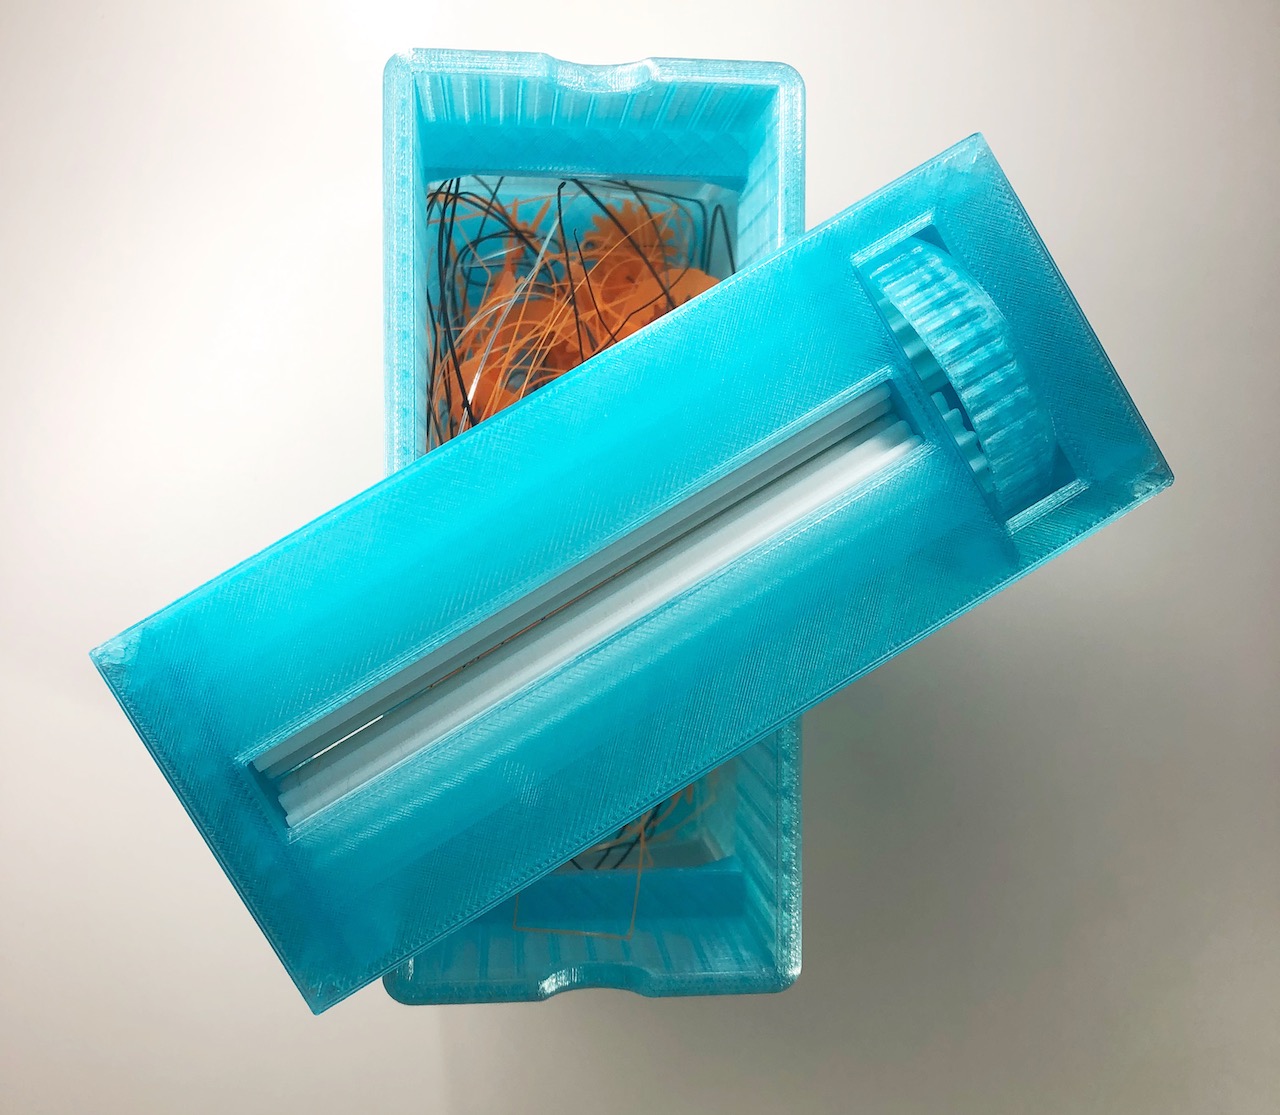
Wormies-B-Gone
prusaprinters
<h3>Wormies-what-now?</h3><p>Nine out of ten *) scientists agree that “filament wormies" that are unavoidable byproduct of FDM 3D printing process are, when it comes to waste storage, the least space-efficient material known to the humankind. Items like skirts, brims, purge lines and failed first layers are well known for their ability to automatically and immediately spring back out of almost any container they've been put in.</p><p>Wormies-B-Gone is a container for efficient and frustration-free disposal of said waste with a help of knob-operated roller action that is designed to minimise the chance of the waste bits making their way back out. Simply stick the bit of waste between the rollers, turn the knob few times and it will get pulled inside the bin. Shake the bin vigorously every so often to shuffle the stuff inside around for even less chance of any of it resurfacing.</p><p>*) projected result of an upcoming research</p><p> </p><figure class="media"><oembed url="https://youtu.be/68bP_TqwEPw"></oembed></figure><p> </p><h3>How to print</h3><p>You currently have two options to choose from: with an S-sized bucket and with an M-sized one. The smaller one fits some skirts, brims, purge lines, failed first layers, etc. that you feed through the rollers. The larger one, in addition to the stuff that the S one fits, also features a flip door on top for disposing of larger items such as removed support material, small failed prints etc. that would otherwise not fit through the rollers.</p><p>In any case, you need to print the following:</p><ul><li>Gears and rollers</li><li>Thumb wheel with axle</li><li>Roller case</li></ul><p>and then, depending on your choice of bucket size:</p><ul><li>Bucket S<br>or</li><li>Bucket M and Bucket M Cover</li></ul><p>No supports are needed but you might want to enable the brim for thumb wheel axle as there's a risk of the small piece dislodging from the print bed.</p><h3>How to assemble</h3><ol><li>Clean up the prints as needed, pay special attention to the half-holes for the shafts on both parts of the roller case and the inside of the thumb wheel cavity. Remove / file down any imperfections in these spots.<br> </li><li>Stick the short round axle into the flat side (the one without teeth on the inside) of the thumb wheel, minding its correct orientation: the flat (non-chamfered) side of the shaft goes into the thumb wheel. Fix the shaft with a drop of CA glue on the inside of the thumb wheel if needed (it should not spin).<br> </li><li>Fit the three shorter gears and one taller one onto the ends of the rollers, minding the flatter surface acting as a key.<br> </li><li>Using silicone grease or other grease suitable for plastic parts, lubricate the moving elements. Do not skip this step as it is needed for properly smooth operation and to prevent binding of the mechanism. Lubricate the following:<ul><li>All shaft hole halves in both case parts</li><li>Inside surface of the thumb wheel (where the teeth are), the teeth themselves</li><li>External face of the taller gear</li><li>Teeth of the smaller gears (this could be done after Step 6)<br> </li></ul></li><li>Place the lower case part with the wheel guard protruding down and to your left. The spot you place the roller with the taller cog fitted will determine the direction the thumb wheel operates. Assuming you will be handling the plastic waste pieces with your dominant hand and turning the wheel with the other one, the usual preferred choice would be:<br><br>For lefties: put the roller with the tall gear facing left into the upper spot<br>For righties: put the roller with the tall gear facing left into the lower spot<br><br>Put the other roller with two shorter gears fitted into the other spot and check the both are meshing correctly and spinning freely.<br> </li><li>Manoeuvre the thumb wheel into its spot so both left roller gears go inside it (but only the taller one engages with thumbwheel's teeth).<br> </li><li>Press-fit the top case part on the assembly and make sure everything turns smoothly. If not, add some more grease (see Step 4).<br> </li><li>Press-fit the “backfeed” guard into the roller case opening taking care not to break it in half.<br> </li><li>Insert the completed roller assembly into the bucket.<br> </li><li>If you chose Bucket M, install the bucket flip cover by inserting small “dimples” on one of its side into the corresponding indentations on the inside of the bucket to make a hinge. </li></ol>
With this file you will be able to print Wormies-B-Gone with your 3D printer. Click on the button and save the file on your computer to work, edit or customize your design. You can also find more 3D designs for printers on Wormies-B-Gone.
