Working Lock
prusaprinters
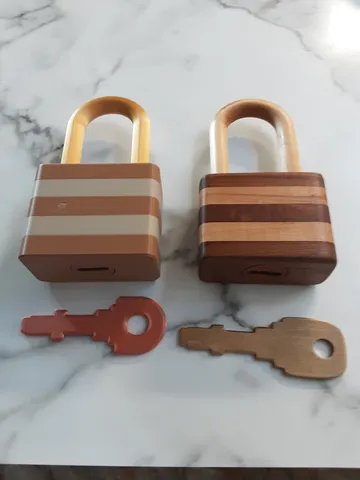
This lock comes from a plan in the book "Making Wooden Locks" (Linden Publishing 2000) by Tim Detweiler. An excerpt of the wood plan can be found at: https://issuu.com/ksorsky/docs/big_book_of_wooden_locksI made this lock in wood many years ago, as shown in the picture. The lock is fully functional but designed more for decoration than function. I have made some changes from the original plan due to the differences between woodwork and 3D printing.I printed all pieces at 0.2mm layer height with 4 perimeters for strength. Except for the Shackle all parts are printed without support. The Shackle requires supports from the build plate and therefore will require clean-up with sandpaper.The Shackle Retainer Pin is designed at zero clearance to maintain position without glue. Clean-up of the Layer 3 hole and fine adjustment of the Shackle Retainer Pin size will be required for fitting.The Shackle Latch Spring is printed with zero clearance to the Layer 2 insert. This keeps it in place after assembly and maintains accurate shackle position.I suggest printing all parts before starting assembly. Assemble as follows without glue and test the function:Caution! Assemble parts in the orientaion shown in the pictures with the shackle hole aligned throughout the entire body.1. Insert Key Hole into Layer 5 Bottom.2. Place Layer 4 on top of Layer 5 bottom.3. Place Layer 3 on top of Layer 4. Do not insert the Shackle Retainer Pin at this time.4. Insert the Shackle Latch Spring into Layer 2. Align the Shackle Latch spring as it was printed.5. Place Layer 2 on Layer 3.6. Place Layer 1 Top on Layer 2.While holding the assembly together check that the Key can be inserted all the way and turned 90 degrees. With the Key turned, insert the Shackle into the lock body and aligned with the body. Turn the Key back to its rest position and remove the Key. The Shackle should be locked into place. When all seems OK use the key to unlock and remove the Shackle.Final Assembly:A. Glue the layers together keeping glue off all moving parts.B. Insert the Key and turn 90 degrees.C. Insert the Shackle to the fully locked position and Remove the Key.D. Tap the Shackle Retainer Pin fully into position. (No glue is required. In case of problems with the Shackle, the pin can be punched out).
With this file you will be able to print Working Lock with your 3D printer. Click on the button and save the file on your computer to work, edit or customize your design. You can also find more 3D designs for printers on Working Lock.
