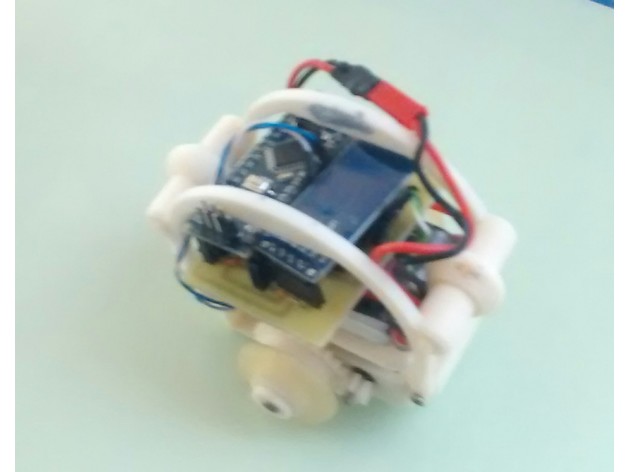
Working ball robot II
thingiverse
This is a working ball robot model whose internal mechanism is very similar to Sphero. It measures 96 mm wide and assembles easily, printing quickly. The sphere opens and closes without removing any screws. I will complete the existing instructions soon. Scroll down for almost complete instructions! More projects can be found at: https://juangg-projects.blogspot.com Print Settings: Supports: No Resolution: 0.2 mm Infill: 25-30% Notes: Supports are required only in Ball_a. I strongly recommend printing it with ABS. How I Designed This I used FreeCAD to design this, a free and easy-to-use 3D design program. At first, it was challenging to enclose all parts within the 44mm radius ball, but as I designed everything inside a sphere, I could see if the wheels were at a proper height and so on. Project: Working Ball Robot II From the start, I've encountered numerous problems that needed solving. In my opinion, I've learned a lot from my mistakes. Starting with this design, the main goal is to allow students to modify it, improving their skills while learning from their mistakes. I believe this project can be suitable for secondary education students who have some knowledge of electronics, Arduino, and CAD design. After completing this project, they will have greatly improved not only those skills but also math, physics, and more. The current design can be completed within four or five hours, excluding 3D printing time. However, you can continue improving and reprogramming until you get bored. At the end, students should have successfully completed an operating model, at least slightly different from the original design, and explain what changes they made and why. You can also try this project on your own as a personal project and learn many things! Scroll down for instructions to complete the current design. Instructions: a) 3D printed parts Just print each part once or twice if the file name ends in (x2) b) Non-3D printed parts Two standard flat side DC motors Four x68 mm brass shafts (you can 3D print one) Two x10 mm wood screws Super glue (or similar) Acetone (if working with ABS) Silicone (any kind) Soap (used to work with silicone) An Arduino Nano, a L293D motor driver, and a Bluetooth module c) Assembly -The sphere: Take one of these (Ball_a) Remove supports Disolve them in acetone; we'll use that later Sand the inner side Brush it with acetone + ABS mix Glue those two pieces Sand the excess material Brush all with acetone + ABS Do the same on the inner side, and repeat all previous steps with the other half of the sphere. -The driving wheels: Print this piece, brush the internals with acetone for better results; let it dry, then brush some soap with water inside Fill the mold with silicone Flat the silicone with your finger and some soap Let it dry overnight, and remove the tires Glue them to the inner piece of the wheel -Internals: Parts needed: Glue the two motors in place Glue the small gears to the motor shafts Cut the brass rod, put it into the frame; then put the big gears on both sides Glue the driving wheels to the big gears Glue that stopper in place Screw that piece onto the upper side of the frame Take one of these and put those shafts in place Place those wheels there Place the other part over there Screw that to the main frame. d) Printed Circuit Board: Download the design (PCB.xps) and print it at 1:1 scale Transfer it to a standard, single copper layer PCB with a permanent marker; remove unwanted copper with HCl With this result, Remove ink with alcohol and make holes needed It should look like this or hopefully better All connectors and the 5V regulator soldered Fixed to the frame with the battery (sorry for the low-quality photo)
With this file you will be able to print Working ball robot II with your 3D printer. Click on the button and save the file on your computer to work, edit or customize your design. You can also find more 3D designs for printers on Working ball robot II.
