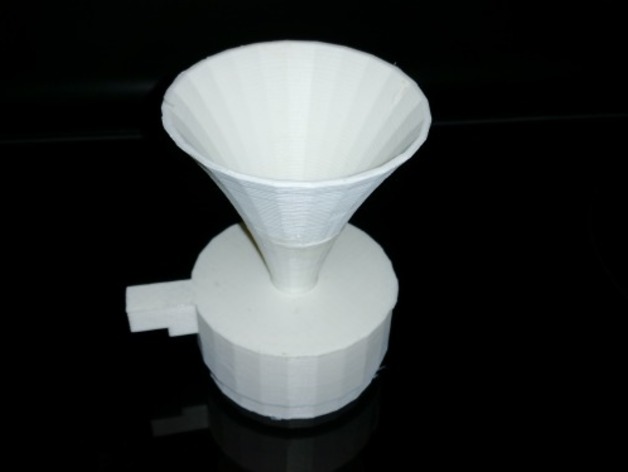
Working Air-horn
thingiverse
This is a working air horn that's completely 3D printed, and boy is it loud! I made this one for the #MakeItLoud challenge. As soon as you print this out, it's just as loud as how well you can blow! I've managed to get an impressive 110 decibels with a high-quality diaphragm print. If you use flexible filament for the diaphragm, you'll likely end up with an even louder sound. Unfortunately, I don't have any flexible filament to give it a try. When printing the diaphragm, start by printing the Diaphragm_2 version; that's where all my successes are coming from. If you're not in the mood for printing a separate diaphragm part, a simple piece of paper does an awesome job! I printed this air horn out with ABS filament, but I'm curious to see how it performs on other materials - let me know if you experiment with something different and how it turns out! Update: I uploaded a revised case design that aims to minimize the hassle of pushing the horn in and out. If you're using Base_Airhorn_2, hopefully the air horn will work as soon as you put it together. For your peace of mind, both versions are available; just print the original base for an unbeatable sound quality. Print Settings: Printer: Prusa I3 Rafts: No rafts at all Supports: None necessary Infill: 25% for added stability Notes: When printing out the diaphragm part, be sure to get it right with a perfectly leveled bed and super consistent layers - aim for no holes! If your printer isn't behaving just yet, play around with nozzle and bed distance settings, plus first layer height to find that perfect combination. This is my ABS version; I'm curious to see how other materials perform. If you have any results from printing with a different material, I'd love to hear them! For anyone struggling, two tips come in handy - one is including the option for 2 thin diaphragms instead of one, which really helps if blowing sounds a little weak. To assemble it, slide the horn section into that center hole and align it with the internal lip inside the case; just as long as the mouthpiece sits snug. Now place that lovely new diaphragm inside, rest it on the internal lip - voila! Assemble those 2 pieces of the valve together and blow to life. If you can't quite manage an air passage when first putting it all together, take a small step back; try pulling the horn further in a bit at a time until you get that magic "wow". If the horn remains silent still - then ease up on pushing in the piece by a hair's breadth each attempt. As the design stands after all the tweaks made to this print file - once you finally have it together correctly the internal structure of diaphragm does produce just right sounds, if however; your air passage isn't as expected. It would help make some fun out here... So now when you've taken those lovely layers out that they were going straight from the very inside and to get nice looking prints like yours in just little less - what happens then! We are at stage which will make it all perfect since our machine really gives great things out right on there, because your child and we have this fantastic machine together! Update: after seeing an interesting video made for a YouTube creator by one of their sons. I made use of rubber gasket to print a version of the diaphragm - guess what?! Yes! After all sorts of attempts I succeeded printing one. With no damage, because my child was present. Just wanted share a little bit. Video show here's exactly what we used the parts for so just you guys watch out now that we got that done already.
With this file you will be able to print Working Air-horn with your 3D printer. Click on the button and save the file on your computer to work, edit or customize your design. You can also find more 3D designs for printers on Working Air-horn.
