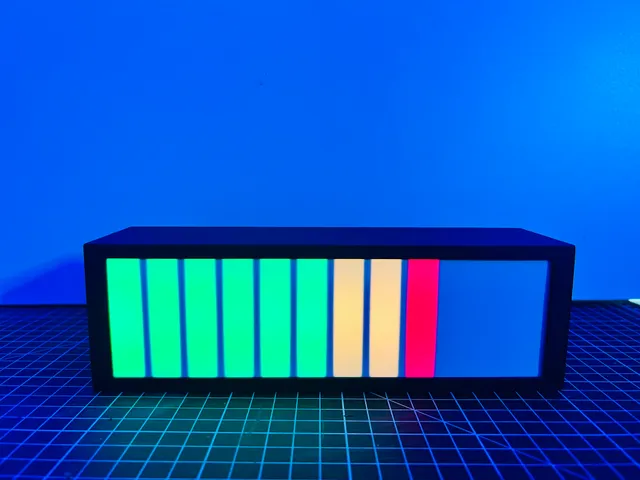
Work Time Visualizer
prusaprinters
I made this device to help me track and reduce the number of hours I spend working every day. Working over multiple time zones means that I can’t really rely on the time of the day. And software tools didn’t work for me, I needed something visual.This is a tool for all my workaholic friends out there.More info, use cases, and known issues in this GitHub Repo:https://github.com/vukasinterzic/WorkTimeVisualizer Light configuration:12 lights for 12 hours. Large enough to be visible but not distracting.1-6 – Green lights – keep working7-8 – Orange – time is running out, finish things and plan for tomorrow9-10 – Red – stop working11-12 – flashing RED – seriously, stop working12+ All lights are flashing red. Self-destruction is in progress. Other functionality:- Every hour is saved to EEPROM and retrieved when turned back on.- Progress can be manually adjusted with a push button on the back.- After 13 hours is reached, automatic counting will not continue and it will end there. The reset can be done by pressing the button. 3D Printing:No supports needed, infill as you wish.The front white diffuser can be replaced with a sheet of paper for a very clean look. Or a thin black acrylic diffuser for a stealth look.The back LED Cover has holders to fit a prototype PCB board of 10cm in length (this one: https://amzn.to/3XEdoul). You can print a version without a PCB holder and figure out a different way to mount your electronic (hot-glue?)The back box cover is provided in versions with and without the hole for the push button. Since the part is very thin, you can easily drill the hole to fit your button location.Other hardware:Apart from the 3d printed parts, the following is needed:- Smaller Arduino board with EEPROM. Some boards such as Seeeduino Xiao don’t have EEPROM and you will need to use an emulator instead. I used ATTINY85 - https://amzn.to/3K7cdAL- 12 pixels of individually addressable 5V LED strip or individual NeoPixel LEDs. Files fit NeoPixel strip WS2812B with 60 pixel/meter - https://amzn.to/3YAC5Jw- 5V power adapter and cable. You can use a 5V USB port on your Arduino, or you can cut the USB cable and solder + and - directly, or use a 5mm female connector as I did.- 10K resistor - https://amzn.to/40Z81Jd- Push Button. For example this one: https://amzn.to/3IoVOX8 Electronic Circuit Diagram: Make sure you check GitHub repo for more information and known issues:https://github.com/vukasinterzic/WorkTimeVisualizer
With this file you will be able to print Work Time Visualizer with your 3D printer. Click on the button and save the file on your computer to work, edit or customize your design. You can also find more 3D designs for printers on Work Time Visualizer.
