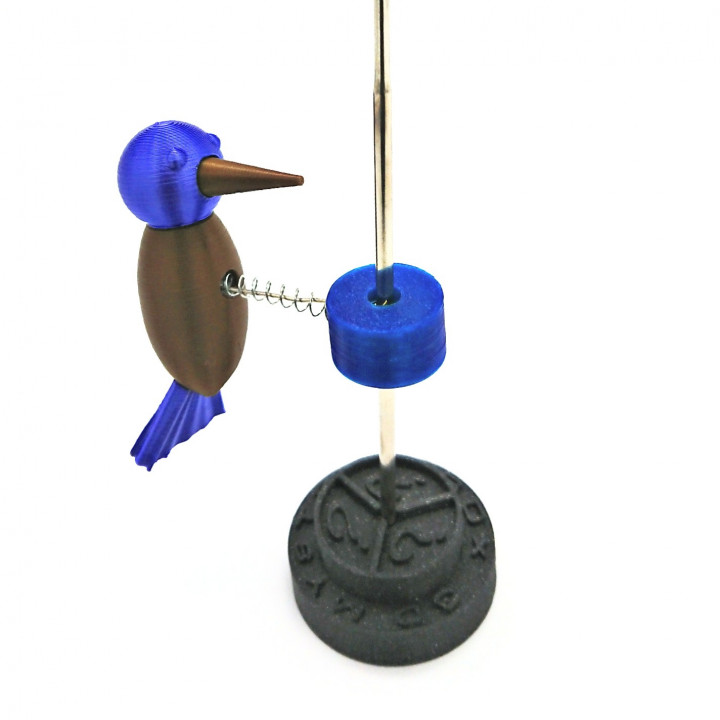
Woodpecker Toy
myminifactory
Make a fun little desktop toy! I'm excited to share with you the project of the EU 3D Mystery Box for March 2019! As spring is just around the corner, I thought a colorful bird with a playful twist would be perfect. Inspired by a wooden woodpecker toy I had when I was a kid, I re-created it to be 3D printable. You'll need some creative materials to bring this project to life: a metal rod, 200 mm long and 3 mm in diameter, a spring from a ball pen (about 30 mm length and 4 mm diameter, can be cut if too long), and a metal paper clip (not too thin, about 0.8 mm diameter should be fine). All of these parts are hidden inside the Mystery Box, along with some superglue to assemble the pieces. Instructions: Watch this video to see how it's done: https://youtu.be/jk6g_oqyR-A First, print each STL file for the bird and one stand. You can choose between a small and a big stand - the small one should be attached to the surface with some double-sided tape (or else), while the big one doesn't need attachment. Print the bird parts in different colors, but make sure they're all made of the same material (e.g., all PLA or all PETG) so they can be glued together. Assemble the bird by gluing the beak into the hole of the head, then gluing the head into the triangular hole of the body. Make sure the beak faces the same direction as the hole in the body. Finally, glue the tail into the slot on the back of the body - it only fits one way, so be careful not to break the pin. Next, take the paper clip and unfold it. Place the spring over one end and bend the clip (90°) at almost the length of the spring (about 2-5 mm shorter). Remove the spring and set it aside for later. Bend the clip after 2-3 mm in the other direction (90°) to create a Z-shape. Now, wind the paper clip around the rod. The windings should be tight but not too tight to work properly. You can wrap some painters tape (or else) around the rod one or two times to create a little distance. Take the longer side of the paper clip and create a little curve around the rod about 7-8 mm behind the last bend. To assemble the ring piece, lay it flat with the slot facing up. Slide in the core with the windings first, then slide the upper Z-part into the slot. If done correctly, the lower Z-part should come out from about the middle of the hole in the side of the ring. Connect the bird and the ring with the spring by gluing some glue inside the hole in the bird's body and the hole on the side of the ring. Take the spring and pull it over the lower Z-part coming out of the ring, then push it inside the side hole into the glue. Add more glue if necessary. Turn the ring around so that the inserting slot on the flat side is facing down. Slide the bird's body over the spring (with the lower Z-part now in the middle) and push it into the glue. Add more glue if necessary. Set the bird attached to the ring aside and let it fully dry before pulling it over the rod! Now, take the base and put some glue into the hole in the middle. Slide the rod into that hole and let it fully dry. When all parts are assembled and the glue is dry, you can slide the ring with the bird over the top of the rod. If everything is done correctly, the bird should stay in place on the top if left alone. Now, tip on the tail and it should "peck" its way down the rod. Pull it up again and let it peck down - repeat this fun process! You made a sweet desktop toy! Congratulations! Enjoy playing with it!
With this file you will be able to print Woodpecker Toy with your 3D printer. Click on the button and save the file on your computer to work, edit or customize your design. You can also find more 3D designs for printers on Woodpecker Toy.
