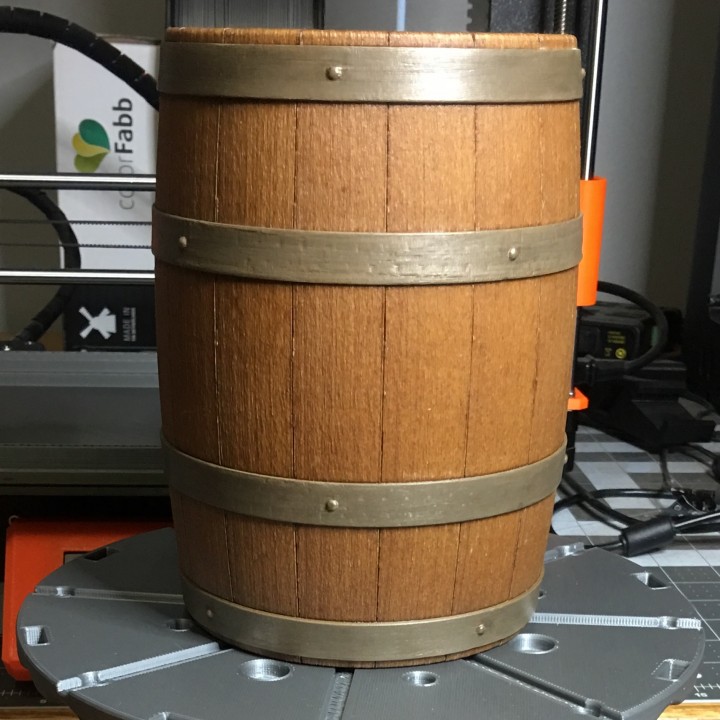
Wooden Barrel Model Kit
myminifactory
Update July 16, 2018: Added a screw on lid option. See my barrel bank in this edition of Fan Mail Friday - Metal Joelbot Edition! https://t.co/7CxiuRcCqI via @YouTube Wooden Barrel Model Kit I submitted for the Envision the Future Design Challenge. This tactile model represents a small wooden barrel, approximately 6 by 4.5 inches in size, designed to help visually impaired people understand traditional Coopering skills. A craftsman who creates barrels is called a cooper. Barrels are hollow cylindrical containers traditionally made of wooden staves bound together with metal or wooden hoops and possessing flat ends or heads. The model was created using Autodesk Fusion 360 and has been adapted for 3D printing. It consists of 16 staves, 2 chime hoops, 2 bilge hoops, and 2 sets of heads that can be assembled as either a bank or jar. All parts are inscribed with braille except the top head ring used for the jar assembly and the optional storage box. Due to tolerance variances in different 3D printers, it may not be possible to disassemble the model once the hoops are fully seated. To allow repeated assembly and disassembly, either adjust the x and y scale of the hoops during slicing or use rubber bands instead of hoops. All parts can be printed without support except the bottom head plug for braille inscription. The chime and bilge hoops can be printed together as they fit inside each other with clearance. Staves should be printed on their side, and STLs are oriented correctly for printing. Print the following common parts: 16 Staves 2 Chime Hoops 2 Bilge Hoops For bank assembly: 1 Top Head with coin slot 1 Bottom Head with treaded hole 1 Bottom Head Plug treaded For jar assembly: 1 Top Head Ring 1 Top Head Lid 1 Bottom Head Full Optional: 1 Kit Storage Box 1 Kit Storage Box Lid Assembly: First, select the set of heads for bank or jar assembly. Assemble the bank by using the top head with coin slot, bottom head with treaded hole, and bottom head plug. Assemble the jar by using the top head ring, top head lid, and bottom head full. Next, take one stave in one hand, position it against the palm, and insert both heads into their respective slots. If assembling the jar, position the head ring so its recess faces out to allow the lid to fit properly. Continue adding staves one by one, ensuring they sit flush with the previous one and apply pressure on the heads so they do not fall off. Once enough staves are in place, the heads will stay put. Secure the model by installing the hoops, starting with chime hoops nearest the head and bilge hoops near the middle of the barrel. They fit into grooves to keep the model securely assembled. The hoops are tapered to match the outside curve of the staves, with the smaller side towards the end of the barrel. Install the chime hoops first using your finger tips, then do the same with the bilge hoops. Finally, screw in the bottom plug for bank assembly or the lid for jar assembly.
With this file you will be able to print Wooden Barrel Model Kit with your 3D printer. Click on the button and save the file on your computer to work, edit or customize your design. You can also find more 3D designs for printers on Wooden Barrel Model Kit.
