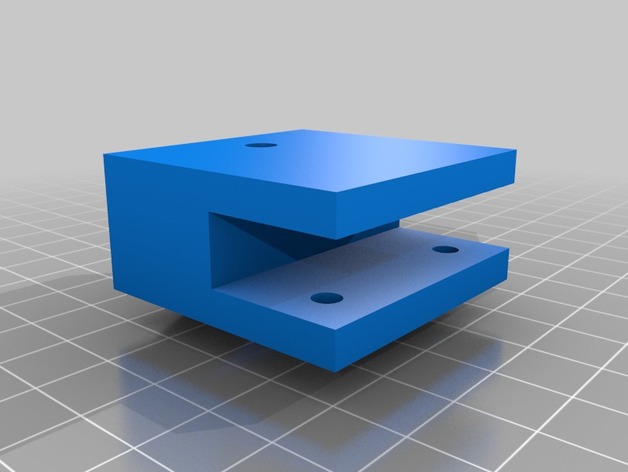
Wood reel and reel plastic support for SmartrapCore 3D printer box
thingiverse
This is my first accessory to upgrade the SmartrapCore, a 3D printer from Smartfriendz. The SmartrapCore can be found at this URL: http://www.thingiverse.com/thing:651117 I designed and built a wooden reel that will conserve my filament instead of purchasing an expensive printed reel costing over $15. To create the reel, I used wood, nuts, bolts, metal squares, and plastic for a total cost of around 7 dollars. This was inspired by this design: http://www.thingiverse.com/thing:10219 However, I built mine using wood! The reel is designed to work with filo3D filament, which I purchased in bulk without the pre-installed reel. It has an inner diameter of 19cm and an outer diameter of 30cm. I created a piece that will connect this reel: a plastic support made for attaching to an M5 (5mm) bolt, which also features two holes that can be used if you choose to attach it directly to the box. However, plugging it into the box is enough for stability and sturdiness. This reusable component serves as a guide for winding the filament around the 3D box's corners: http://www.thingiverse.com/thing:755862 Below are the step-by-step instructions for creating this wooden reel: 1) Acquire 30cm x 30cm MDF (Medium-Density Fiberboard). Measure and draw a circle with a diameter of 30cm, or 15cm in radius. Utilize very heavy scissors (metal ones will work too, capable of cutting through thin metal sheets) to cut out the circular shape. Be cautious not to drill the central hole yet; its precise placement is needed for accurate measurements during future steps. 2) Buy six 5cm-long metal squares that each have M4 holes. Measure and draw axes 120 degrees apart from the circle's center, ensuring each square's length is positioned precisely at 9.5 cm from the axis' center (for a desired 19cm inner radius of the reel). Mark the holes with a pen or pencil and use a drill to make precise 4mm diameter holes for the metal squares. 3) Next, drill a large central hole that allows you access to your ball bearing's shaft (even if not using one; they're optional but help maintain reel alignment). I used an 8mm diameter hole drill bit. Acquire M4 nuts, bolts, and washers in total quantities of nine pieces each. Use these items to attach the metal squares with screws by placing them into holes previously drilled. 4) Secure a ball bearing onto the wood plate; the outer edges must touch the board, but ensure that its center can freely move inside the hole. Now acquire a 50mm length M5 bolt and an extra set of three M5 nuts. Place this long M5 bolt within your newly-placed bearing. You see, the bolt has to have access to all four edges at some point (to connect the wooden piece). However this might not be enough: just attach it loosely. This plastic support can easily print with an ABS filament so I created a file for you. Please follow below for assembling of both parts: First Print Your Support After this go back here to assemble
With this file you will be able to print Wood reel and reel plastic support for SmartrapCore 3D printer box with your 3D printer. Click on the button and save the file on your computer to work, edit or customize your design. You can also find more 3D designs for printers on Wood reel and reel plastic support for SmartrapCore 3D printer box.
