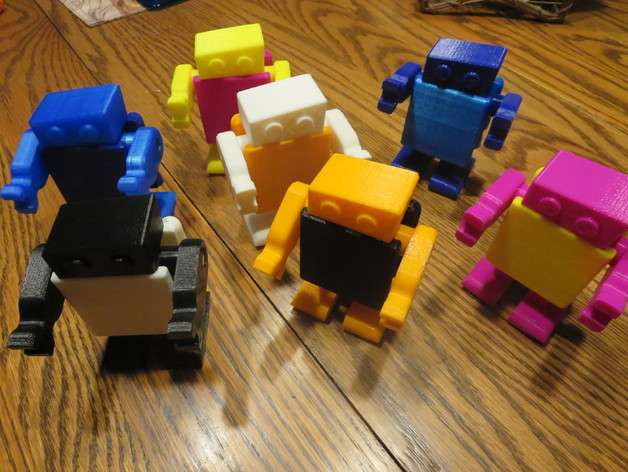
Wobbly 2
thingiverse
This is a reinterpretation of Wobbly, the walk-by-robot. I streamlined it by merging the limbs with spacers and making the jetpack integral to the body. I also added a stud for the head, including a hole within the head for simple swaps between various heads. Furthermore, I shortened the torso a tad to grant the legs more room to move around. Moreover, I made several tweaks to the body's design for improved printing efficiency while in an upright position. Additionally, I increased the size of the holes in the legs so users wouldn't have to thoroughly clean up excess pegs before they could move. I think this would be perfect as a party favor with numerous Wobbly parts of different hues and colors, enabling kids to create their very own walking robot to take home. This walking contraption functions well without any coin if you place the arms down flat but performs its best when a quarter is used. You can even test it out using up to a silver dollar if desired. Several videos showcasing them as they walk: http://youtu.be/gqPcbVr0dwM http://youtu.be/2wUMOt1C_0A Now, let's move on to the assembly instructions! For your robot to work effectively, you'll need three essential components: a body, head, two arms, and two legs. When printing these pieces, make sure to have them facing in their correct directions - specifically, print the body standing upright. You should provide support for the long pegs of the arms and legs, as this is the only place it's really necessary or beneficial. As an aside, I found that setting supports at angles as sharp as 89 degrees or greater can help minimize unnecessary overhang, especially within the head's stud hole area. Print the head so its eyes are facing upwards, while printing the arms with their spacers oriented towards you and holes on top. When printing the legs, have the shorter end of their feet directed downwards and their studs pointing upwards. If your printouts happen to become a tad tight in the head or arms sections, simply use some gentle sandpaper to loosen them up - be sure not to apply too much pressure as you don't want the pegs to snap! Lastly, should you discover that after assembly the arms or head have started moving loose over time, add some drops of super glue around their stud holes. Don't, however, apply it onto the head itself since it's best to wait for it to fully set and then reattach these parts later when ready. In terms of movement itself, remember that you need your arms in just the right position - not too far up or down so as not to cause them from getting into the way while still allowing enough room around your legs. This delicate balance will make sure your walk-by-robot roams free with smooth strides!
With this file you will be able to print Wobbly 2 with your 3D printer. Click on the button and save the file on your computer to work, edit or customize your design. You can also find more 3D designs for printers on Wobbly 2.
