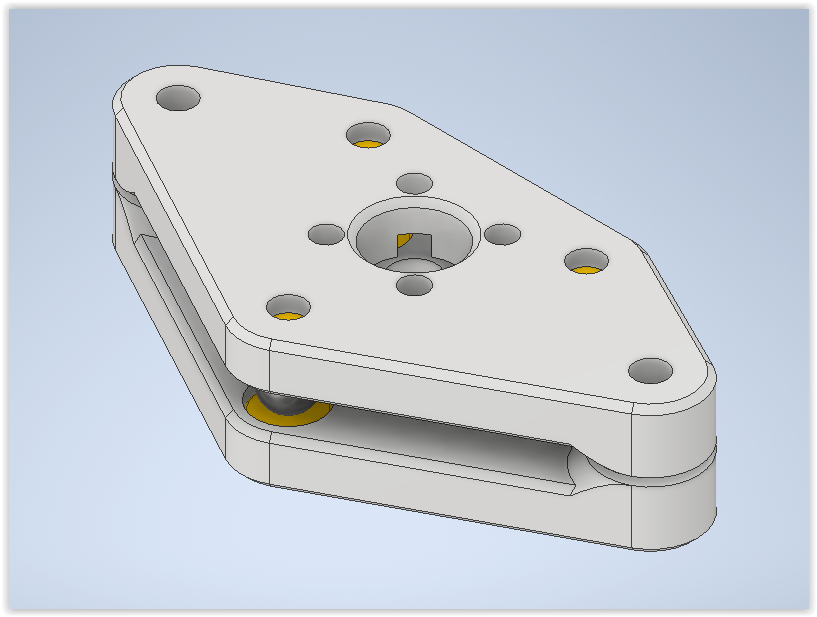
Wobble Wings - Artillery Sidewinder X1
prusaprinters
<p>For a long time I was looking for a solution to the layer lines that were present in all my prints ever since I bought the printer. <br>As it turns out our cheap printers with their trapezoidal lead screws are horrible in this regard.<br>I bought the printer new. It was a v4, so it already came with the blue plastic washer/slider combo that was supposed to help with this issue.<br>Regardless I still had visible layer lines exactly matching the lead screw pitch.</p><p>I have to give credits to MirageC / Hevort for the original idea / design of the wobble wings. A truly elegant and clever solution.<br>In his video ( <a href="https://youtu.be/mqSQhwqSzvg">https://youtu.be/mqSQhwqSzvg</a> ) he discusses the issue, its causes and even gives a possible solution to the problem.<br>Thank you MirageC for all the info!</p><p>The moment I finished watching that video I was convinced this is THE solution to my X1 layer lines problem.</p><p>However, I had to adapt MirageC's design to the Sidewinder X1. <br>I have drawn this model from scratch however, I have relied heavily on MirageC's .stl model and kept most of the dimensions including the size and shape of the magnets, steel balls etc.<br>I didn't want to reinvent the wheel so to speak. Since those magnets worked for him I have just stuck with those. ;)<br>Initially the wings were narrower in my design partly to accommodate for the "L" shaped aluminium plate that the POM wheels are sitting on, but I had to make them wider to counter the twisting motion that resulted in height misalignment between the two Z screws.</p><p>Since I have this mod installed my layer line issues have reduced by 99%. I still have some if I watch really carefully. But it is day and night compared to how it was prior to this mod.</p><p>I have printed the parts in PETG. But ABS or PC would have been an even better option. This is especially true for those who plan to have a heated chamber at some point.</p><p>Slicer settings I have used:<br>0.2mm layer height<br>30% infill minimum<br>3 walls minimum</p><p>Magnets used: Ø8x3mm<br>Steel balls used: Ø6.35mm (size can vary a bit, anything between 6.0 - 6.5mm will work, but all balls used must be identical in size)</p><p>Insert the magnets in such a way that the upper and lower wings attract one another.<br>The magnets on the wing tips are especially important as they keep the two wing halves from twisting. Make sure those magnets attract each other! They need to pull to keep the two wings (upper and lower) aligned constantly. When done correctly the assembled wings will have a ~1mm gap between the wingtips. They should not touch.</p><p>If you like the design please show it by clicking the like ♥ button. Thank you!</p><p>Happy 3D printing!</p>
With this file you will be able to print Wobble Wings - Artillery Sidewinder X1 with your 3D printer. Click on the button and save the file on your computer to work, edit or customize your design. You can also find more 3D designs for printers on Wobble Wings - Artillery Sidewinder X1.
