Wiress Charger Puck (QI Charger)
prusaprinters
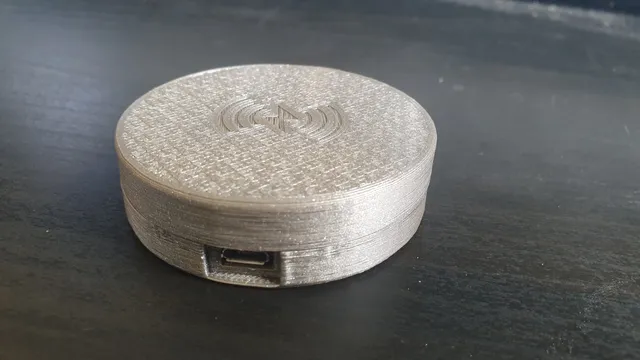
This is an enclosure for a QI charger PCB/coil I brought off of eBay. It is designed to hold the PCB and coil by melting the plastic parts over. It could also be glues into position. There is also a platter that can be printed to expand the support for the phone. It slides over the top of the unit and sits flush with the charging side. I brought the charger off of eBay however I found what seems to be the same charger on AliExpress: https://bit.ly/2LWqlhX I haven't included gcode yet as I am not currently using a Prusa printer so it would be useless ;) I have one on order but I have included a 3mf file so you can either slice using the settings I used or tweak to your hearts content :D Print instructionsPrint the two halves (plus the platter if you wish). I'd suggest adding a modifier block for the walls on the lower half and increase the perimeters (normal and outer) to 0.5mm - this will save having gap fill. The 3mf file has this ready to go, but check to make sure! Follow the images on how to secure the PCB and coil into the housing. The images are for a previous version, the coil side no longer has a central 'nub' as it isn't needed. Make sure the cables from the coil sit in the cutout. To melt the plastic, I set my soldering iron to 200C and used it to gently melt the plastic over. Alternatively glue could be used, I'd avoid hot glue as the coil especially gets hot while charging. Glue the two halves together with superglue once the internals are secured. The platter, if using, can be slid over the top half and should sit flush. It shouldn't need glueing as it is a press fit and the top is designed to match the curve on the top so shouldn't fall through.
With this file you will be able to print Wiress Charger Puck (QI Charger) with your 3D printer. Click on the button and save the file on your computer to work, edit or customize your design. You can also find more 3D designs for printers on Wiress Charger Puck (QI Charger).