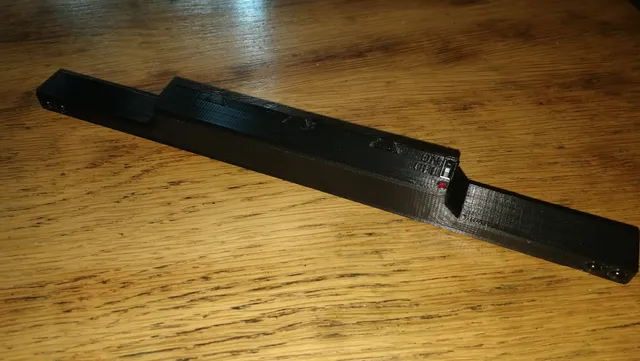
Wireless Wii Sensorbar
prusaprinters
Overview:I needed a replacement for my original Wii Sensorbar because that one uses a proprietary connector and a weird voltage level of 7.5V so that converting it to be used in combination with the Dolphin emulator on PC would be rather complicated.This design is powered by 2 AA batteries (rechargeable ones are preferred) and is therefore really easy to use on the go in combination with a laptop.I would have preferred to use USB power, but IR LEDs use too much current to be easily powered that way. Needed Components:2x AA Batteries (rechargeable ones are recommended)4x 5mm IR LEDs with a wavelength of around 950nm (e.g. OSRAM SFH 4512)4x Resistors for IR LEDs (e.g. 25Ω for OSRAM SFH 4512; check your LED datasheet!)1x 3mm LED as power on indicator1x Resistor for power indicator LED (e.g. 100Ω for a red LED)1x Small switch [4 x 9mm] (e.g. SS12D00G3 switch)1x Battery terminal [+] (e.g. a metal plate or coiled up and soldered wire)1x Battery terminal [-] (e.g. a small metal spring from a pen)A few wiresHeat-shrink tubing2x M3 lowering head screw (max. 15mm) Assembly:IMPORTANT: Make sure all components fit! Space is pretty tight!Solder the resistors to your LEDsSolder the power on indicator LED and a wire to a pin of the switch (leave the pin that's closest to the back free for now; it's easier to connect the battery terminal [+] there)Cover exposed leads with heat-shrink tubing to prevent shortsAttach a wire to the battery terminal [-] (make sure there is good contact, most pen springs can't be soldered to easily)Place components in housing (where should be pretty obvious)IR LEDs go into the big holes in the frontPower indicator LED goes into the small hole at the topSwitch goes into the square cut-out at the topBattery terminal [+] can be glued in place next to the switch (or carefully melted it into the plastic) in the battery compartmentBattery terminal [-] goes into the holder on the opposite side of the battery terminalWires for [+] and [-] can be routed through the channels below the battery compartmentIMPORTANT: If soldering inside the housing, make sure not to touch the plastic!Connect IR LED pins [-] together (best as pairs on each side and both sides with the previously routed wire)Connect power indicator LED pin [-] to the same wireConnect IR LED pins [+] together (just like the [-] poles)IMPORTANT: Make sure resistors are at the right place!Connect IR LED pins [+] to the wire attached to the middle pin of the switchConnect battery terminal [+] to the switchConnect battery terminal [-] to the wire that is connected to the LED pins [-]Secure everything that is still loose with some glueScrew on the back covers (file names “left” and “right” refer to the front of the housing; heat the screws carefully e.g. with a soldering iron if there is too much resistance)Place 2 AA batteries inside and slide on the battery coverHave fun with your new battery powered Wii Sensorbar :) Remarks:Don't forget to use heat-shrink tubing! If that is not possible, make sure that the exposed wires and pins can't touch! (seriously: this can make the batteries explode!)Test your components beforehand (assembly is pretty tight and removing a defective IR LED afterwards can be annoying)If you want to use other battery types (e.g. Li-Ion) then make sure you select the correct resistor values! Everything I have listed before is meant for 2 AA batteries (ca. 1.5V each → ca. 3V together)This design does NOT include over-discharge protection or any other form of protection! Always turn it off after use and keep an eye on the battery charge.One battery charge should yield 6-12h of usage (depending on resistors and IR LEDs)If you want to use your Wiimotes with the Dolphin emulator on PC, you still need to connect them via Bluetooth, the Sensorbar is only an IR emitter and does not connect to your device at all.I have included the SolidWorks 2020 files if someone wants to edit something (As a warning: I haven't labelled anything in SolidWorks, so it looks pretty chaotic) Print Settings:Used Printer: Ender 3 V2Material: No-name PLASupports: Battery Cover: Yes, Everything else: NoInfill: 10 - 20% (Doesn't matter that much: walls are solid anyway)Layer Height: 0.12mm
With this file you will be able to print Wireless Wii Sensorbar with your 3D printer. Click on the button and save the file on your computer to work, edit or customize your design. You can also find more 3D designs for printers on Wireless Wii Sensorbar.
