Wireless charging tray to suit a Mercedes phone preparation clip
prusaprinters
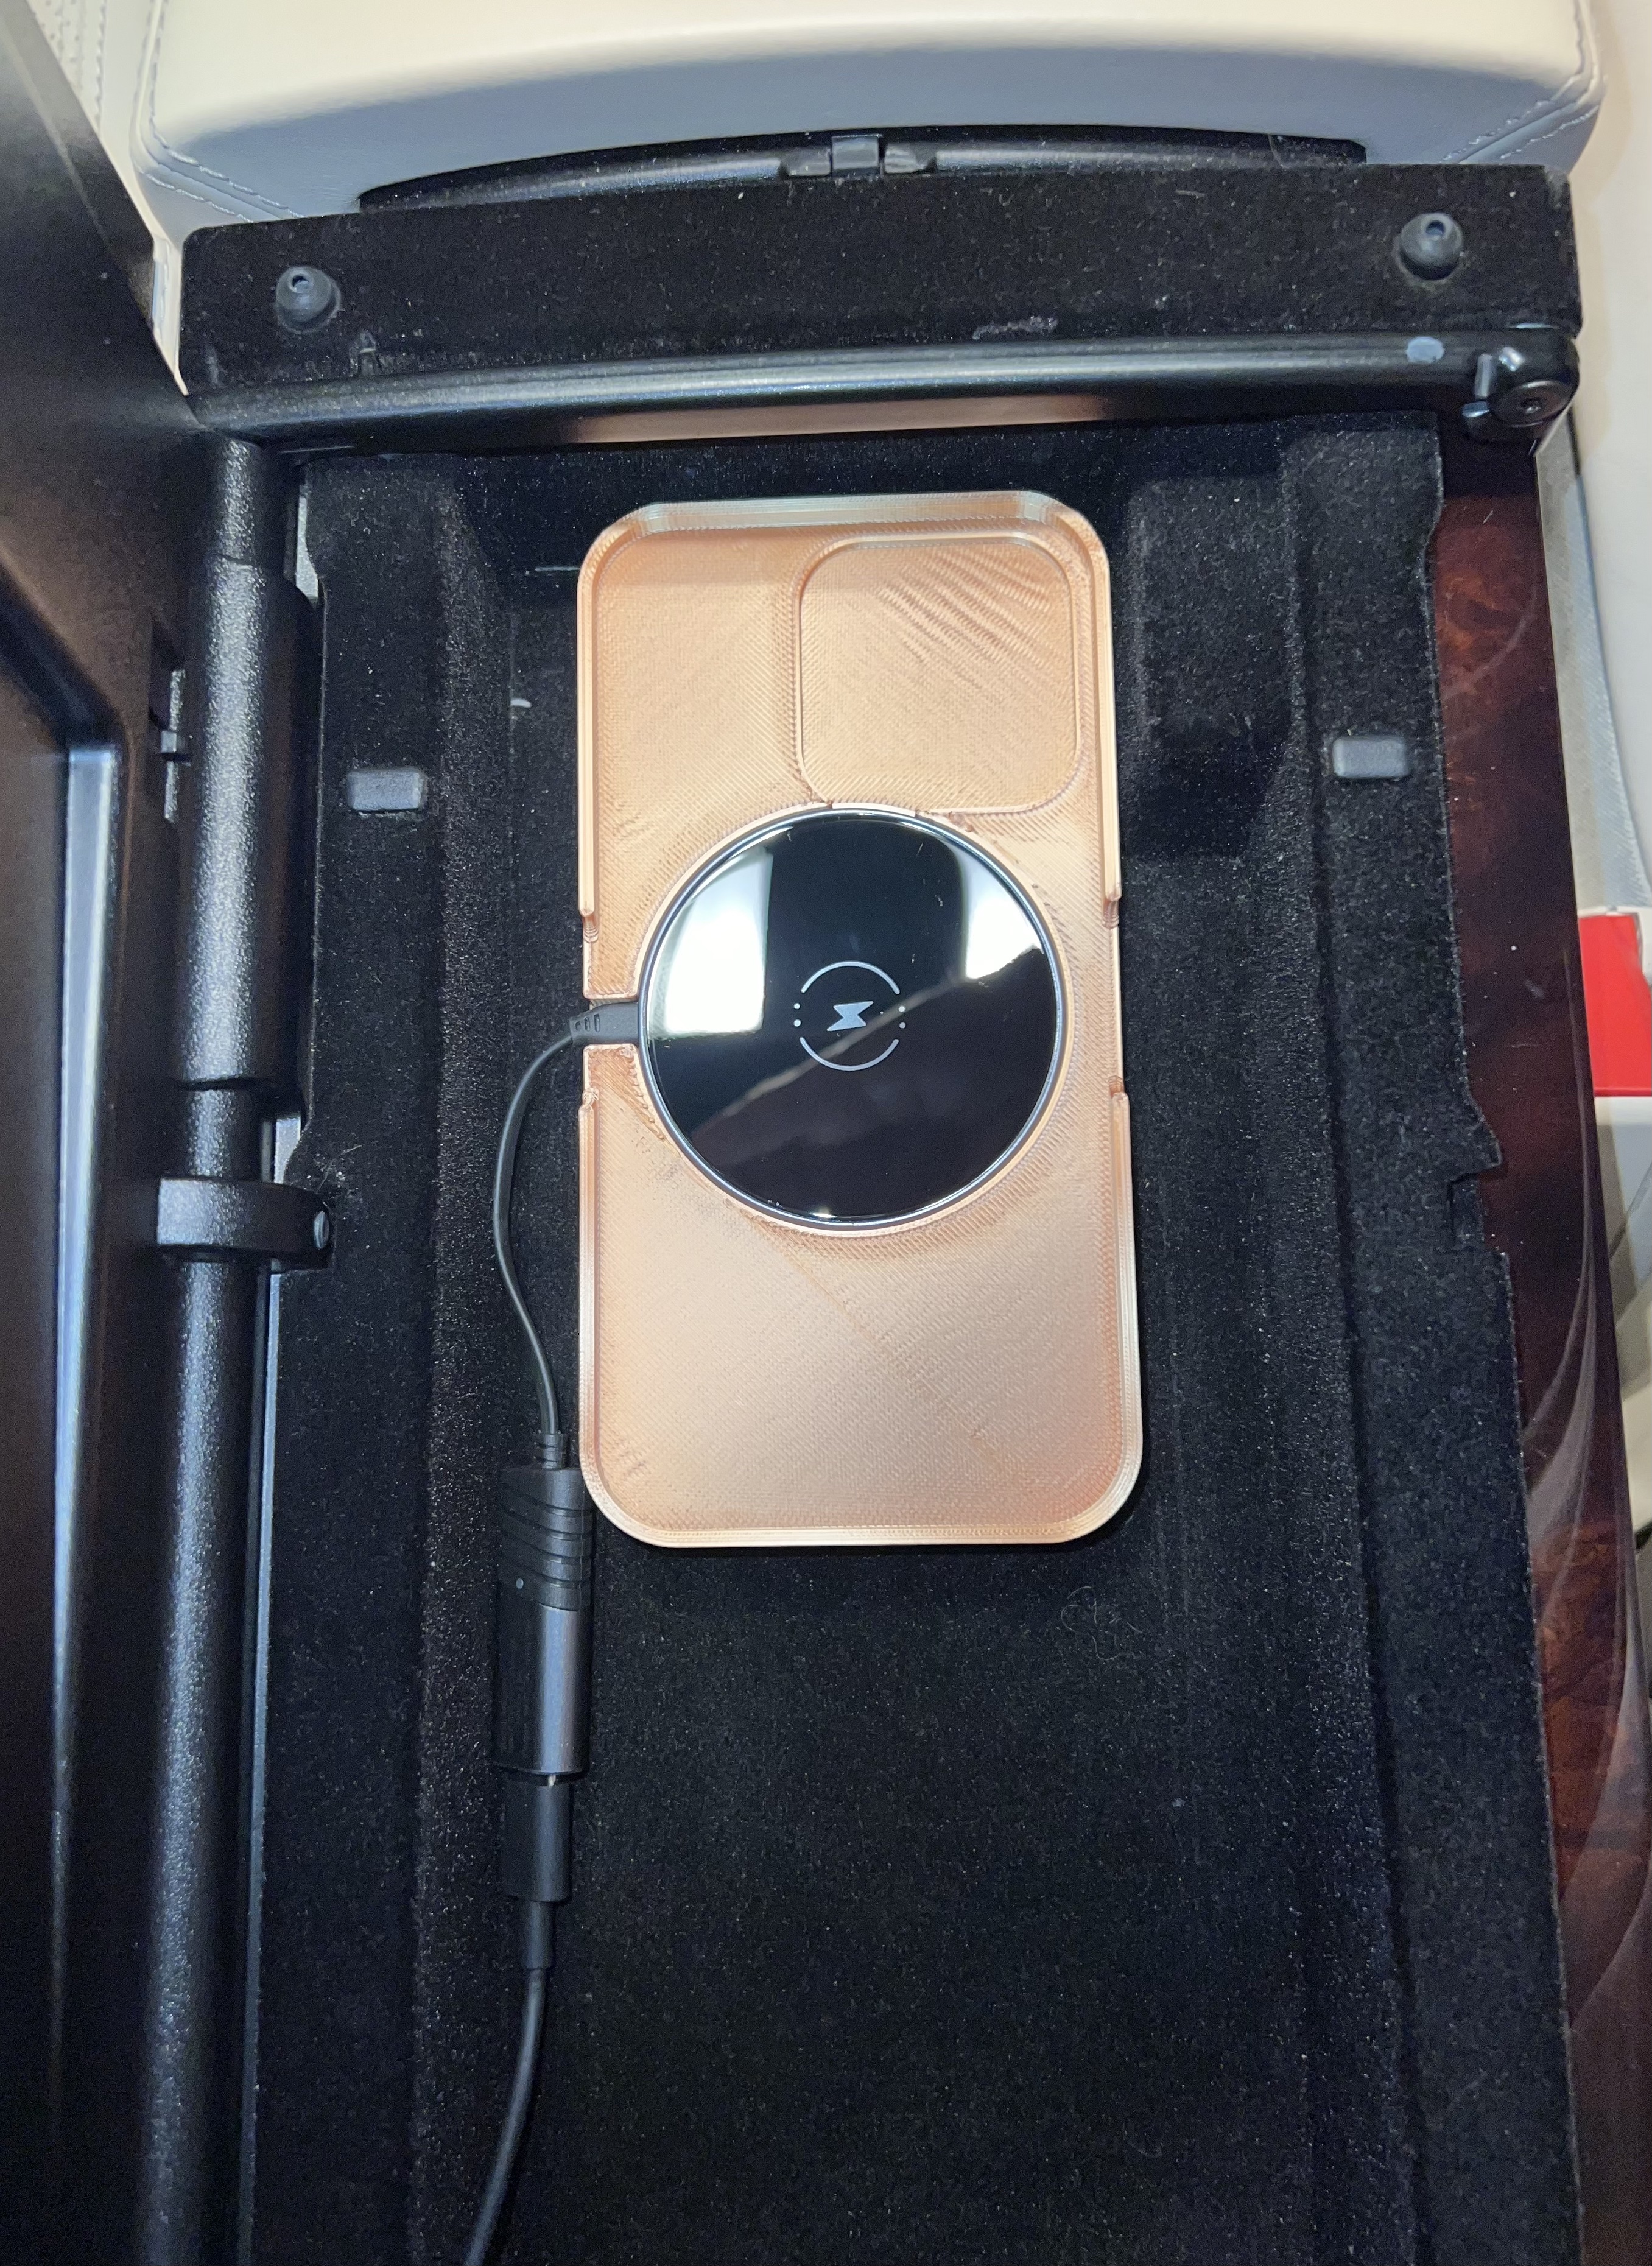
<p>This is a tray to hold an iPhone 13 Pro, with a wireless charging puck hot-glued into the recess.</p><p>The tray is intended to clip to the phone connector inside the armrest of a Mercedes W221 S-Class (and probably other models). Two STL files are included, both suitable for an iPhone 13 Pro in an aftermarket silicone case: one file has the charging puck cable exiting out of the bottom edge of the tray, and the other has it exiting out of the left side, as per the photos of the printed tray. The OpenSCAD file used to create these STL files is also included, and many of the dimensions can be customised, for instance to suit an iPhone 13 without a case, or a different phone model, or a vehicle with the same phone preparation clip but in a slightly different position in the arm rest.</p><p>The phone dimensions in the code suit a phone inside an aftermarket silicone case:<br>phone_width = 75; <br>phone_height = 150; <br>phone_radius = 12; <br>and the lens recess dimensions<br>lens_width = 41; <br>lens_height = 42; <br>lens_radius = 10;<br>These dimensions can be adjusted to suit a phone without a case.</p><p>The original charging puck dimensions in the code, i.e.<br>charger_thickness = 5.4;<br>charger_diam = 64.1;<br>are suitable for this 'Roxgear' wireless charger:<br><a href="https://www.amazon.co.uk/gp/product/B09V58YLMJ">https://www.amazon.co.uk/gp/product/B09V58YLMJ</a><br>The position of the charging puck can be adjusted with the charger_x and charger_y parameters. The above puck is just about small enough that it will rest flat against the back of a phone case while centred over the magsafe magnets and charging coil, and without interfering with the lens recess. Using the 'charger_y' parameter I shifted it 0.9mm below centre to ensure that it clears the lens recess, but it still makes a good contact with the magnets and charging coil.<br>charger_x = 0;<br>charger_y = -0.9</p><p>charger_rotation = 270 will put the cable channel out through the left side, <br>charger_rotation = 0 will put the cable channel out through the bottom edge.</p><p>The position of the tray within the armrest can be adjusted with the clip_x and clip_y parameters.<br>The original values in the code, i.e.<br>clip_x = 4;<br>clip_y = -7;<br>will move the tray left of centre by 4mm to accommodate a protrusion in the armrest tray, <br>and 7mm forward so that the top edge is close to the front of the armrest tray.</p><p>Print this clip side down, as per the STL file, and use build plate supports so that the clip recess prints cleanly.</p><p>Use a dab of hot glue to fix the charging puck into the recess. Locate the tray over the phone preparation clip then gently slide it forwards so that the clip engages to hold the tray in place.<br> </p>
With this file you will be able to print Wireless charging tray to suit a Mercedes phone preparation clip with your 3D printer. Click on the button and save the file on your computer to work, edit or customize your design. You can also find more 3D designs for printers on Wireless charging tray to suit a Mercedes phone preparation clip.