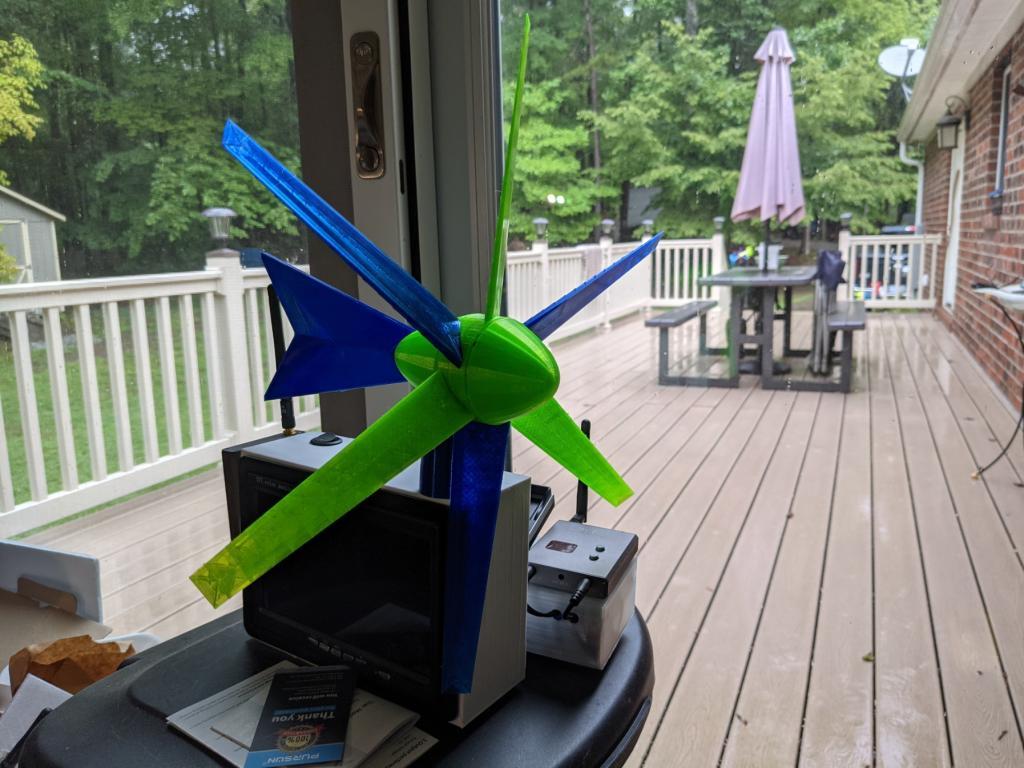
wind spinner v3
prusaprinters
<p>A wind spinner sized for Ender 3 or similar, this is an update to an earlier design & incorporates elements used in the large V5 spinner ( <a href="https://www.prusaprinters.org/prints/96490-wind-spinner-v5">https://www.prusaprinters.org/prints/96490-wind-spinner-v5</a> ).</p><p>The sail blade attachments are much more sturdy than the original six blade windmill design and are held in place through the blade root with 3mm cap head screws (12 - 14mm) and nuts. Those screws also join the two part hub.</p><p>There are two hub categories which enclose either one (SB) or two (DB) 608RS bearings. A two bearing hub can be more stable and allow a closer fit at the expense of a bit more drag. Axle shafts consist of 5/16" bolts for both horizontal & vertical axes. Alignment jigs are available to assist in getting a right angle position established while gluing the axle bolts in place.</p><p>The stake mount uses two bearings (DB) for a more stable upright posture for the assembled spinner.</p><p>The overall design supports either a single or double fan arrangement, with two hub/blade versions (A & B) having opposite blade orientations to permit contra-rotating fans. Spacers maintain clearances between nose, base and hub components.</p><p>There are two versions of the "base" part (the part that sits on the stake mount & holds the tail and forward parts). The "short base" is appropriate for a single fan spinner. The "long base" would be appropriate for a double fan spinner adding more leverage & counterweight to the rear of the assembly.</p><h3>Print Settings</h3><p><strong>Printer Brand:</strong></p><p>Creality</p><p> </p><p><strong>Printer: </strong></p><p>Ender 3</p><p><strong>Rafts:</strong></p><p> </p><p>No</p><p> </p><p><strong>Supports: </strong></p><p>No</p><p><strong>Resolution:</strong></p><p> </p><p>220</p><p> </p><p><strong>Infill: </strong></p><p>15</p><p><br/><strong>Filament:</strong><br/><br/>any PETG <br/> </p><p><strong>Notes: </strong></p><p>Using a concentric pattern for the top layers makes for interesting patterns on the blades and tail when printing with a translucent material.</p><p>I have been printing with PETG & 0.24mm layers. Finer resolution will increase the number of "steps" on the printed tapered sail blades.</p><p>My experiences are that PLA will not stand up to extended outdoor exposure. I saw sun fade, sag and deterioration.</p><p> </p><p>If printed items appear too tight, you may need to tune your flow rate.</p><p>If printing the nose bolt alignment tool, scale up by 5% (i.e. print at 105%) for an easy fit with a 5/16" bolt.</p><h3>Post-Printing</h3><p><strong>Assembly</strong></p><p>The A & B designations are for wing/hub assembly. A blades on type A hub, B blades on a type B hub. Wing roots and hub openings are keyed for one way orientation during assembly. 3mm cap head screws (12 - 14mm long) are used for hub assembly & tail attachment.</p><p>You may want to clear the printed screw holes with a tool or drill to ease assembly. Nuts & bearings may need to be pressed into place with a clamp or pliers during hub assembly. The tail can be secured to the base with a 3mm screw or CA glue.</p><p>5/16" bolts are used as axle shafts. You can tighten fitment of the bolt in the bearing by shimming the bolt shaft with a bit of aluminum tape. CA glue was used to attach bolt heads to the nose & base pieces. The bolt alignment tools can help with getting the right orientation. The opening in the tool may need to be cleaned up with a drill for easy movement of the tool on the bolt. A spacers with a hex shape can be glued over the bolt head for more security to the glued fit.</p><p>The axle bolt glued to the nose will get screwed into the base used. Pre-threading the base with a loose bolt can ease final assembly. I used a1 1/2" bolt for the vertical axis into the double bearing stake mount, a 2" bolt as the horizontal axle for a single fan build and a 2 1/2" bolt for a double fan build.</p><p>The stake mount is sized to fit on a 3/8" all-thread rod.</p><h3>How I Designed This</h3><p>This was done in Tinkercad.</p><p>Components can be found here:</p><p><a href="https://www.tinkercad.com/things/c5Bw11BEyo5">https://www.tinkercad.com/things/c5Bw11BEyo5</a></p><p> </p><p> </p><p> </p><p>Category: Outdoor & Garden</p>
With this file you will be able to print wind spinner v3 with your 3D printer. Click on the button and save the file on your computer to work, edit or customize your design. You can also find more 3D designs for printers on wind spinner v3.
