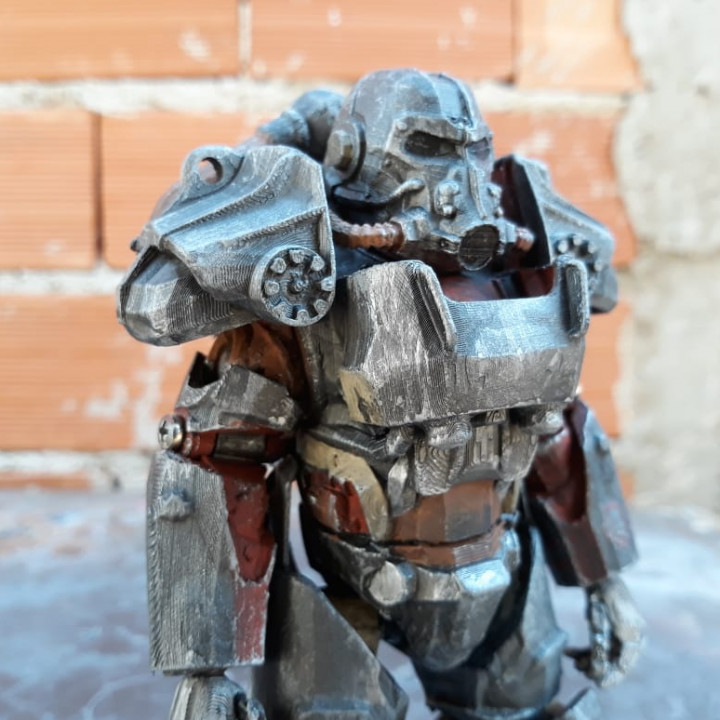
West Tek T-60 Power Armor ( Fallout 4 )
myminifactory
First off, I want to express my gratitude to some individuals who helped make this project a reality: arboriginal for providing that much-needed push to finally tackle this long-awaited endeavor by sharing his 200% FO Joe; rbuckbailey for creating the figure that served as inspiration and sparked many of the joints; and amshuma94 for crafting a figure that offered valuable insight into converting Bethesda's model into an articulated figure. Without their contributions, this project wouldn't have been possible. All the parts should already be oriented for optimal printing. To achieve maximum strength with minimal filament usage (I used approximately 250g for the entire figure), print with 5+ walls and low infill (around 15%). The arm and leg parts require reversal and printing twice, which is relatively easy to accomplish on a slicer; however, I can upload pre-turned part files if anyone encounters difficulty. Assembling this figure is straightforward, but there are some points to consider. The arm rings fit into the holes where the shoulders will be situated, serving as bushings that can be glued in place. For a tighter fit, apply a small amount of superglue to the inside of the ring. The leg pins should work effectively without requiring glue, but I recommend using M3 machine screws instead of the provided arm pins. Before printing, choose whether you want to include the jetpack; the back part should be glued onto the torso, and the jetpack attaches to it. This figure was designed to be exactly 200% the size of Fallout Joe, ensuring that all the awesome weapons and hands will fit perfectly – just print them at double the size. Several individuals have asked me to share my painting process, so I'll provide a brief overview. Since I didn't plan on documenting this project, I don't have step-by-step photos, but here's how I achieved my BOS Paladin version: I started with a full coat of spray can metallic graphite paint. The red, tan, and brown details were hand-brushed, while the silver and black details were applied using a combination of spray can paint and a brush – simply release the paint inside the can's cap and use a brush to achieve the desired effect. For a distressed metal look, I employed a technique involving the coarse side of a kitchen sponge, spraying it silver and then quickly brushing it onto the area where I wanted the effect. To create rust spots on the minigun, I used the same method. For giving the grime look on low-lying areas and sealing everything up, I mixed a small amount of black paint with water in a cup, dipped all the parts into the mixture for a few seconds, and then allowed them to dry. Finally, to achieve the heat glow effect on the barrels of the minigun, I spray-painted it while rotating the barrel on an electric drill. This process requires patience – rushing through any of the steps can result in subpar results. Have fun building your own version!
With this file you will be able to print West Tek T-60 Power Armor ( Fallout 4 ) with your 3D printer. Click on the button and save the file on your computer to work, edit or customize your design. You can also find more 3D designs for printers on West Tek T-60 Power Armor ( Fallout 4 ).
