Wemos D1 mini ( DIN rail ) mount
thingiverse
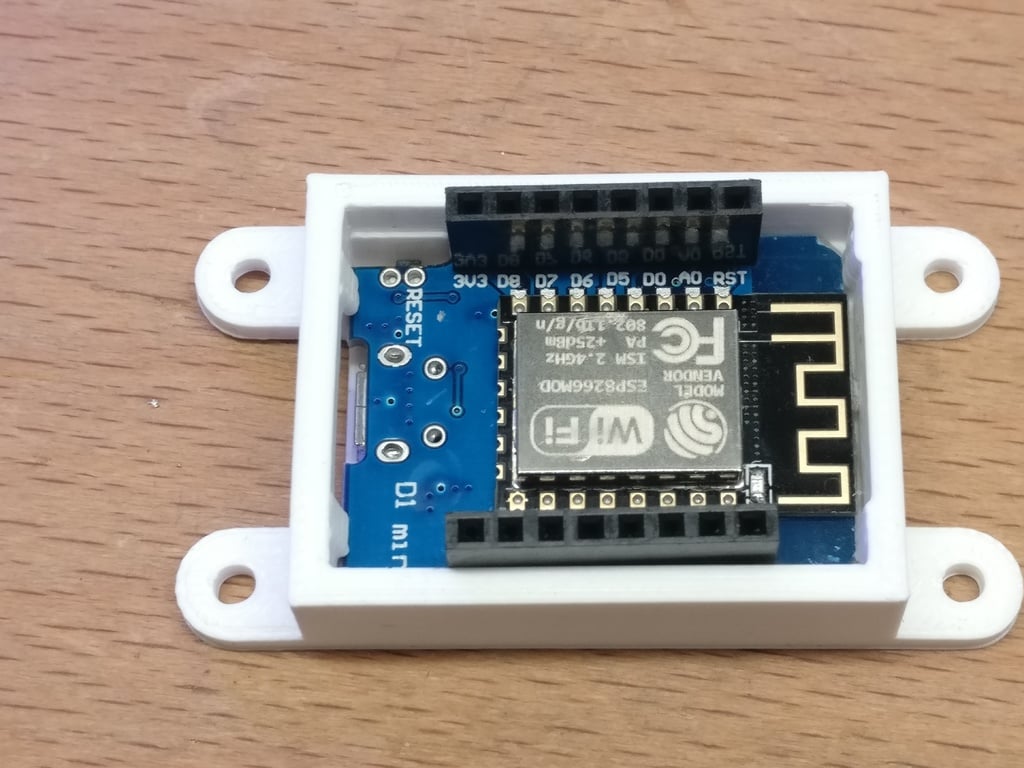
This mount is designed for the Wemos D1 mini, which clicks snugly into place. A small button allows users to press the reset switch with ease, despite a tight fit. To assemble the mount, start by inserting the button, noting that its three flanged sides make it easier to install. Next, insert the Wemos D1 mini at an angle under the nodges on either side of the micro USB opening. Once in position, push down on the antenna side until it clicks into place securely. To release the Wemos D1 mini from the mount, use a 2mm hex screwdriver (or similar object) to insert it into the hole in the back. The pressure point is located on a section of the PCB with no electrical traces. The micro USB connector remains accessible when mounted. For users who want to mount the Wemos D1 Mini DR on a DIN rail, print the Wemos-D1-Mini-DR-mount.stl and Wemos-D1-Mini-DR-mount-button.stl files. To add DIN rail brackets, print Wemos-D1-Mini-DR-mount-49mm-bracket.stl twice. M3x8 screws are required for assembly (M3x5 to M3x10 screws will also work).
With this file you will be able to print Wemos D1 mini ( DIN rail ) mount with your 3D printer. Click on the button and save the file on your computer to work, edit or customize your design. You can also find more 3D designs for printers on Wemos D1 mini ( DIN rail ) mount.