WDhex - housetiles - wood wall - door
myminifactory
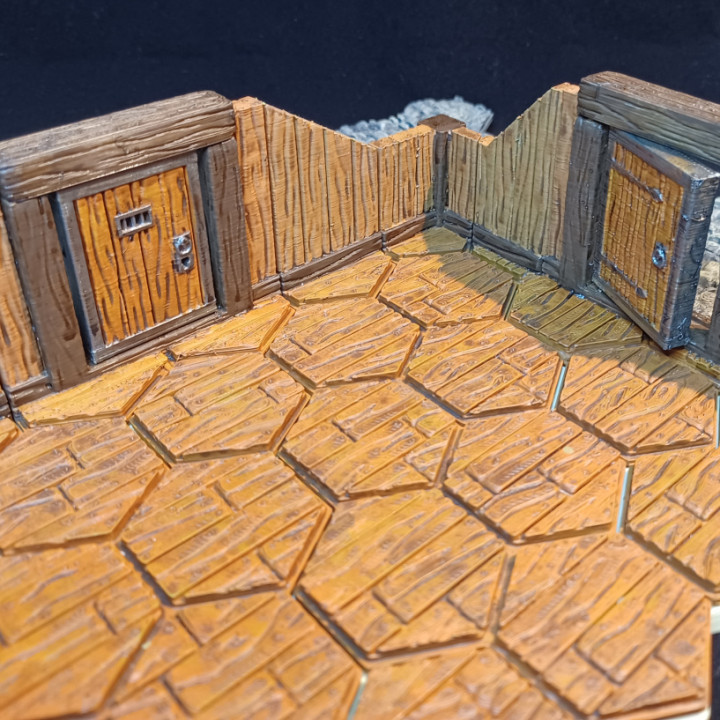
All that was needed to finish my basic housetile set were doors. I was perhaps a bit too demanding about them being functional and all, so it took longer than I liked, but here you go! These doors conclude the making of the basics for the house-tile set. Don't worry, I am not done with the housetiles, there are plenty of variety and add-ons to make but I am glad to have all the stuff I need to create any house-set-up I like on my table. The door-tile does require a little construction;Print a door and doorframe-beam for each tile. Please note the door has hinges on one side, and opens only to one side on the tile. If the tile is an outer wall, de door will open inwards, so to the wood-floor side of the tile.I find it easiest to paint everything before construction. Construction:Put the door with the hole over the pin in the door-opening. Glue the doorframe-beam to the top of the opening-frame. Do not glue the beam to the door, or the door to the doorframe, as it will not be able to open if you do. These wood floors come in 2 patterns, with the beam-ends connecting either straight (floor-S) or diagonal (floor-D) to a hexagon-side. This way the wood floor can be laid out in any direction you want. Our hex-tiles go together with the baseplates and the other housetiles we made:baseplateswood floor tileswood outer wallscobblestone streetWe made more WDhextiles, just check my profile for those! Our tiles are made for about 32mm scale, but we made them a bit larger (gloomhaven size-ish) because the baseplates of our 28-32mm sized medium creature mini's did not fit between the walls in a small alley.
With this file you will be able to print WDhex - housetiles - wood wall - door with your 3D printer. Click on the button and save the file on your computer to work, edit or customize your design. You can also find more 3D designs for printers on WDhex - housetiles - wood wall - door.