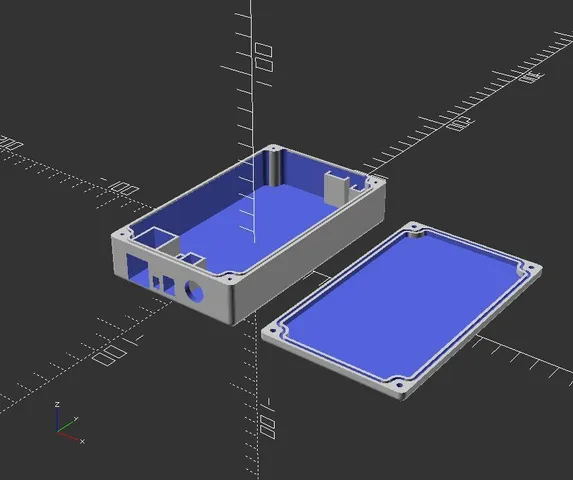
Waterproof forumslader housing
prusaprinters
Update 25. Jun. 2021: fixed bug with only the sides rounded; this is also default now for better printing Description: This is a waterproof housing for the forumslader, a device to charge your USB device with the hub dynamo of your bike in a very efficient way. The example is fitted for the 2.9Ah version with three LiMn 18650 batteries. It is fully parameterized, so you can adapt it to other versions. I added a dovetail joint for future bike mounts. It is based on this housing: https://www.thingiverse.com/thing:3147316 and optimized for the battery compartment from enif: https://www.thingiverse.com/thing:456900 There are holes with compartments for: The usb plug a mini tamyia plug (male). To save space it has to be shortened by a cutter. a bec plug (male). To save space it has to be shortened by a cutter. the pressure compensating element see also here and here the button the LED To be waterproof, there must be a gasket in form of a rubber ring, which can be found in office supply stores. The rubber ring should have a 1.5mm thickness and 240mm total length approximately. You need 4 water resistant screws 3.0mm x 16mm. The compartments for the plugs, the LED and the button have to filled with hot glue. There are four openscad files: housing.scad is the module which contains the logic housing_forumslader.scad is the file with the parameters flexbatter18650x3.scad is the battery compartment (from enif) dovetail.scad is the module for the dovetail mount. Included are also the ready to print .stl files for the bottom part, the top part and the battery compartment. Printing information: Open the housing_forumslader.scad in openscad.Important: The preview doesn't show everything correct due to the complex structure. Press F6 in openscad to render it. The variable names should be rather self-explanatory. The inner size does not include the screw sockets, so the available volume is a bit smaller. The dimensions of the rubber gasket are printed in the console output of openscad. The tolerances and gaps should be fine for a calibrated printer. You can switch on and off the bottom/top part and choose the arrangement of both: side: next to each other, fit: closed, demo: above each other, overlap: both in origin. Switch on both parts and choose 'side' for printing both at a time or switch on only the respective part you want to print and choose 'overlap' to have it centered. Slicer settings: The big surface might make the bed adhesion at the corners problematic. I was using ASA as material (ASA is UV-proof and sturdier than PLA) and Cura as slicer and these settings (beside my standard profile): wall line count: 8 top/bottom thickness: 0.8 bottom thickness: 0.8 infill density: 100% generate support: yes support overhang angle: 70 build plate adhesion type: brim support join distance: 10 support overhang angle: 55 z Seam alignment: random initial build plate temperature: 100 initial build plate temperature: 70 optimize wall printing order: yes Additional Information: ASA is sturdier than PLA and UV-Proof for outdoor use, but more difficult to print. Don't tighten the screws too much; the groove between top and bottom part should be constant along the sides. No guarantee on the waterproof performance! The area around the groove for the rubber should be perfect. The compartments for the plugs, the LED and the button have to filled with hot glue. Use clothes pegs for fiddling in the rubber ring Disadvantage: Quite a waste of space Advantage: Batteries can be replaced or taken of during flight, waterproof Weight of the housing alone: approx. 90 g Category: DIY
With this file you will be able to print Waterproof forumslader housing with your 3D printer. Click on the button and save the file on your computer to work, edit or customize your design. You can also find more 3D designs for printers on Waterproof forumslader housing.
