Water Nozzle for Garden Pond
thingiverse
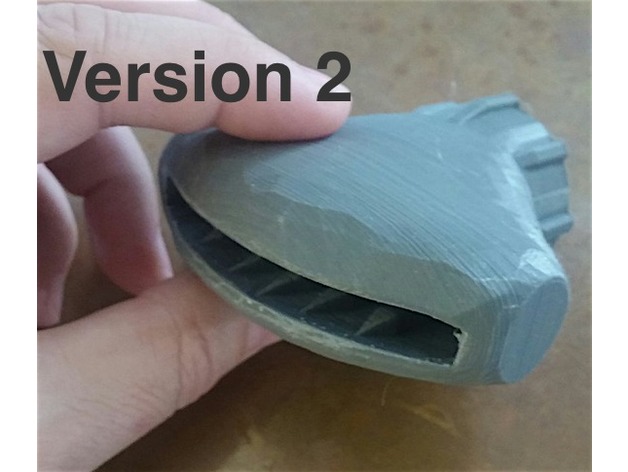
I have a small fish-pond with an upper pond that is fed by a filter made from a large bucket filled with graduated stones and gravel. The outflow is a 1-inch PVC pipe, but it was not long enough to prevent water waste. Additionally, the stubby pipe piece was only about 6cm, so I wanted it to reach further into the upper pond or spillway. 3D printing came to the rescue. This piece is a fan-shape that fits over a 1-inch PVC pipe fitting. I'm using it with a detachable threaded assembly so I can remove it at will and try again, but you could simply attach it to the end of a 1-inch PVC pipe as well. Note - it's the nozzle that is the 3D-printed part. The other pipe pieces in the pics are simple off-the-shelf PVC fittings worth about $5. I'm still testing it at this point. It's intentionally snug, so you'll need to lightly sand the inside after printing for a good fit on the PVC pipe. It took me about 30 seconds to lightly sand and get a snug friction-fit on the PVC pipe. Beware that the print can pop off your print bed mid-print if your adhesion isn't great. Try using a brim for more surface area contact. One Year Update: The first version served me well, but it failed almost exactly one year later. The collar let go from the main body. Version 2 has been designed, printed, and added to this Thingiverse entry. I've reinforced the collar with some ribs and raised the inner combing teeth for a better water flow. Two Year Update: The second print is still fine, but I thought I'd add another variant. The new file has separate holes that make more splashy noise and provide a different visual effect, likely offering even better aeration too. It prints nicely without supports. Print Settings: Printer: MP Select Mini Rafts: Yes Supports: No Resolution: .2mm Infill: 35% Notes: I used a raft mostly because the height is tall, and I wanted good bed-adhesion. Works well, and isn't a very large raft, just a small disk, so not much waste. (Had good adhesion on painters tape + glue-stick, with bed at 30C.) Post-Printing: A Little Sanding I found it was a very good fit from my machine as is, with just a small bit of sanding resulting in a snug, waterproof (at low pressures) fit. You could print it at 1% larger probably for quick-fit with some goopy glue, but may leak if used in a friction-fit. Sanded with some 220-grit paper for about 30 seconds. A word of warning about assembly: If you use a screw-together coupling like I did, remember to think about the assembly order. Even though I proudly announced that I had thought ahead and remembered not to glue the pieces together before putting the coupling ring over the straight piece, I quickly forgot in the excitement of assembly and had to destroy my part and print another. (The fan head won't go through the coupling ring, of course.) PVC glue works okay with the PLA-to-PVC joint. PVC-cement is poor on PLA in peel/tension mode but in shear mode it's pretty good, bonds to the PVC and texture-fills on the PLA, so it holds pretty well (as I found in destructively disassembling the parts). Since it's right at the exit of water, a simple friction fit will often work too - very low water pressure there.
With this file you will be able to print Water Nozzle for Garden Pond with your 3D printer. Click on the button and save the file on your computer to work, edit or customize your design. You can also find more 3D designs for printers on Water Nozzle for Garden Pond.
