WATER ALARM with Telegram notification and control
prusaprinters
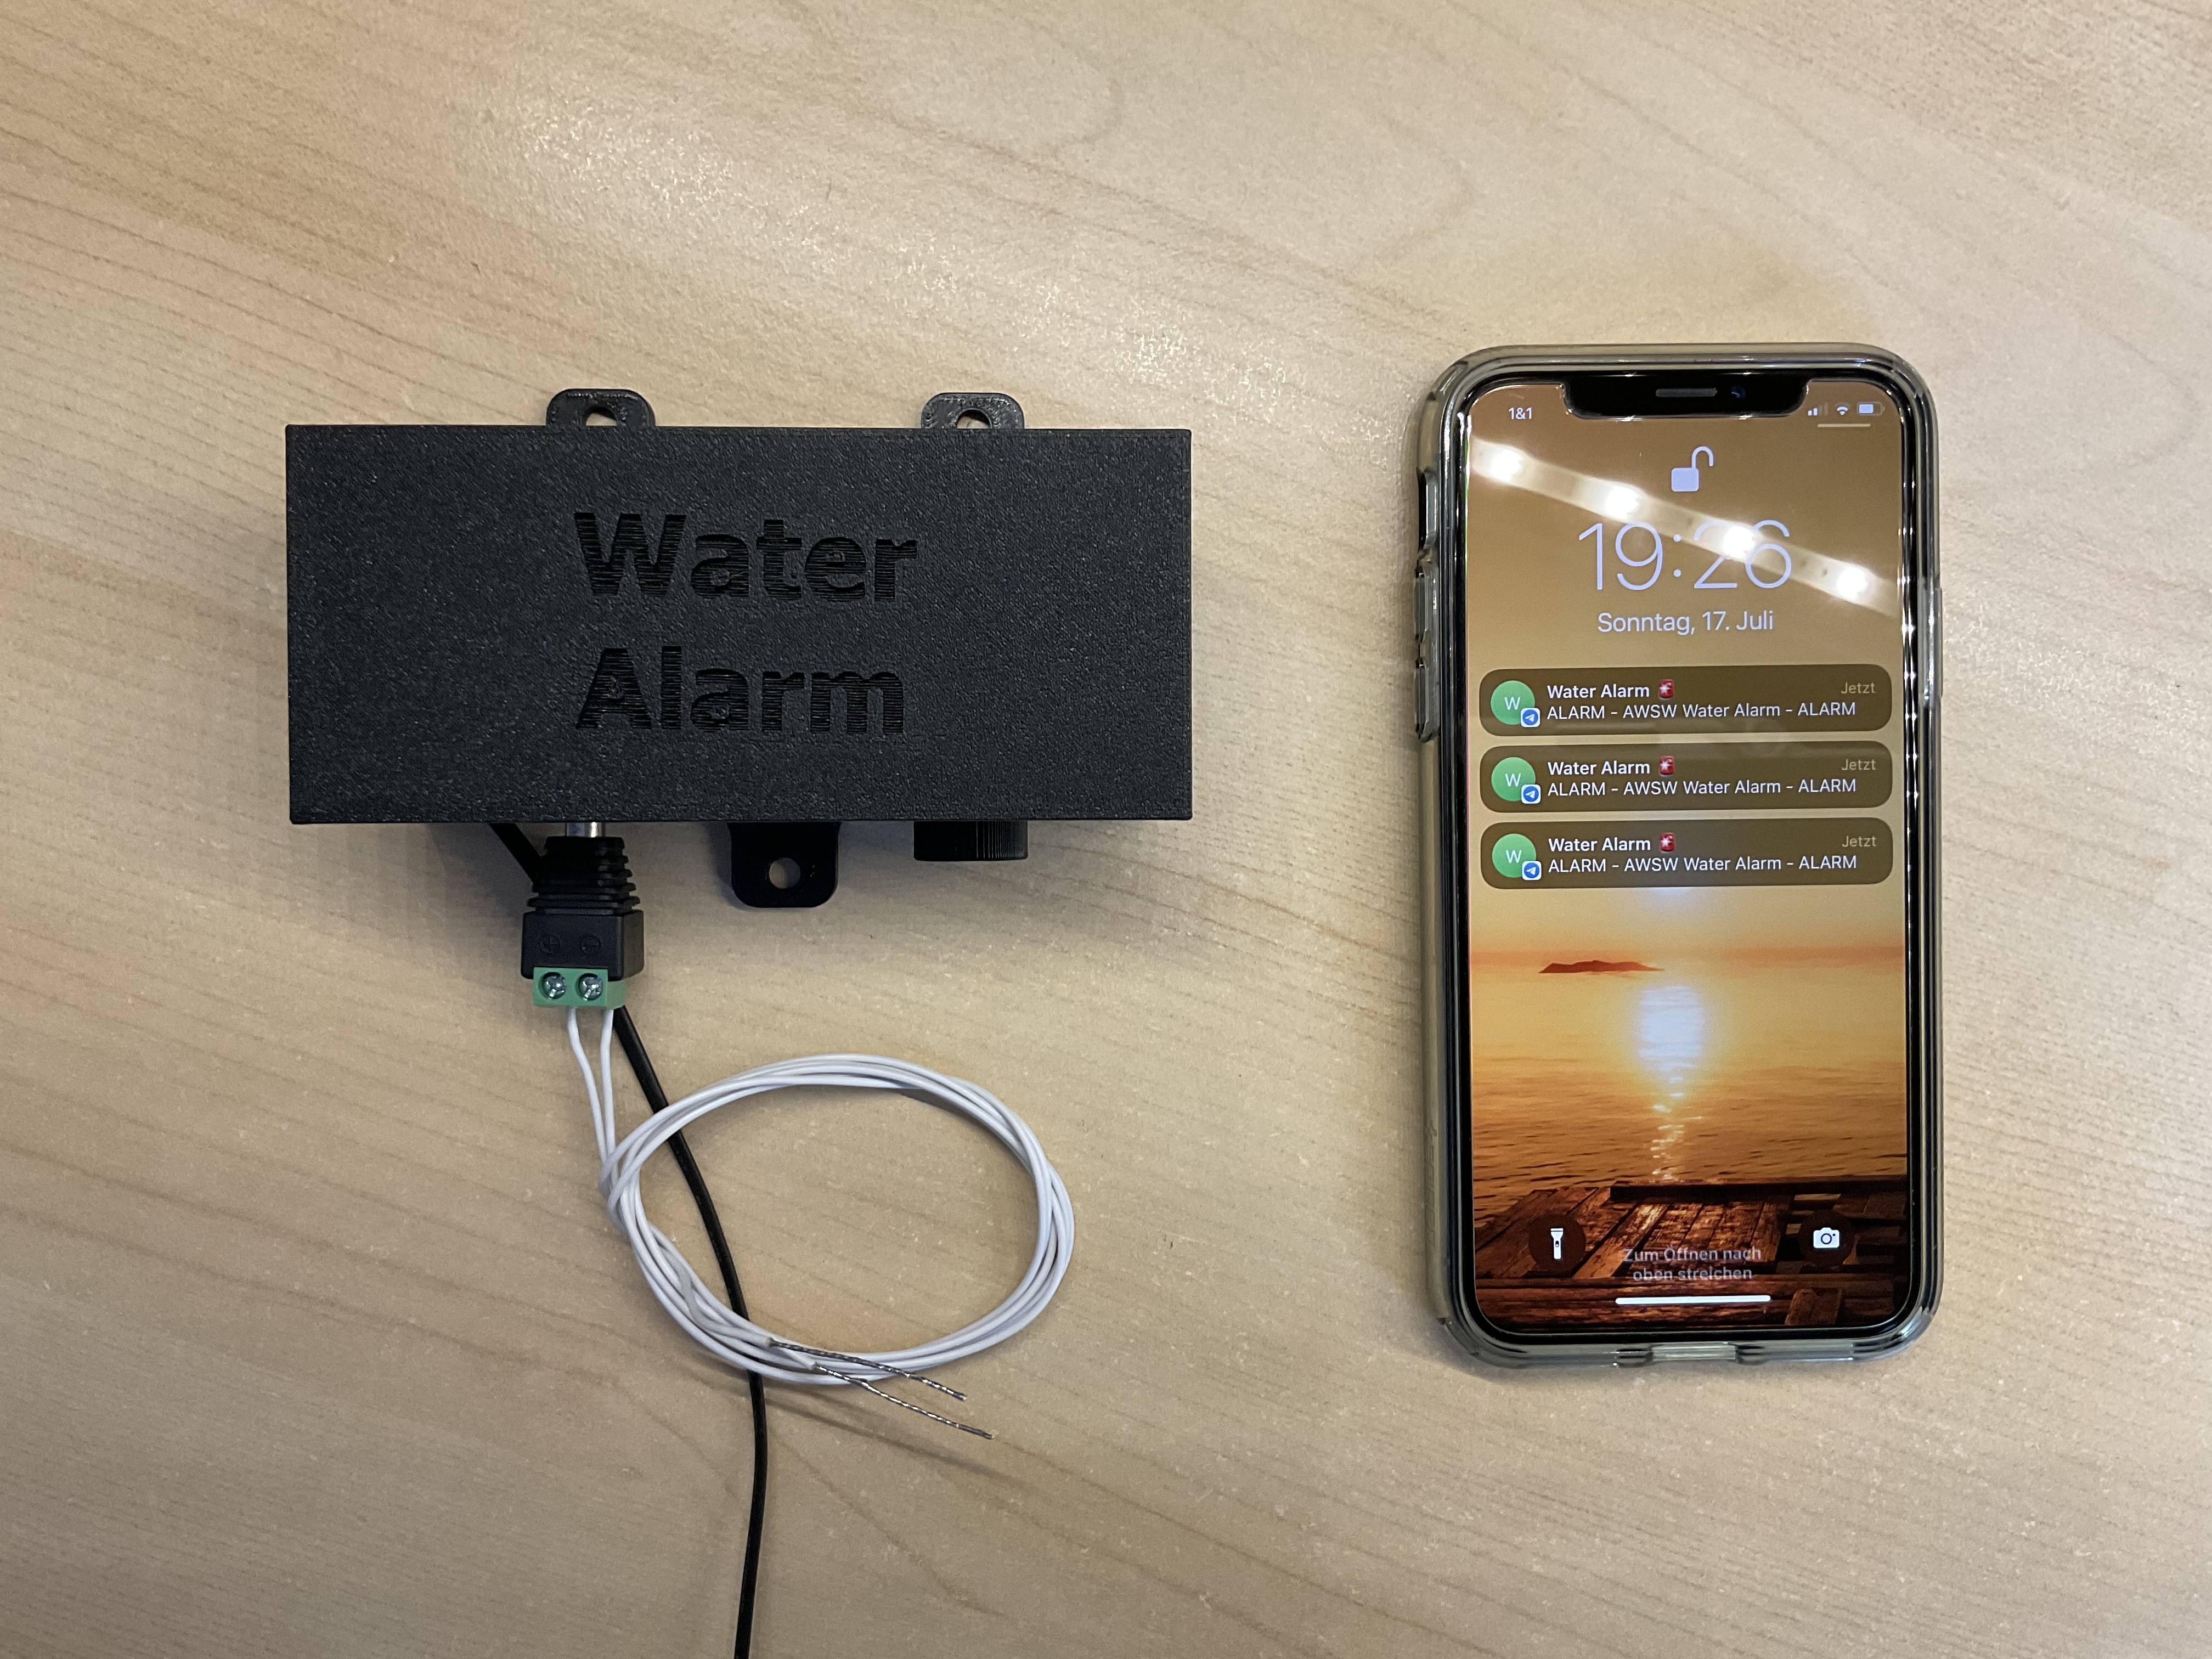
<p>Arduino controlled WATER ALARM with Telegram notification and control for f.e. your dish washer or washing machine. It can detect leaks of water with a contact cable on the floor and notifies you via Telegram and with a local alarm signal generated with a piezo buzzer.</p><p> </p><p>My dishwasher outlet water tube had a small hole last week which could not be detected by the water stop function of the dishwasher because this works for the incoming tube only…</p><p> </p><p>So i made this little water alarm circuit to detect any water leaks and notify me via Telegram and in addition activates an internal piezo buzzer with a very annoying alarm signal, which you should hear:<br> </p><figure class="media"><oembed url="https://youtu.be/JdxWkM-DG-8"></oembed></figure><p> </p><p>Functions:</p><ul><li>Telegram notification and control via any of your Telegram messenger apps</li><li>Via Telegram you can stop the activated alarm even remotely </li><li>Via Telegram you can also run a test alarm to check the functionality</li><li>In the code you will find a hint how to set up a new Telegram bot to chat with you from the circuit </li><li>The circuit will only react to your own Telegram messenger ID so that no other user can activate or deactivate the device for security reasons</li><li>Your local WiFi is used to connect the board to the internet → Telegram service</li><li>When the alarm status is activated via the contact cable that detected water or with the above named test function an internal piezo buzzer will notify you locally as well</li><li>3 mounting holes are integrated in the base to hang the case on a wall or in a cabinet</li><li>Barrel jack connector to use a as long as required contact cable to the floor and to be able to hang the case higher up from the ground</li><li>All holes in the case are placed below the case to avoid water coming into the case</li><li>The case is made for a NODE MCU V3. Earlier versions of the circuit were smaller and might not fit</li><li>I use a switchable multiple plug for my dish washer so that the circuit is powered only when the dish washer is used too</li><li>The 2 open contact ends of the contact cable are taped simply to the floor you want to watch for water leaks with the circuit. The contacts itself should not be hiden under the tape and should be some millimeters away from each other to detect water leaks fast</li><li>The Node MCU V3 board is held in place with the 4 rings on the posts inside the case</li><li>The lid clicks in place and closes the case base part </li></ul><p> </p><p>Required parts:</p><ul><li><a href="https://www.amazon.de/AZDelivery-NodeMCU-ESP8266-ESP-12E-Development/dp/B074Q27ZBQ">1x Node MCU V3 ESP8266</a></li><li><a href="https://www.amazon.de/Dericam-Micro-USB-Ladeger%C3%A4t-DC-Netzteil-Android-Smartphones-Europen-Standardstecker-Schwarz/dp/B07TBKXYKL">1x Micro USB charger 5V/1A</a></li><li><a href="https://www.amazon.de/gp/product/B07ZYVH6XM">1x Piezo buzzer</a> </li><li><a href="https://www.amazon.de/gp/product/B00HGAJM5Q">1x Barrel jack port</a></li><li><a href="https://www.amazon.de/gp/product/B01A9SNXIS">1x Barrel jack connector</a></li><li><a href="https://www.amazon.de/gp/product/B07KFMSW7H">Some 0.25mm² wires or jumper wire cables</a></li><li>A little tape stripe to tape the 2 open contact cable ends to the floor</li></ul><p> </p><p>Printing instructions:</p><ul><li>0.2 speed profile </li><li>Supports set to overall used for the “base” part only</li></ul><p> </p><p>Wiring:</p><ul><li>I used the jumper wires to reduce soldering actions in the first place for testing reasons. Later i will solder all connections properly</li><li>The barrel jack port will need 2 soldering points. See pictures please which of the 3 contacts are used. There is no direction you need to pay attention to for these 2 cables</li><li>For the other contacts please have a look into the table:</li></ul><figure class="table"><table><tbody><tr><td style="background-color:#fa6831;border-style:solid;text-align:center;"><strong>Node MCU V3 pin:</strong></td><td style="background-color:#fa6831;border-style:solid;text-align:center;"><strong>Piezo buzzer pin:</strong></td><td style="background-color:#fa6831;border-style:solid;text-align:center;"><strong>Barrel jack pin:</strong></td><td style="background-color:#fa6831;border-style:solid;text-align:center;"><strong>Color:</strong></td></tr><tr><td style="border-style:solid;text-align:center;">3V</td><td style="border-style:solid;text-align:center;">+ (middle pin)</td><td style="border-style:solid;text-align:center;"> </td><td style="border-style:solid;text-align:center;">red</td></tr><tr><td style="border-style:solid;text-align:center;">G</td><td style="border-style:solid;text-align:center;">-</td><td style="border-style:solid;text-align:center;"> </td><td style="border-style:solid;text-align:center;">blue</td></tr><tr><td style="border-style:solid;text-align:center;">D5</td><td style="border-style:solid;text-align:center;">S</td><td style="border-style:solid;text-align:center;"> </td><td style="border-style:solid;text-align:center;">grey</td></tr><tr><td style="border-style:solid;text-align:center;">D2</td><td style="border-style:solid;text-align:center;"> </td><td style="border-style:solid;text-align:center;">middle pin</td><td style="border-style:solid;text-align:center;">white</td></tr><tr><td style="border-style:solid;text-align:center;">G</td><td style="border-style:solid;text-align:center;"> </td><td style="border-style:solid;text-align:center;">outer pin</td><td style="border-style:solid;text-align:center;">white</td></tr></tbody></table></figure><p> </p><p>Code:</p><ul><li>The code for the Node MCU V3 can be found on my <a href="https://github.com/AWSW-de/WATER-ALARM-with-Telegram-notification-and-control">GitHub repository</a></li><li>You will need 2 extra libraries which are named on top of the .INO</li><li>In the Arduino code please check the settings.h file to set your WiFi settings</li><li>In the settings.h file you will find a short help to setup a new Telegram bot and to find your own Telegram messengers chat ID so that the bot is able to send you messages only</li><li>The setting for your own Telegram messengers chat ID is also needed to block all other users for security reasons</li><li>In the settings.h you will also find a short help how to set up a menu for the bot to be able to access all commands with this menu in Telegram itself</li><li>Currently there a 3 commands available:<ul><li>/start → shows a short help about the commands</li><li>/testalarm → activates the test alarm via Telegram and the piezo buzzer</li><li>/stopalarm → stops the alarm status</li><li>Any other text you send will be replied 1:1 to you with a note that this command is not known. This is used for communication testing and for future usage of this code for an upcoming other project ;)</li></ul></li></ul><p> </p><p>Happy printing :)</p>
With this file you will be able to print WATER ALARM with Telegram notification and control with your 3D printer. Click on the button and save the file on your computer to work, edit or customize your design. You can also find more 3D designs for printers on WATER ALARM with Telegram notification and control.
