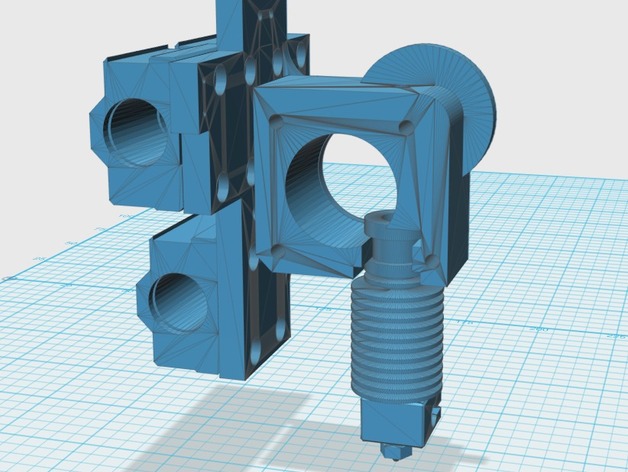
Wanhao i3/Maker Select/Cocoon Create Titan Extuder mounting plate
thingiverse
This is a step-by-step guide on how to convert a Wanhao i3, Maker Select, or Cocoon Create 3D printer to use an E3D V6 hotend and a NEMA 17 pancake motor, specifically a Titan extruder. The Titan extruder is a popular upgrade for these printers because it provides a more reliable and precise extrusion system. Here are the steps: 1\. Print off and install the 3rd rail tower brace mod made by user delukart. This will provide additional support to the printer's frame. 2\. Print off the Titan plate using strong plastic such as ABS or PETG with an infill of at least 50%. This is the main component that will hold the E3D V6 hotend and NEMA 17 pancake motor in place. 3\. Remove everything from the X axis, including the thermistor, fans, extruder, and smooth rods. You'll need to unplug all the wires and remove any screws holding these components in place. 4\. Remove the old hotend mounting plate. This will involve removing any screws or clips holding it in place. 5\. Remove the bearing blocks from the X axis. You'll need to remove the smooth rods, which you can set aside for later use. 6\. Using 12mm/16mm long button head hex screws, screw the Titan plate onto the bearing blocks. Make sure they're securely attached. 7\. Attach the NEMA 17 pancake motor and E3D V6 hotend to the Titan plate. The motor should be on the right side. 8\. Attach a female header to the stock hotend wire and a male connector to the E3D V6 hotend wire. This will make it easier to connect the wires later on. 9\. Make the wire lengths shorter for the thermistor, as you'll need to plug it into the stock thermistor plug later on. 10\. If you didn't do step 8 or want to skip this step, fish the E3D V6 hotend wire through the drag chains. You can use the stock plugin for the NEMA 17 extruder motor if you're using a NEMA 17 pancake motor. 11\. Attach the X axis smooth rods back into the bearings and attach them onto the X axis. Make sure they're not upside down! 12\. Attach the drag chain to the mounting plate with the stock M3 flat head screw. 13\. Plug everything in, including the thermistor, hotend wire, heatbreak fan, and NEMA 17 pancake motor. 14\. Multiply your current e-steps per mm value by 3.58 to get the new e-steps per mm value. This is a necessary step to ensure proper extrusion. 15\. Level the bed to ensure the printer is properly calibrated. 16\. (Optional) Print off a calibration test or two to make sure everything is working correctly. 17\. Congratulations! You've successfully converted your Wanhao i3, Maker Select, or Cocoon Create to use an E3D V6 hotend and a NEMA 17 pancake motor. Give yourself a big pat on the back! This guide assumes you have some basic knowledge of 3D printing and electronics. If you're new to these topics, it's recommended that you seek guidance from more experienced users or online forums.
With this file you will be able to print Wanhao i3/Maker Select/Cocoon Create Titan Extuder mounting plate with your 3D printer. Click on the button and save the file on your computer to work, edit or customize your design. You can also find more 3D designs for printers on Wanhao i3/Maker Select/Cocoon Create Titan Extuder mounting plate.
