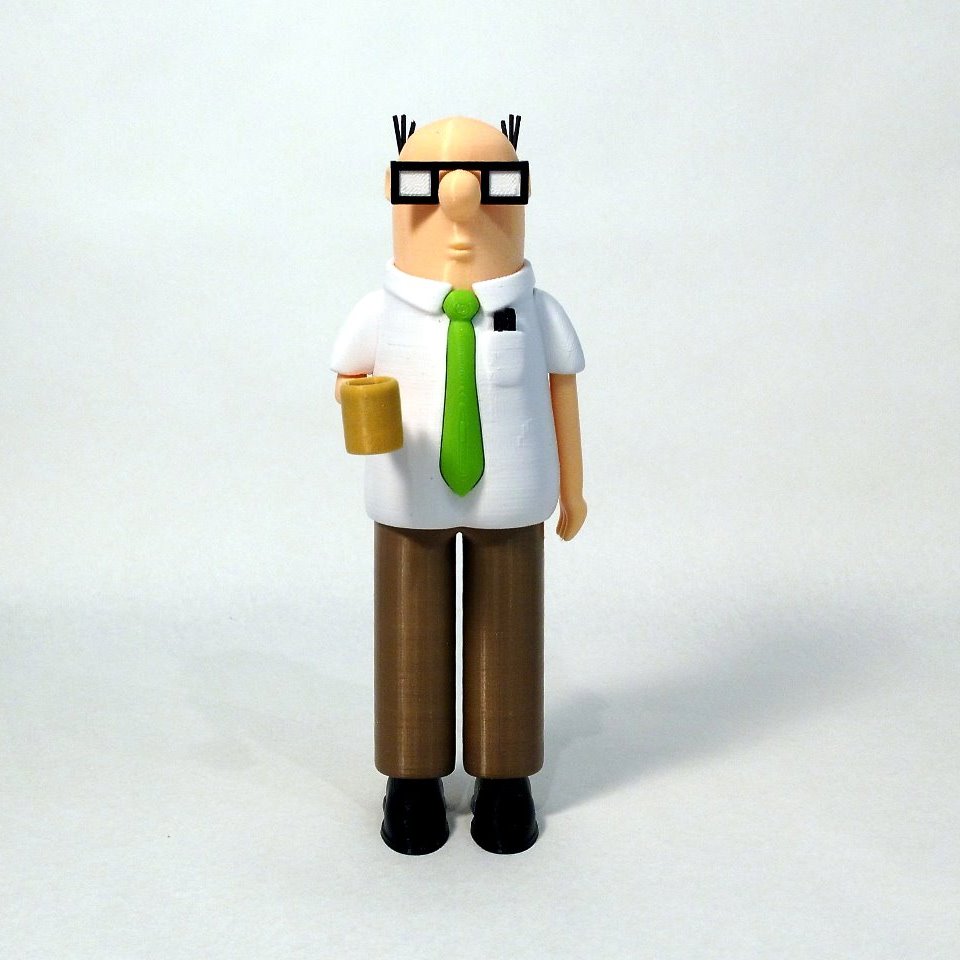
Wally
myminifactory
Wally, from the comic strip 'Dilbert' by Scott Adams, is a master of avoiding work in ways that will amaze everyone. In fact, evading work has become his specialty, something he can proudly claim as a job well done. No special tools are required; just the right filament colors and you're good to go - no painting needed at all. The finished model stands 200mm tall after assembly, matching perfectly with the Dilbert and Pointy Haired Boss models previously posted. This is going to be fun! Enjoy! Print Settings Printer: FlashForge Creator Rafts: Not necessary Supports: None required Resolution: .2mm Infill: 10% Building the model Colors (no multiple printed pieces) Beige/Skin: head, arm_right, arm_left Black: shoe_right, shoe_left, glasses, glasses_arms, pens, hair_right, hair_left White: shirt, sleeve_left, sleeve_right, eyes, socks Brown: pants, coffee Green: tie Gold: cup Any color (hidden part): body_bump Printing and assembly tips Printing Tips: 1. No supports or rafts are needed for the pieces; however, a raft or brim may be necessary for arm_right due to its small base and part angle. 2. All parts were printed and fitted using a .4mm nozzle. A .5mm nozzle should still work well with the small pieces. Assembly tips: - The diagram in the pictures section will guide you through assembling the model, making it easy to follow. - The model is designed to be glued together. - The eyes should fit snugly into the back of the glasses, requiring no cleanup. - For those who struggle with small parts, try gluing the glasses_arms into the notch in the head with tacky glue first. Then, place the glasses (with the eyes already inserted) on the nose and glue them into the glasses_arms. - The hair parts are also small but should pose no problem at all with tacky glue. General comment: My goal is to create models that are fun, free from supports, and simple to build. If you encounter any issues, please let me know so I can learn from your feedback (Many thanks for the tremendous constructive feedback I've already received on my previous models - you know who you are!). All parts should fit nicely, with only minor cleanup needed on the first layer if necessary.
With this file you will be able to print Wally with your 3D printer. Click on the button and save the file on your computer to work, edit or customize your design. You can also find more 3D designs for printers on Wally.
