 prusaprinters
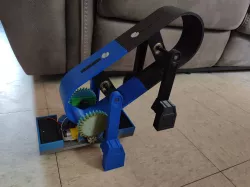
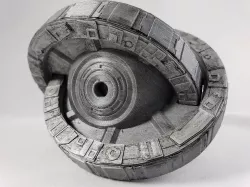
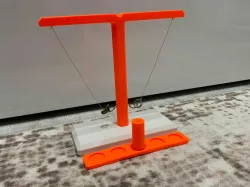
Walking Robot
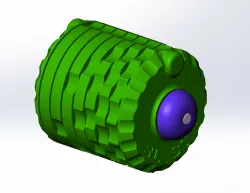
This is a walking robot modeled to be included in the Alien3D June UFO Box. It works by having the little under carriage ride the inside of the ring until it reaches the front, at this point it is in front of the pivot point for the legs and its weight causes the back to lift up. Since the carriage continues to proceed further the legs keep being lifted and brough to the front where the process repeats itself.Update: This project is finished enough to share and work but I do plan on adding some more options like a cover for the electronics that looks a bit better, and longer legs so the robot could go step over and on things. I will also see if I can lighten up the ring so that less weight is needed to get the robot walking.Update2: I have added the cover and new legs and extensions. If you add the legs you will need to add more weight to the train so that it can lift the legs, the cover was not enough extra weight to compensate it. It does not need much more but I don't have an exact amount.Printing: Only the legs will need supports, everything else is support free. You will need to print:4x: Legs, bearing holder, screws2x: Big Gear, small gear, roll pin, rubber ring, rod - The rubber rings should be printed in TPU for grip, and because they stretch over the roll pins, if you don't have TPU some rubber bans should work as an alternative.1x: BaseParts required:* = not included in alien 3d UFO box2 - 8mm bearings1 - 10mm round rocker switch2 - 2AA battery holders2 - Yellow geared DC motors4 - 25M3 screws [could get away with only 2] *4 - M3 Nuts [could get away with only 2] *2 - Weights that are about 68grams each (I used 2 stacks of 12 US quarters) * Wiring Diagram:(also included as svg and pdf in other files section)The motors are wired opposite of each other so that the rollers go in the same direction.The battery holders themselves already have power switches so you can skip the power button and have to press both of them on or you can wire in the switch and leave them on always.Assembly Video:Things not included in the video:You will need to bend the pegs on the rocker switch so it does not interfere with the spindle on the motors (or you can cut the spindle from the motors)The fitting between the legs and the rods is very tight and might need some sandingThe bearing needs a good amount of force for it to go into the bearing holders (I used a clamp)The rod going into the bearing does need a bit of force to overcome the bump that holds the rod in place after.
Direct link to the original creator's page
Also Available On
More from dsk001
 prusaprinters
 prusaprinters
 prusaprinters
 prusaprinters
 prusaprinters
Similar Models


Model Specifications
Frequently Asked Questions
How do I download Walking Robot?
Click the "View on prusaprinters" button above to visit the original model page on prusaprinters. You can download the STL file directly from the creator's page for free.
What 3D printer can I use for this model?
This STL file is compatible with most FDM 3D printers (Creality Ender 3, Prusa MK3S+, Bambu Lab, etc.) and resin printers (Elegoo, Anycubic). Check the original page for recommended print settings and materials.
Is this 3D model free to download?
Yes, this model is available as a free download on prusaprinters. Some creators accept tips or donations.
Can I modify this STL file?
Most STL files can be modified using free software like Blender, TinkerCAD, or Meshmixer. Check the license on the original prusaprinters page to see if modifications are permitted by the creator.