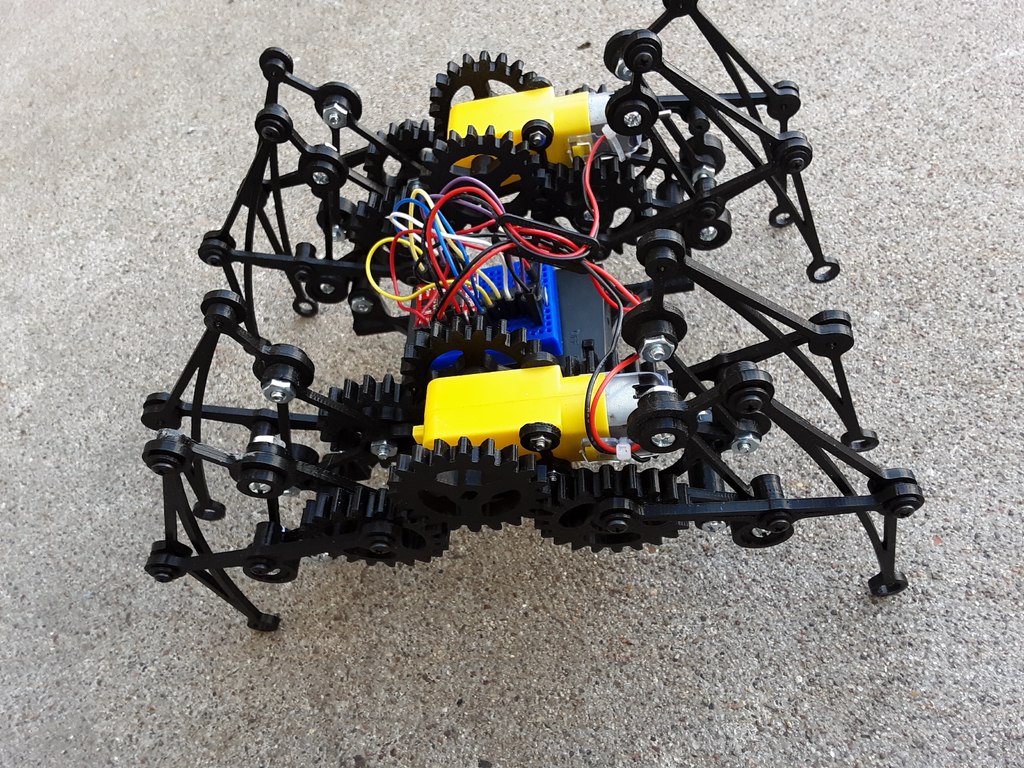
Walkbot
thingiverse
Human: 3/4/2020 Modified chassis so you don't need to use washers. Added support for US sensor. https://youtu.be/H4KZcUhznWU Walking robot based on Klann device. You need: Chassis6CLt, WBChassis4ALt, WBChassis4BLt, 8 WBLeg1Lt, 8 WBLeg2Lt, 4 Gear20A, 8 WBGear20BLt, 8 WBLinkLLt, 8 WBLinkUpperLt, 4 WBSpacer19, 4 WBSpacer10 (scale to match screws), 24 WBHubLt, 32 TCHub, 32 Small screws (like for electronics), Number 6 1/2" Screws (34), Number 6 Screws 1 1/2-2" (4), Batterypack, Breadboard, 16f1825 PIC (programmed to your liking), 2 Hobby motors available from Sparkfun, 4 M3 Screws, 1 Motor controller available from Sparkfun. 1. Attach WBChassis4A and WBChassis4B to gear motor using M3 screws. You may need to add some washers for clearance of the motor. Repeat for other motor. 2. Push Gear20A parts onto gear motor shafts. 3. Attach WBGear20BLt (8) to mesh with Gear20A using WBHubLt hubs and number 6 screws. Add washers if necessary to prevent gears from hitting wires on the motor. Adjust slots for proper rotation, making sure gears are not too tight or loose. Clean residue from holes and file or sand ridges from hub. 4. Attach WBLeg1Lt to WBGear20BLt using small black screws and TCHub (8x). Position concave up with longer segment towards gear and smaller segment attaching to WBLeg2Lt later. 5. Attach WBLinkLLt to chassis using WBHubLt and #6 screws, rotating freely. Rotate it up position. Use small black screw and TCHub to attach linkage to WBLeg1Lt on middle hole. 6. Attach WBLinkUpperLt to chassis using WBHubLt and #6 screws, rotating freely. Rotate it up position. Use small black screw and TCHub to attach linkage to WBLeg2Lt on one of the end holes. 7. Attach WBLeg2Lt and WBLeg1Lt using a small screw and TCHub. 8. Pass longer number 6 screws through lowest holes on WBChassisA & B with WBSpacer19 providing support for legs. You may need to adjust length of spacer through scaling. Add WBSpacer10 to the end, then attach to Chassis6CLt. Increase length of spacers to provide more space for electronics (4x). 9. Use velcro to attach a battery pack and small breadboard for PIC microcontroller and motor driver. Make pulses fairly long if running at slower speeds (~10 Hz).
With this file you will be able to print Walkbot with your 3D printer. Click on the button and save the file on your computer to work, edit or customize your design. You can also find more 3D designs for printers on Walkbot.
