WAC Corporal
prusaprinters
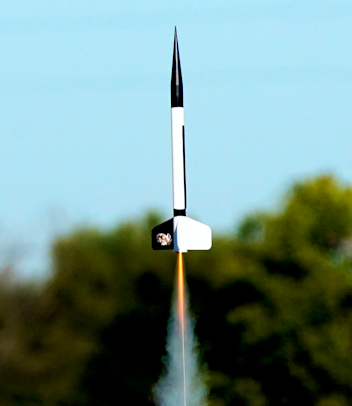
<p>Update 9 4/6 22: I added a nose cone for those who would like to print one instead of using an extruded one. The extruded ones are cheap and light. The printed one is heavier but still works although it makes the rocket a bit overstable.</p><p>Update 9/11/22: Have flown it several times and it is a great flyer! See picture of lift-off.</p><p>If you have not assembled a rocket before, get a cheap kit at a local hobby store and put it together first. I simplified this one - my other models are a lot more complex but you only need a few files and some BT50 tubing to make it and it is a great rocket.</p><p>This is a model of the WAC Corporal. The nose was from a Crossfire model but any long nose will work. The Nose Cone Factory on Thingiverse (<a href="https://www.thingiverse.com/thing:3249782">https://www.thingiverse.com/thing:3249782</a>) will make one - If you make one, then it should be about 5.5 inches (139 mm) long not counting the part that goes into the tube. </p><p>Use a 12" (340mm) long BT50 tube. You could print a tube but the motor can won't fit quite right so you would need to size it in your slicer.</p><p>The motor can consists of two parts, the upper lug and the lower can. It is best to print them in PETG although the motor only touches the very top and bottom of the motor can so you may get away with PLA. The upper lug is meant to be glued in. Coat the inside of the BT50 tube with CA as far down as you can and leaving as much of the top part of the tube as dry as you can. Then, using a spare motor, push the top lug down until the motor is flush with the back. Remove the motor. Let the glue set. Spraying with accelerator is fine. To load, put a motor in the tail can and slide it into the rocket. Tape the tail-can to the bottom of the rocket to stop it from popping out during ejection..</p><p>Print 3 fins (I printed two with white PLA and one with black PLA). Print the dorsal fin and two 1/8 launch lugs. You may want to rescale the dorsal fin so it is about twice as tall - I wanted to keep weight down on mine. Glue the fins flush with the bottom of the tube - a fin alignment jig is in the stls - it was made with the Parametric tool found on Thingiverse (<a href="https://www.thingiverse.com/thing:5371861/files">https://www.thingiverse.com/thing:5371861/files</a>). If you print a nose cone, be sure to print it with no fill.</p><p>Use the Estes method of attaching a bungee cord/shock cord by folding the shock cord inside of a 3/4" (19mm) by 2" (50mm) glue soaked paper. Look at any of the beginner rocket instruction sheets to see what I mean. Let the glue set a bit and then glue the paper/shock cord combo about 1.5 inches (38 mm) from the top of the rocket body. Attach the bungee to the nose cone and to your parachute. A 12" parachute is plenty big enough.</p><p>My rocket weighs less than 67 grams with a B6-4 motor loaded. That means it can fly with any 18mm motor from A8 to C6. I really suggest using an A motor for the first flights. It can go out of sight easily. Rocksim says a C6-5 will take it to 1500 feet. Any wind at that altitude and your rocket is gone girl.</p><p>The decals on the model (you can just see them in the picture) are made from cartoon stock on typewriter paper using either an ink jet or color laser.</p><p>The CP will be just inside the fin area so the CG should be at least an inch forward of them. You will find that no weight is necessary on most builds.</p><p>Have fun!</p>
With this file you will be able to print WAC Corporal with your 3D printer. Click on the button and save the file on your computer to work, edit or customize your design. You can also find more 3D designs for printers on WAC Corporal.
