Volume of a Cone
thingiverse
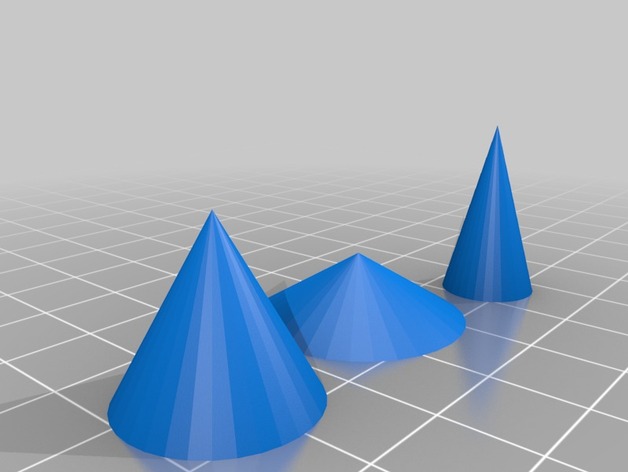
In this activity, students will create three-dimensional cones to discover the formula for volume. They will be given specific dimensions to use in Tinkercad and work in groups to create their 3-D shapes. Team Members: Jordan Federico, Jennifer Silhan, Leanne DiGiovanna. Project: Volume of a Cone Overview and Background: As students complete this project, they will use critical thinking skills to discover the formula for finding the volume of a cone. They will learn how to use Tinkercad and improve their teamwork skills. Objectives: Students will be able to calculate the volume of a cone, discover the formula for finding the volume of a cone, use the definition of radius and diameter to find the volume of a cone, create all cones in Tinkercad with specific dimensions given. Audiences: -grade: 8th grade mathematics -age: 13-14 years old -skill level: general education / inclusion / honors Subjects: Relevant subjects include: math, drawing and design (graphic design) Skills Learned (NYS Common Core Standards): CCSS.Math.Content.8.G.C.9 : Know the formulas for the volumes of cones, cylinders, and spheres and use them to solve real-world and mathematical problems. Solve real-world and mathematical problems involving volume of cylinders, cones, and spheres. Lesson/ Activity: Log in to your Tinkercad account. If you don't have an account yet, create one now. Under the tab that says "Project" choose "Create Project." Click on the blue tab that says " Create New Design." On the top left of the page, click on the "Design" tab. Then select the option labeled "Properties." Under "Name" create a new title as "Discovery of a Cone." On the right-hand side of the window page, locate the "Geometric" tab. Choose the cone and drag it into the "workplane." Get familiar with all of the Tinkercad tools. Once you feel comfortable, create two cones with the information provided. The first cone that you will create will have the following dimensions: an altitude of 18mm, and a diameter of 20mm. The second cone that you will create will have the following dimensions: an altitude of 8mm, and a diameter of 26mm. For the third cone, you will choose an altitude and diameter. Save these files as an "STL" file. After you have created these images, you will be required to print them out in your 3-D printer. Use your manipulatives to assist you in discovering the volume formula for the cones you have created. (hint: The formula will remain the same for EVERY cone you've created.) Make sure to show all of your work on a separate sheet of paper. Have fun! Image 1: Cone with altitude of 18mm and a diameter of 20 mm. Image 2: Cone with altitude of 8mm and a diameter of 26 mm. Image 3: Cone with altitude of 22mm and a diameter of 12mm. Duration: This project should take approximately 2 class periods. If not completed, students can have one extra day. Preparation: The students should either be in a computer lab, library, or in the everyday classroom with a laptop cart provided. Students should already know the difference between radius and diameter, and should be able to find one of them if given the other. Students should also be provided with the handout and a calculator. References: There is no pre or post research students or teachers have to complete. This is a discovery lesson where students are required to determine the volume of a cone. Rubric & Assessment: Attached is the rubric a teacher would use to assess this project. Handouts: Attached is the student handout for this project. Page 1 Page 2 Page 3
With this file you will be able to print Volume of a Cone with your 3D printer. Click on the button and save the file on your computer to work, edit or customize your design. You can also find more 3D designs for printers on Volume of a Cone.
