Visual Dessicant Indicator for Filament Drybox (V2)
prusaprinters
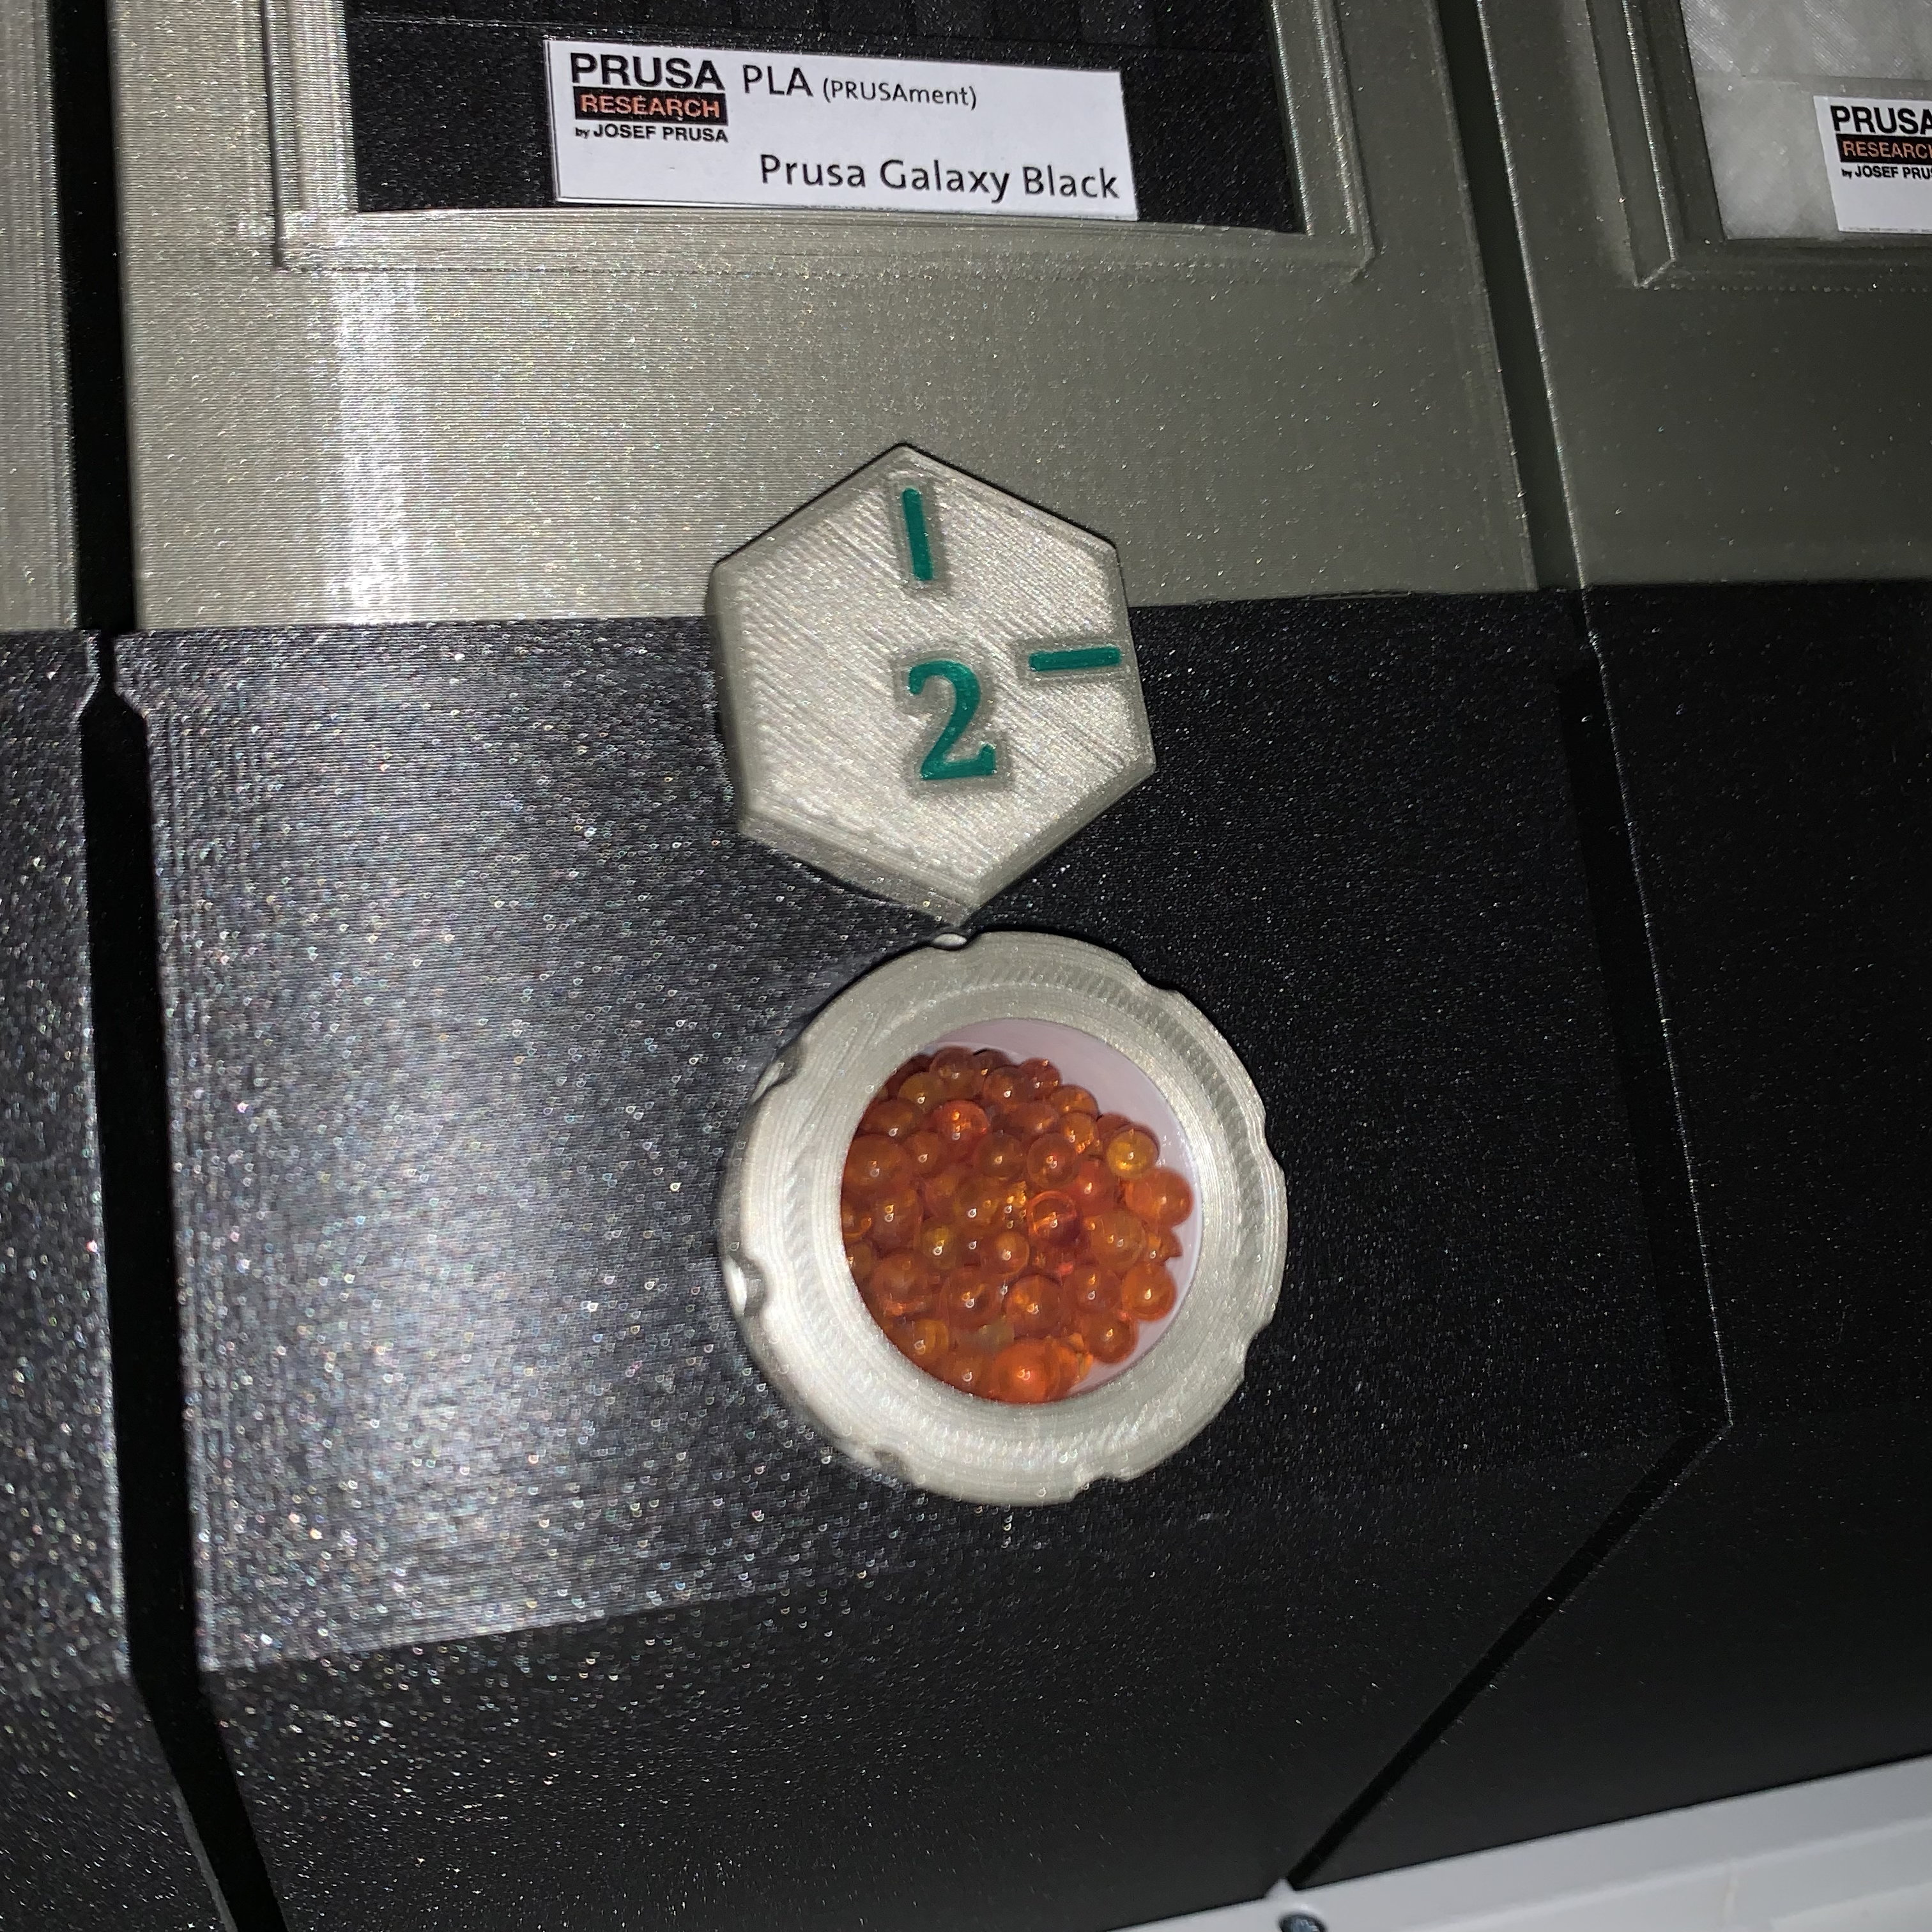
<p>A new version of partsMakers great idea. We discussed the idea of a screwable Version without opening the dry box. </p><p>A screwable version of a great idea. Sealed and replaceable without opening the Drybox<br>The container consists of 2 printed parts, 2 seals and a plexiglass pane.<br>Since the diameter should be as large as possible, a new design of the drybox was necessary.<br>After many tests it was impossible to print a reasonable thread in the sloping wall of the drybox, so an insert is needed for it, which is simply glued into the drybox with a little super glue.<br>For this purpose, 2 assembly aids are enclosed as print files with the help of which the insert can be press-fitted with a screw clamp.<br>When gluing, use a little more glue (preferably more viscous) as the upper part of the drybox hole is printed somewhat uncleanly. Before inserting, it is advisable to trim the print edge a little.</p><p>Since the lower part of the drybox has to be reprinted, I added a groove for a seal of the drybox.<br>This makes the drybox really tight and the desiccant does not have to be changed so often.</p><p><strong>Additional parts that are still needed:</strong></p><ul><li>1x O-ring seal 28x1,5 mm (inner diameter)</li><li>1x O-ring seal 30x1,5 mm (inner diameter)</li><li>1x plexiglass disc diameter 30 mm, 1mm thick (cut from a plate)</li><li>70 cm neoprene round cord 2 mm</li></ul><p><br><br><strong>Mounting container:</strong><br>Press the Plexiglas disc into the screw cap, insert the 28 mm seal. If the Plexiglas disc is a little too small, it will still be held in place by the seal.<br>Roll the 30 mm seal onto the container - there is a groove in the thread under the lid. Deburr the top edge of the container a little so that it slides easily into the seal in the lid. Fill with desiccant and screw the lid on tightly.</p><p><strong>Drybox assembly:</strong><br>Check the fit of the insert thread in the drybox opening - should be difficult. Then glue the insert in place using the mounting plates and allow to dry.<br>In the meantime, the neoprene seal can be inserted into the groove of the drybox. When inserting it, make sure that the sealing cord is not stretched - rather slightly compressed.<br>Pressing the seal in works well with the lid of the drybox.<br>The original lid of the perfect <a href="https://www.printables.com/de/model/4583-spool-holder-and-drybox-for-enclosure-v2-with-humi">Drybox</a> from amazing <a href="https://www.printables.com/de/social/10-ondrej-stritesky/about">Ondřej Stříteský</a> can be used.</p><p>After the glue is dry, screw on the existing lid of the Drybox, fit the locking knob, screw in the desiccant container and fit the filament outlet seal. I use the ingenious outlet from <a href="https://www.printables.com/de/model/31696-extended-ptfe-pc4-m10-quick-fitting-mod-for-prusa-/comments/193406">Xuis</a> with PTFE tube connection. </p>
With this file you will be able to print Visual Dessicant Indicator for Filament Drybox (V2) with your 3D printer. Click on the button and save the file on your computer to work, edit or customize your design. You can also find more 3D designs for printers on Visual Dessicant Indicator for Filament Drybox (V2).